Welcome to the first part of assembling your Bowie robot 3D printed pieces! This will guide you through the steps of attaching the fasteners through the pieces. You will mainly be attaching the fasteneners in these steps.
*Note: If you plan on driving your Bowie around a lot (who wouldn’t?) we recommend blue thread lock on the fastener threads. It’s possible some pieces may require sanding.
If you ever need a to see what you are working on, feel free to go back to the splash page, where there is an interactive 3D model viewer there.
Pieces required – Check out the pieces page for what to print! (Coming soon)
Fasteners required
Base:
- 12 x 10mm screws
- 28 x 16mm screws
- 40 x washers
- 40 x nuts
Lay out your base assembly pieces to look like the image below.
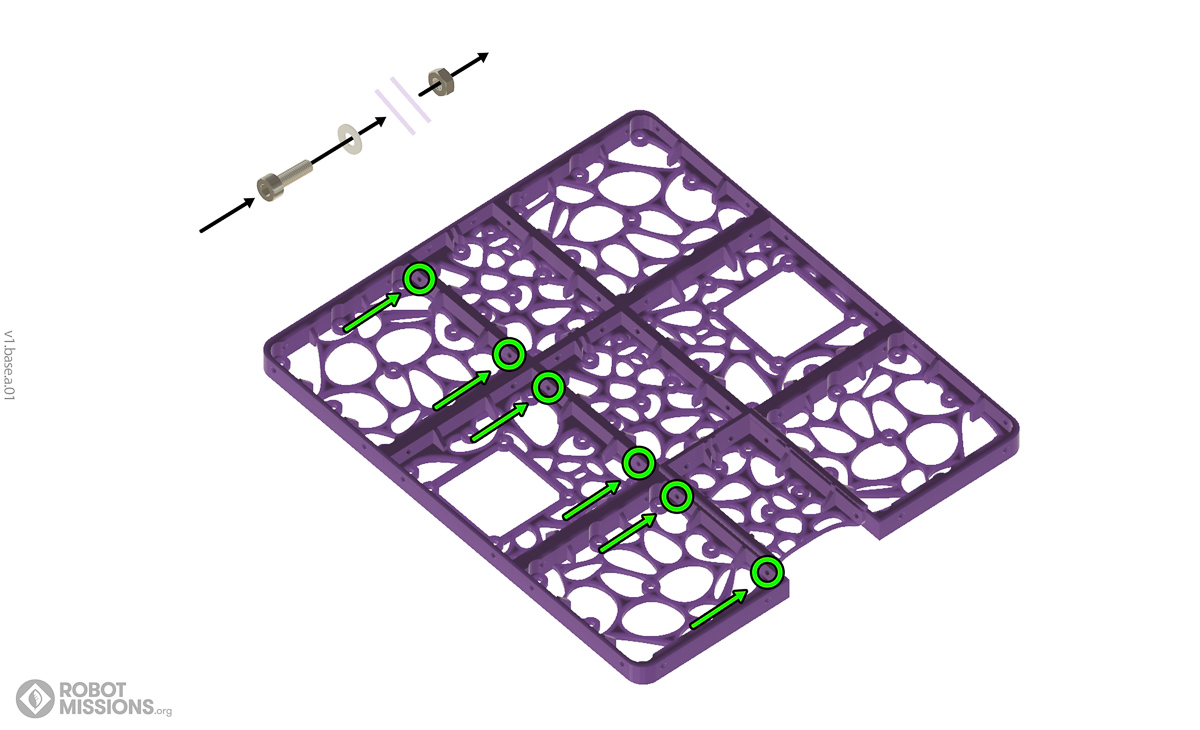
Use 6x16mm screws with washers and nuts to join these plates at the highlighted locations.
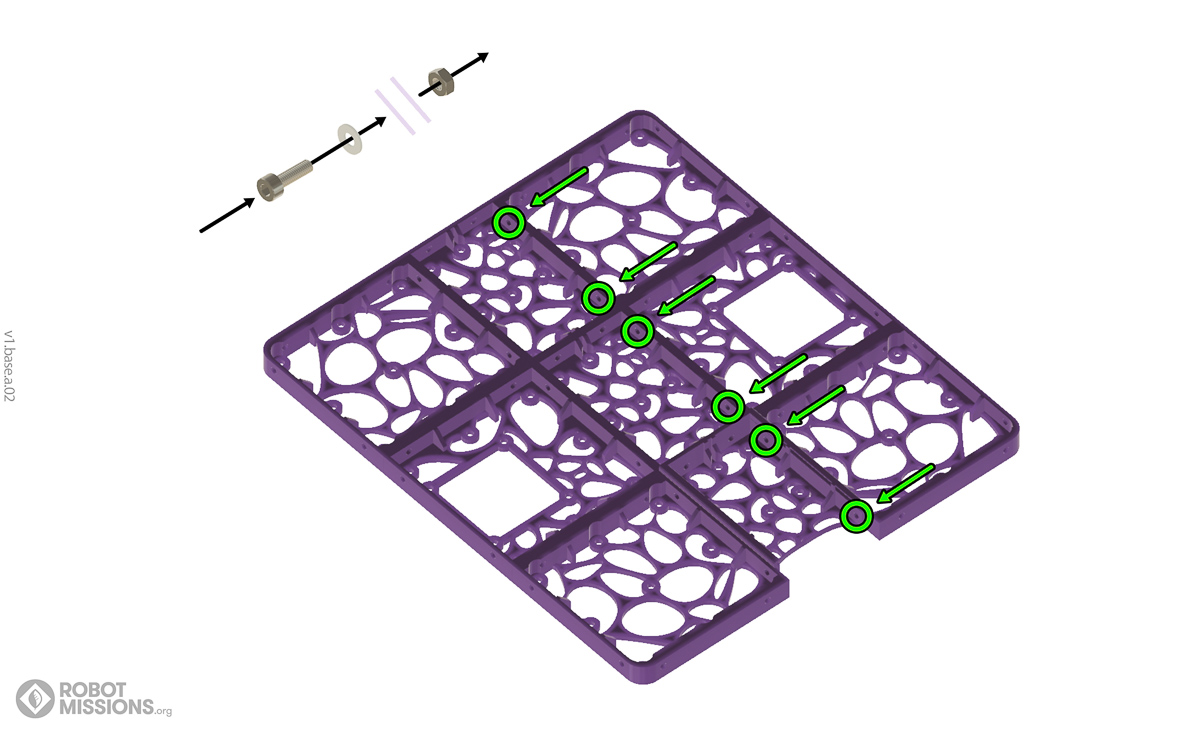
Use 6x16mm screws with washers and nuts to join these plates at the highlighted locations.
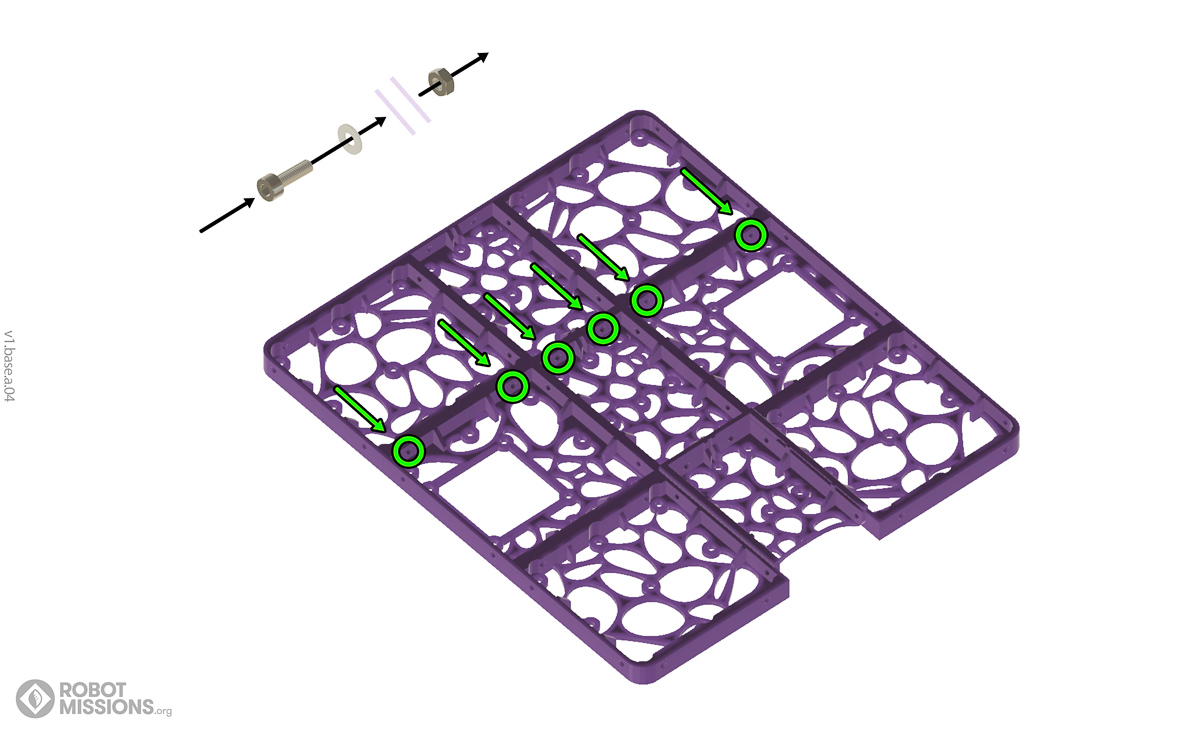
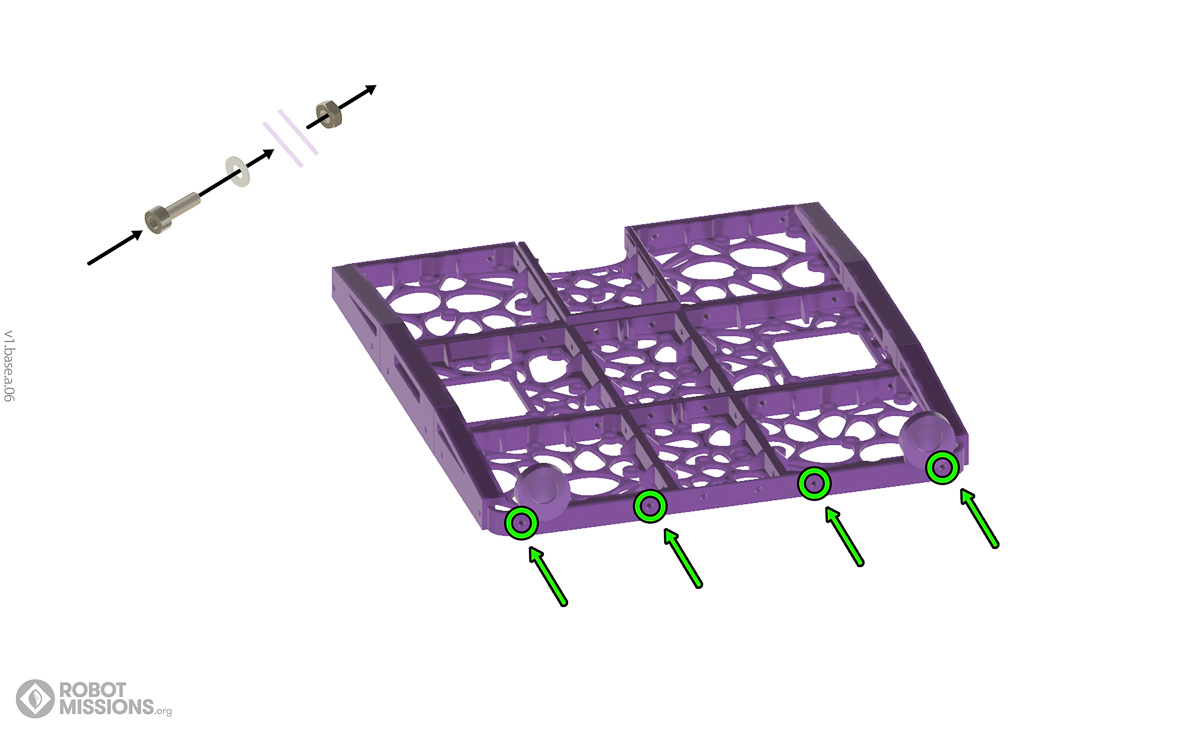
Next, use 6x16mm screws, nuts and washers to join tiles at the highlighted points.

Next, use 6x16mm screws, nuts and washers to join tiles at the highlighted points.
For these tiles, use 6x10mm screws with washers and nuts
Join these tiles with 6x10mm screws, washers and nuts. All your base tiles should be fastened securely together now. Hooray!
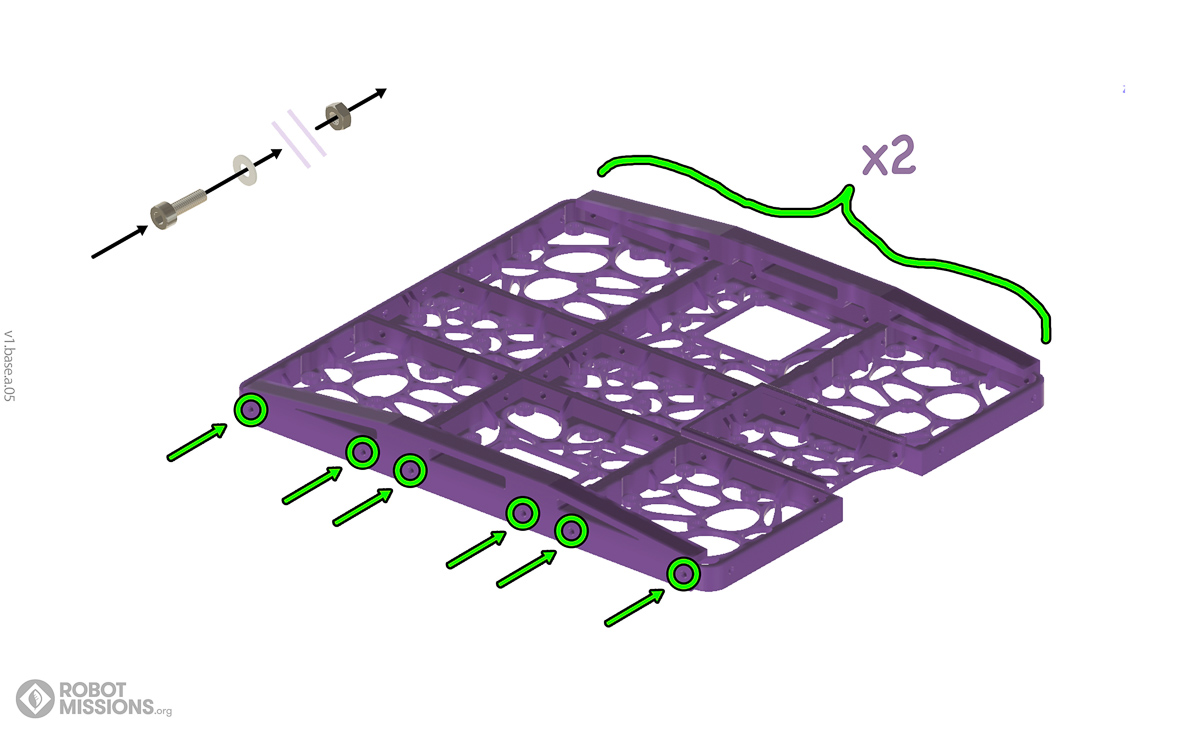
Now, attach the truss pieces to each side of the base assembly using 6x16mm screws with washers and nuts. Ensure that the edges of the trusses and the base assembly are facing upwards!
Fasten the light mounts to the back of the base using 4x16mm screws with washers and nuts.
Congratulations! You have completed your base assembly!
| Home | Enclosure Top → |