Welcome to the Super Bright Lights Kit! This will guide you through the soldering steps that are needed to make the electronics for lighting up the LEDs that go on the front and back of Bowie. Needless to say, these LEDs are quite bright. We recommend that you do not stare at them. For this kit you will be soldering two surface mount components, and the rest will be through hole. The instructions will guide you through how to do this! Let’s get started!
Tools required:
- Soldering iron
- Solder (your choice – lead free or leaded)
- Third hand tool
- Desolder wick braid, or desoldering tool (just in case there are mistakes along the way)
- Diagonal cutters
- Painters tape
- Screwdriver with bit kit
- Arduino and usb cable for testing
- Jumper wires
- Hot glue gun and hot glue stick
Please note, when you are cutting the leads with diagonal cutters, to be cautious and wear eye protection. Sometimes the leads can accidentally go flying in weird directions, and you don’t want to get hurt.
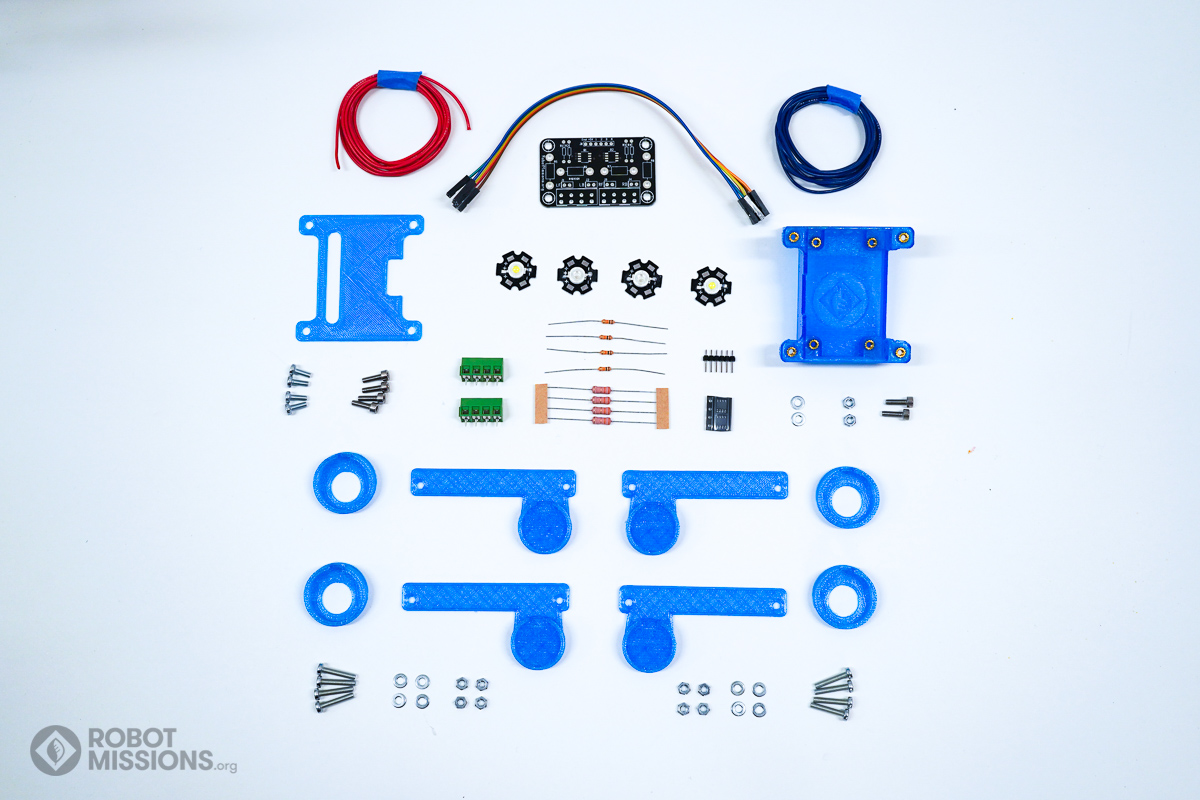
Here are all the components in the Super Bright Lights Kit. Make sure to check the parts that are in your kit to familiarize yourself with them before beginning!
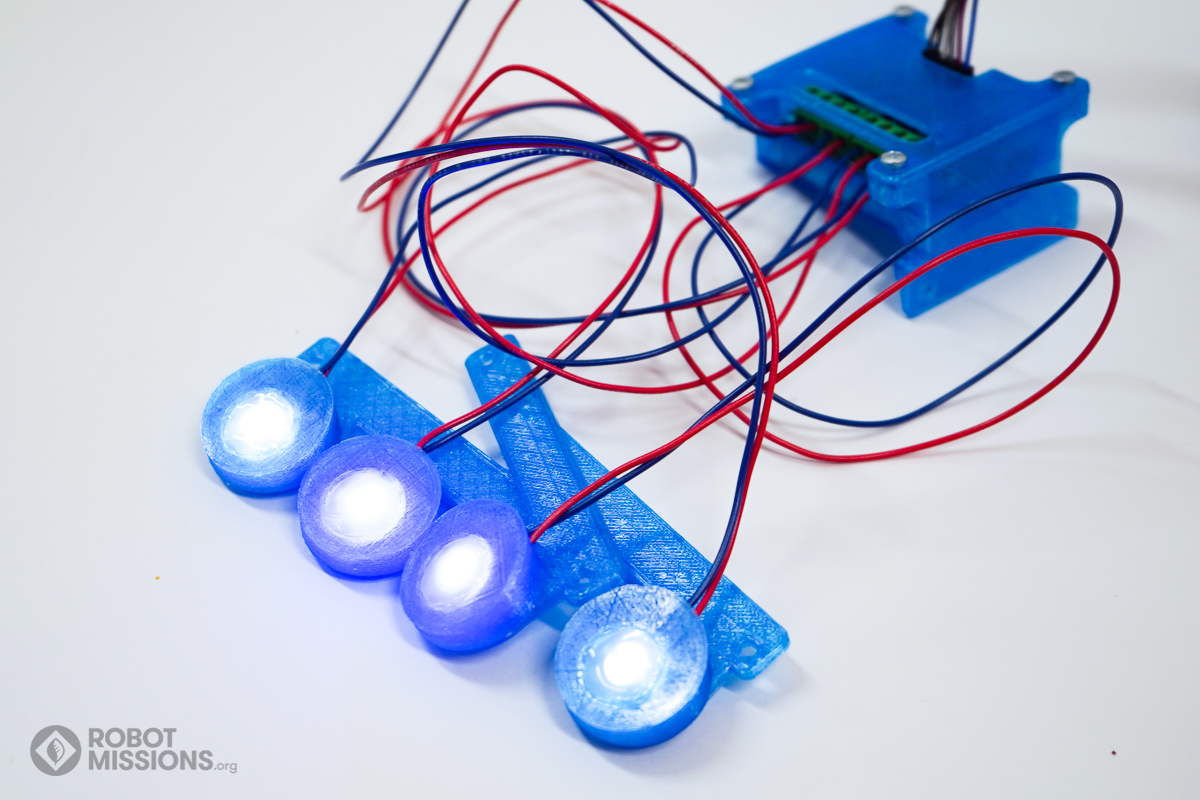
Here is what the final product looks like. This is what we will be making.
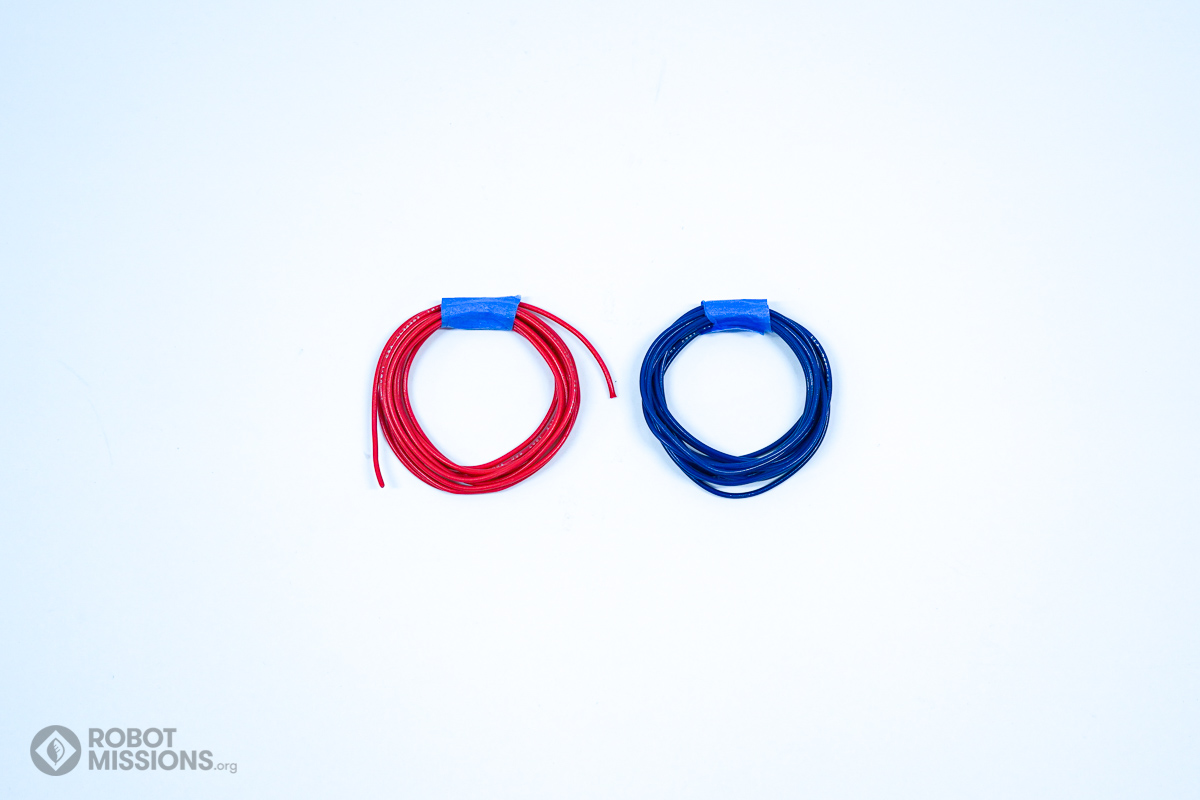
The included positive and negative wires are 160cm. These will need to be cut to the proper lengths.
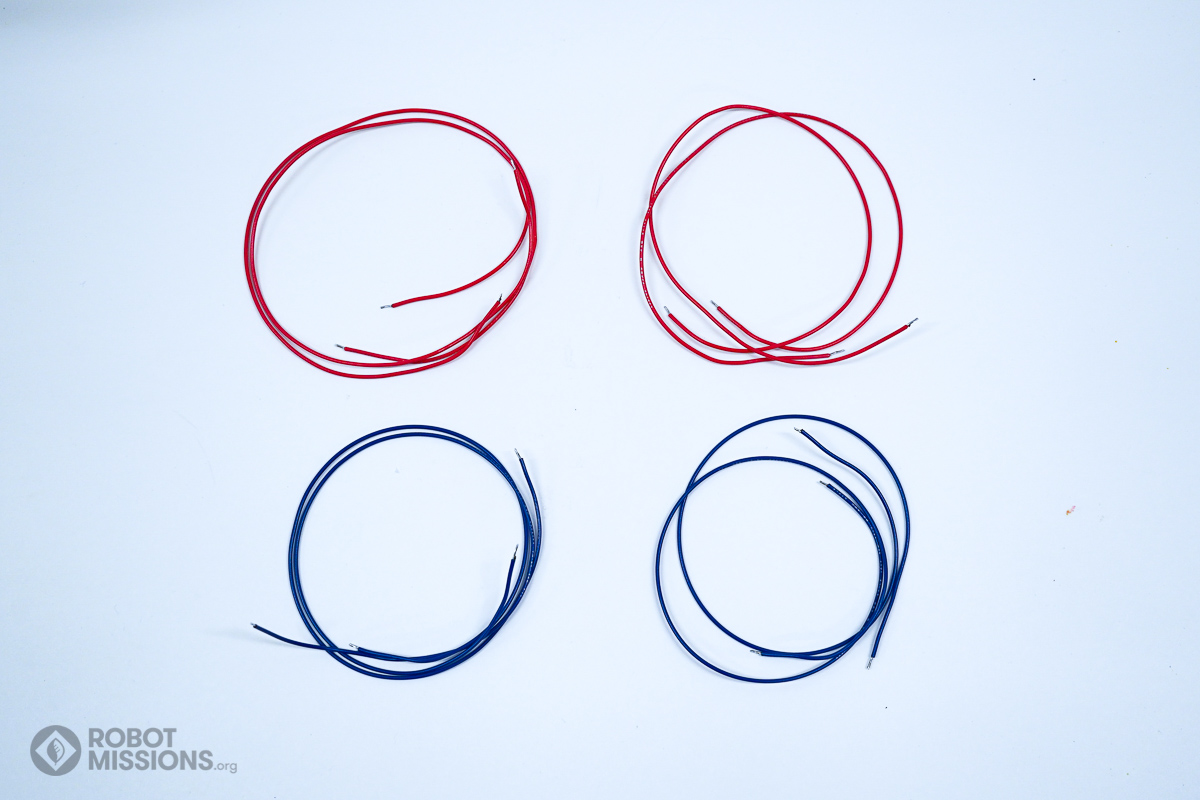
The lengths to cut are 2x positive (red) at 42cm, and 2x positive (red) at 38cm. Repeat for the negative (blue) as well: 2x 42cm and 2x 38cm.
| Home | Soldering lil mosfets → |