We will finish the arm build by adding the scoop! If you want to add a claw instead, this is the part you would skip in order to add the claw – those instructions aren’t done yet though. Once you complete this, your Bowie will have its arm ready to start scooping garbage.
*Note: If you plan on driving your Bowie around a lot (who wouldn’t?) we recommend blue thread lock on the fastener threads. It’s possible some pieces may require sanding.
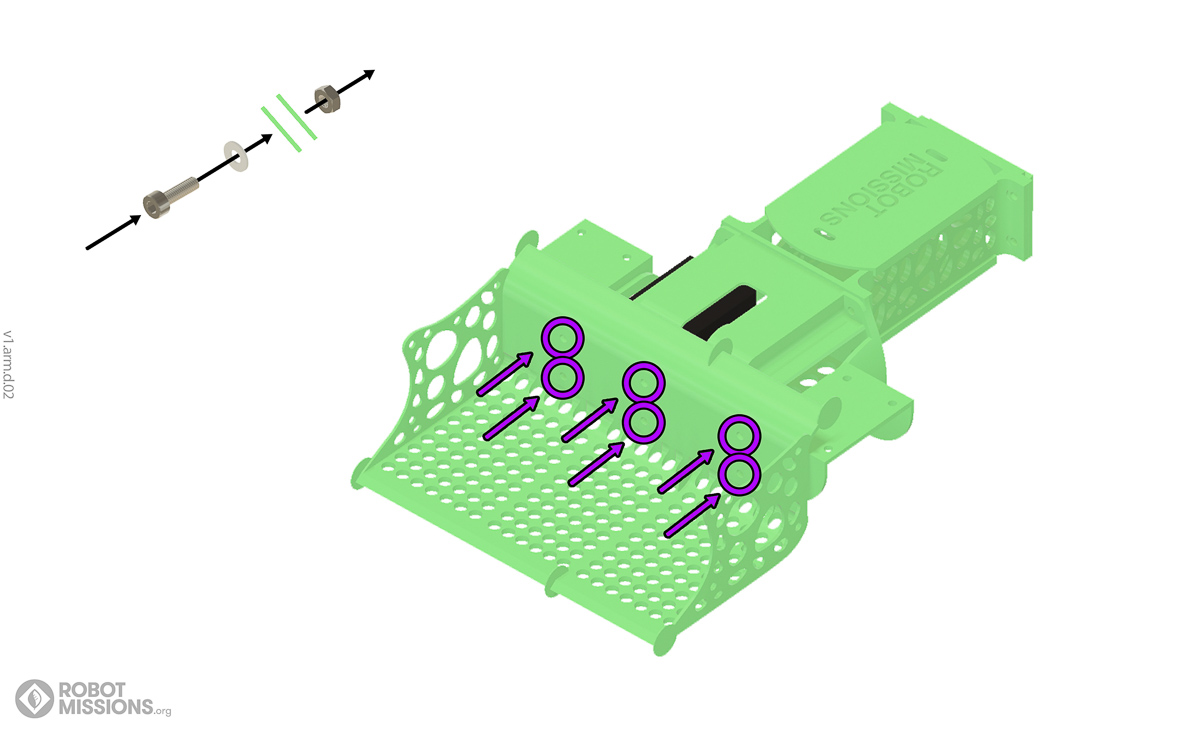
Fasteners required
- 6x M3 16mm
- 6x M3 washers
- 6x M3 hex nuts
Supplies required
- Hot glue
Pieces required – Check out the pieces page for what to print! (Coming soon)
If you ever need a to see what you are working on, feel free to go back to the splash page, where there is an interactive 3D model viewer there.
When you’re done this – congratulations! Keep at it and keep going until your Bowie is complete.
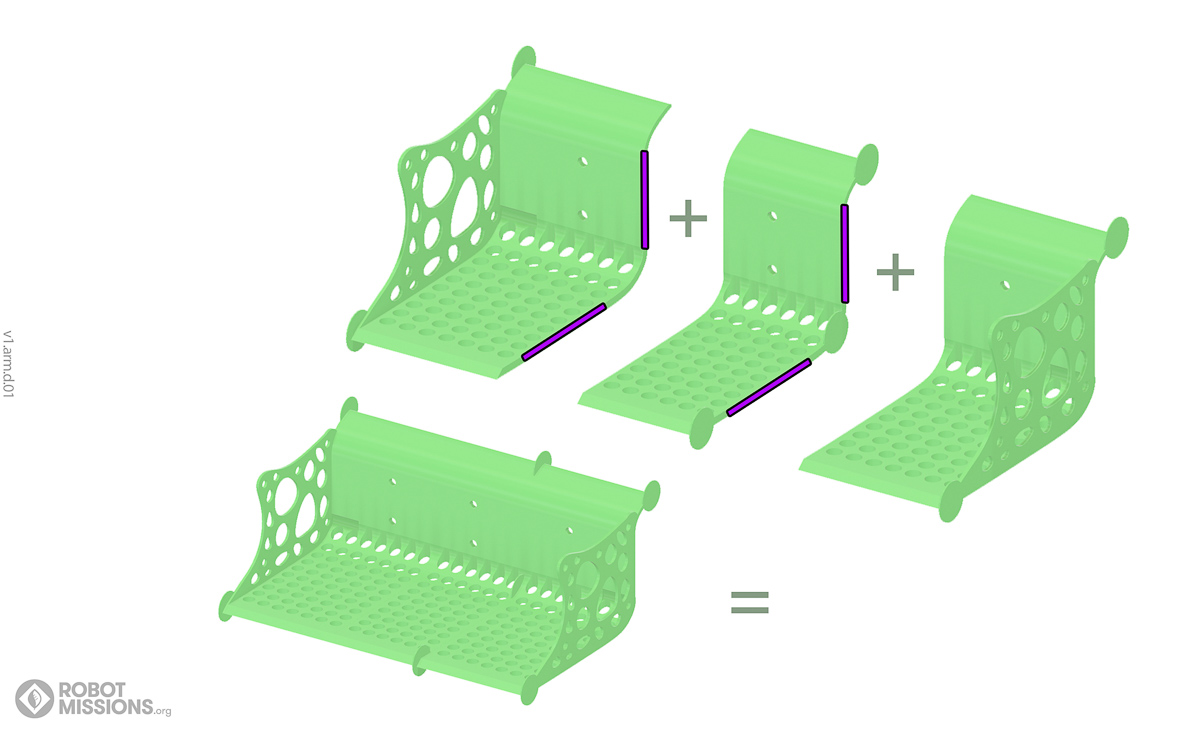
There will be little circular tabs on each piece of the scoop. These can be removed before or after the hot glue process.


| ← End effector | Home |