by Erin RobotGrrl | Oct 15, 2020 | News, Tech Logs
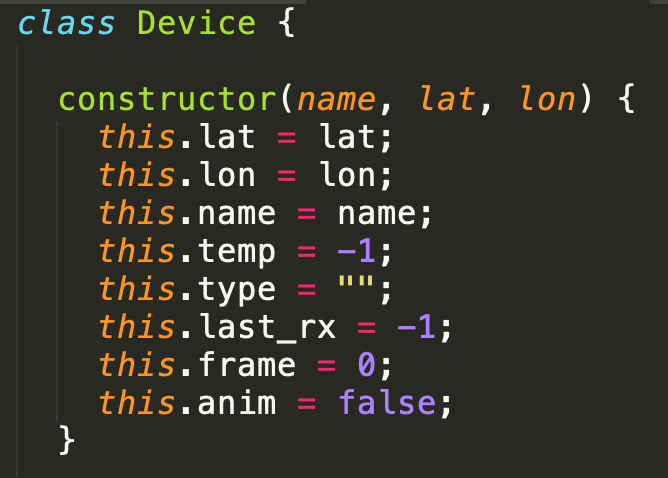
The task of the day was to change the current way of device data to be object oriented in Javascript. Learned about an old way to make Javascript objects (ES5), then learned about the new way to do so with classes (ES6). Created a device class in a separate device javascript file. Transferred the variables, changed the calls to the variables in the main sketch, and same with the functions. Everything is working! As well, changed all the var (function scope) variables to let (block scope). Pretty simple. This Device class will evolve over time. The next step is to process additional data logs from Bowie, and have them displayed on the map as instances of the object.
by Erin RobotGrrl | Oct 14, 2020 | News, Tech Logs
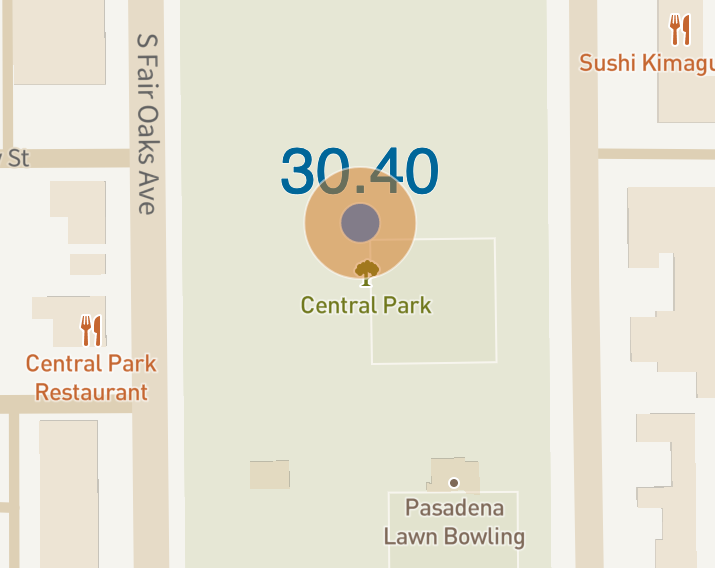
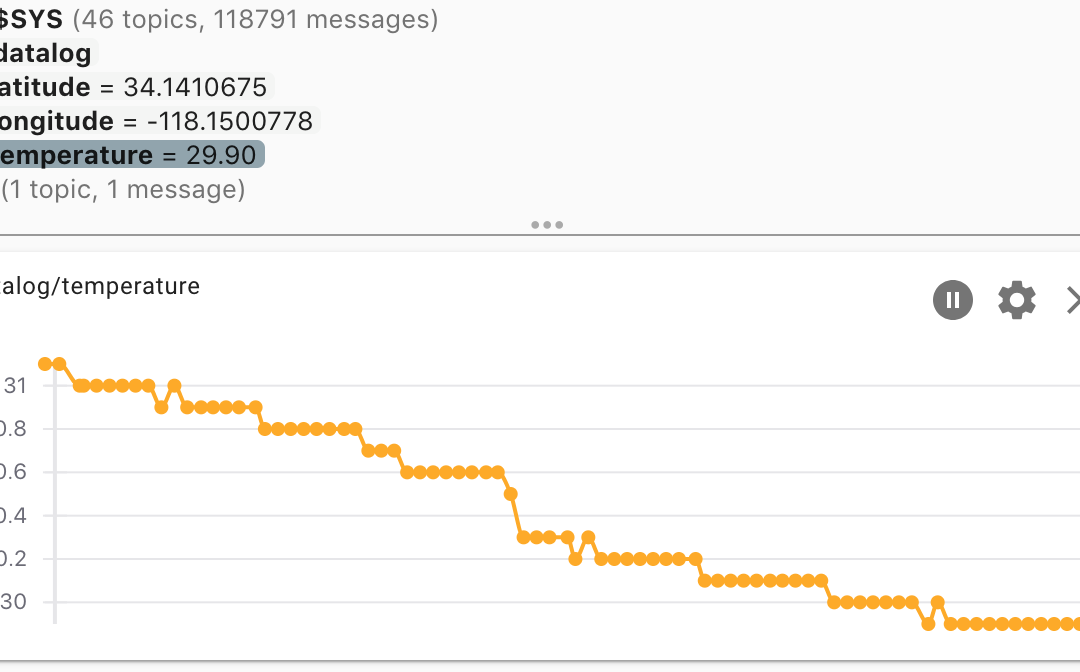
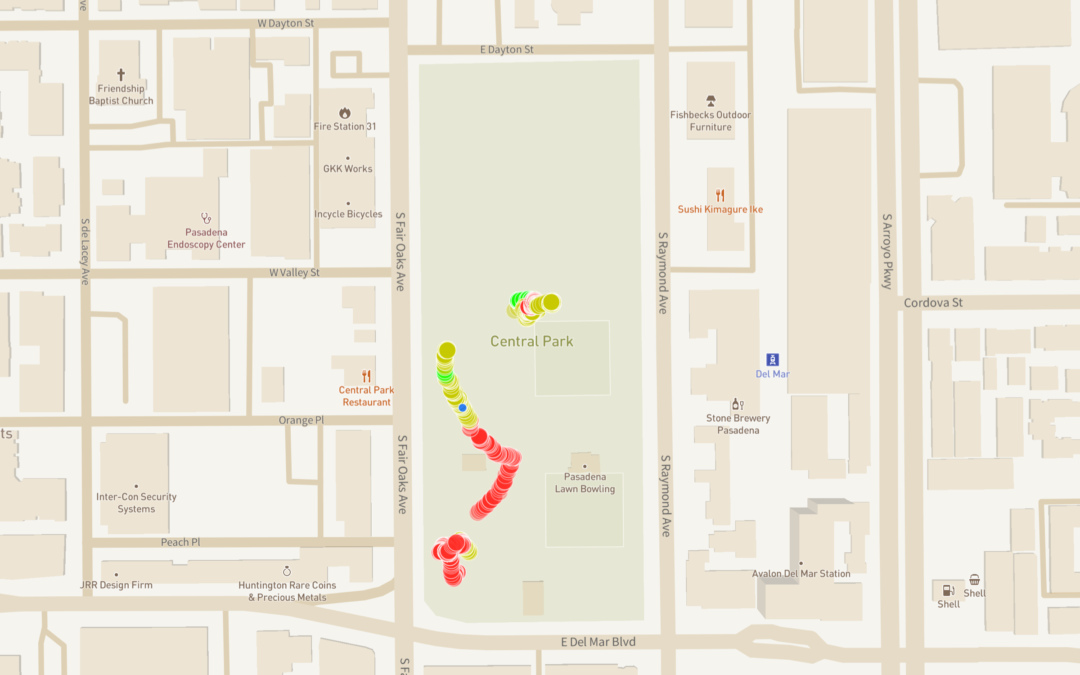
There’s now a dot being displayed on the map corresponding to the data received through MQTT on the AWS server. The loglooper of Bowie’s data, which sends the MQTT messages, is running continuously on the AWS server too. There was a minor change in the topic structure. Now the sensor value falls under air, water, or soil. The number of data points in each of those topics will be added to a counter which will eventually be displayed along the bottom of the page. The next step is to find a better data structure for multiple devices. The data structure should be chosen with the future possibility of dynamically loading / unloading based on the map position. After this, will be prototyping and testing sending data from an IoT device *live* in the field.
by Erin RobotGrrl | Oct 13, 2020 | News, Tech Logs
Derived a python program from convert_data.py to loop through an already processed Bowie log file, called loglooper. When it processes a line, it also sends the data to the MQTT broker. There’s a 1 second delay per line. The server was able to receive the data perfectly. The next step was to try to get this program to run continuously using nodejs forever. Originally encountered some difficulties related to the spinSleepTime and minUptime, which were changed from 1000 ms to 5000 ms. It’s now working continuously with forever. The next step will be to receive the data on the map and draw a dot. As well as transferring the python loglooper to the server to run on AWS.
by Erin RobotGrrl | Oct 10, 2020 | News, Tech Logs
Today the map was created from previous code experiments with mappa.js that Robot Missions worked on in 2018 and 2019. This uses AWS, MQTT, p5.js, mappa.js, and Mapbox GL. The version of Mapbox GL library was changed in mappa.js from v0.43.0 to v1.12.0. Solved a lag issue with the points not following the map by only redrawing when the map is moved. Started a p5.js simple MQTT template example, and tested with our MQTT broker on AWS. Was stuck for a while on not being able to connect, this was due to WSS instead of WS. The next step is to connect MQTT to the main map.
by Erin RobotGrrl | Oct 12, 2020 | News, Tech Logs
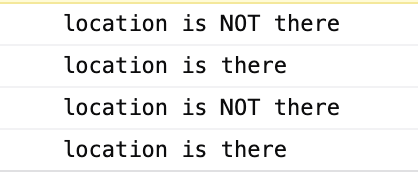
Today MQTT was integrated into the map, and the basic MQTT topic structure was decided. Basically, devicename/latitude, with the data being that value. The navigation controls were added to the map by modifying mappa.js with the correct Mapbox GL function. Tests were completed to detect the lat & lon from mouse location, the current zoom level, and if that lat & lon is visible. This will be useful for unloading / loading devices. The next step is to make a python program that loops through a Bowie log and sends the data over MQTT to AWS.
by Erin RobotGrrl | Feb 28, 2020 | News, Tech Logs
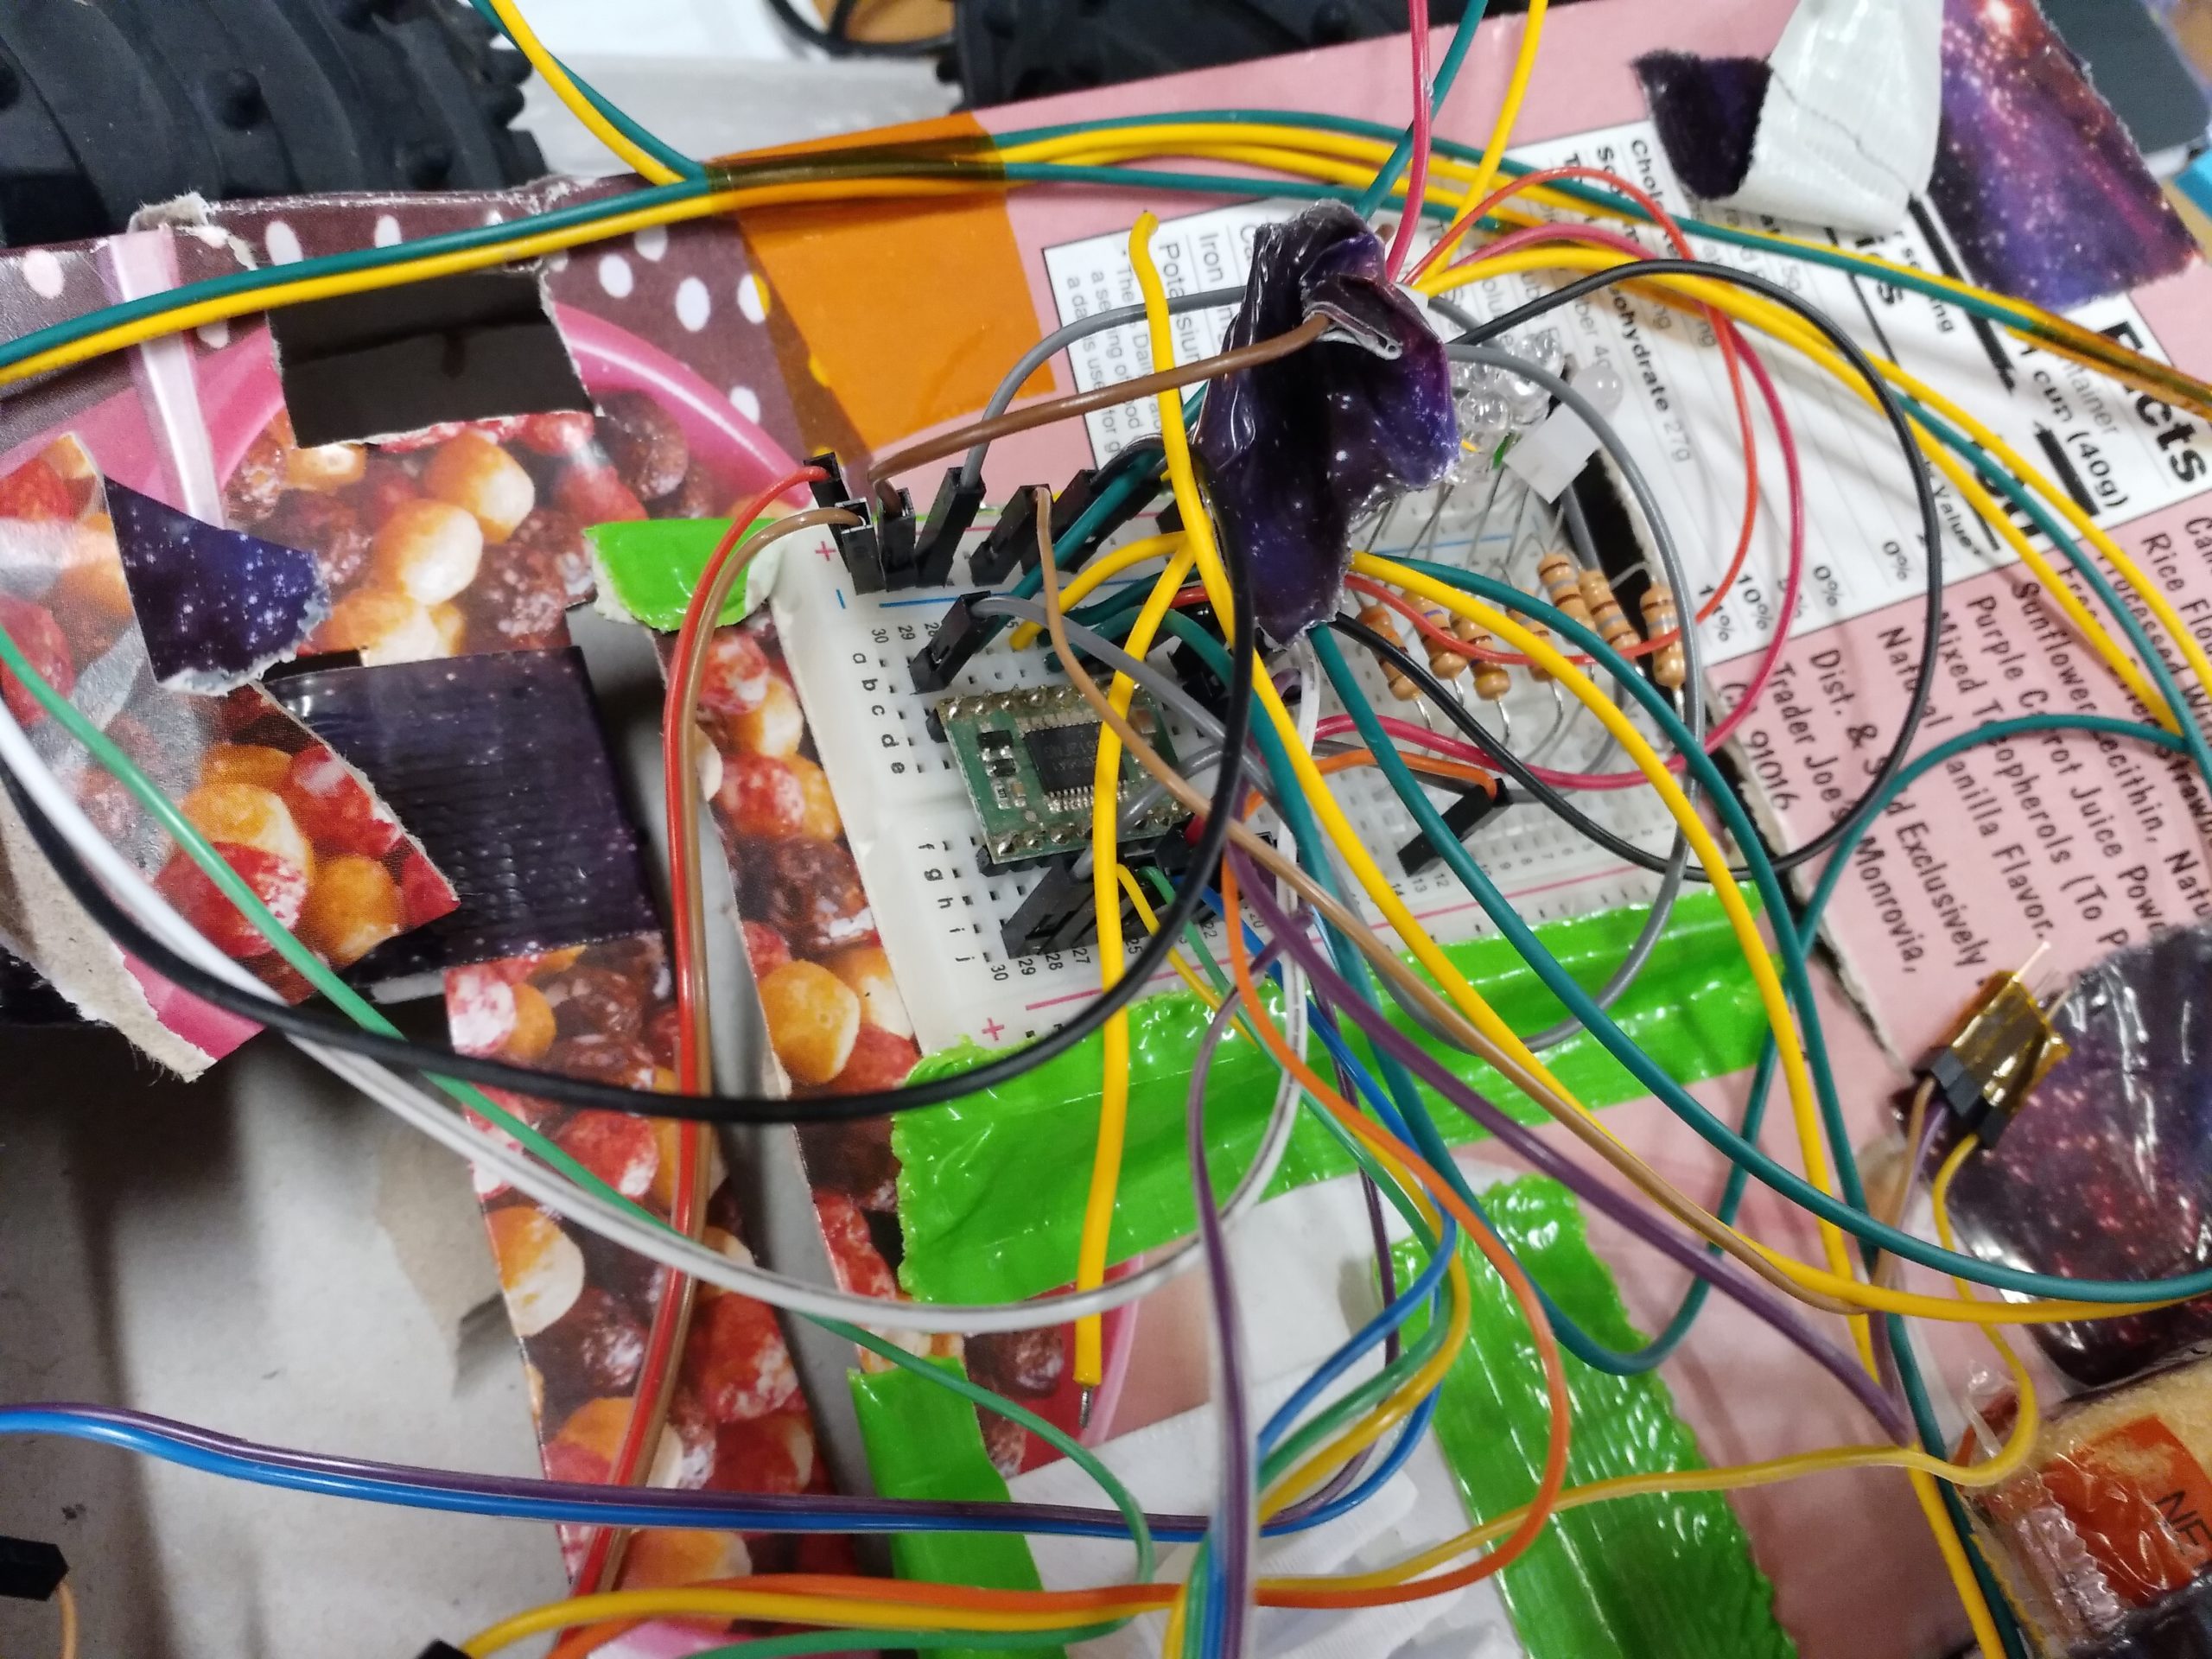
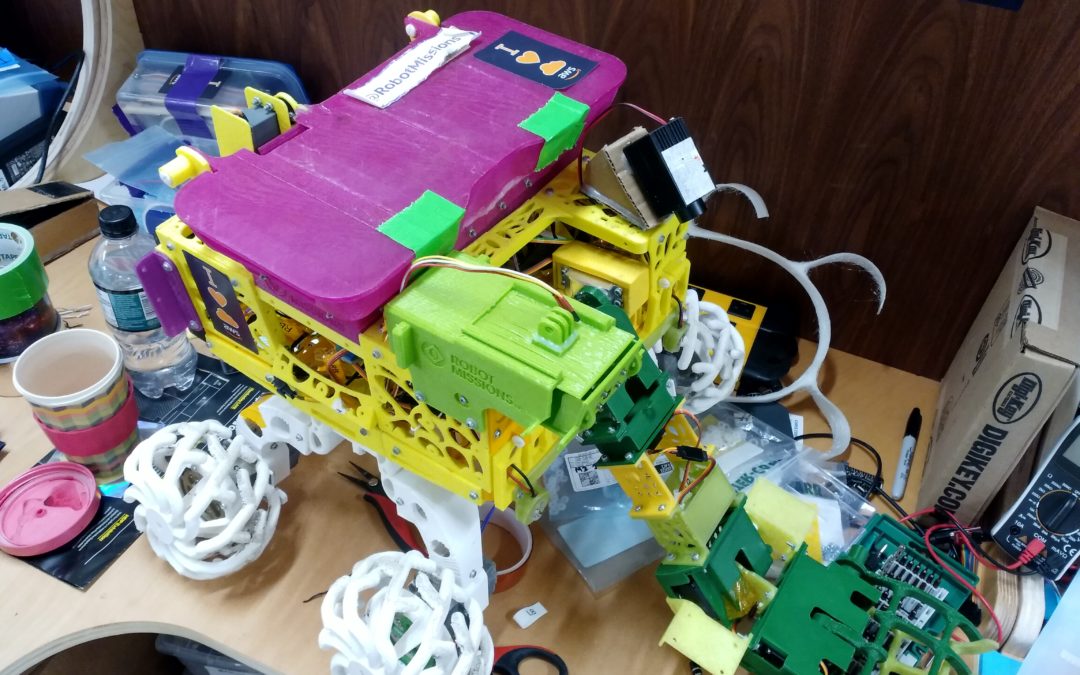
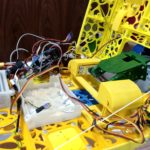
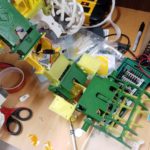
Bowie has been disassembled since the summer when it was disassembled for the trip to France. With some of its pieces in different boxes, and sensors on different robots. It’s time to re-assemble a working Bowie again.
One of the pieces that broke was the front hinge, this was 3D printed and replaced.
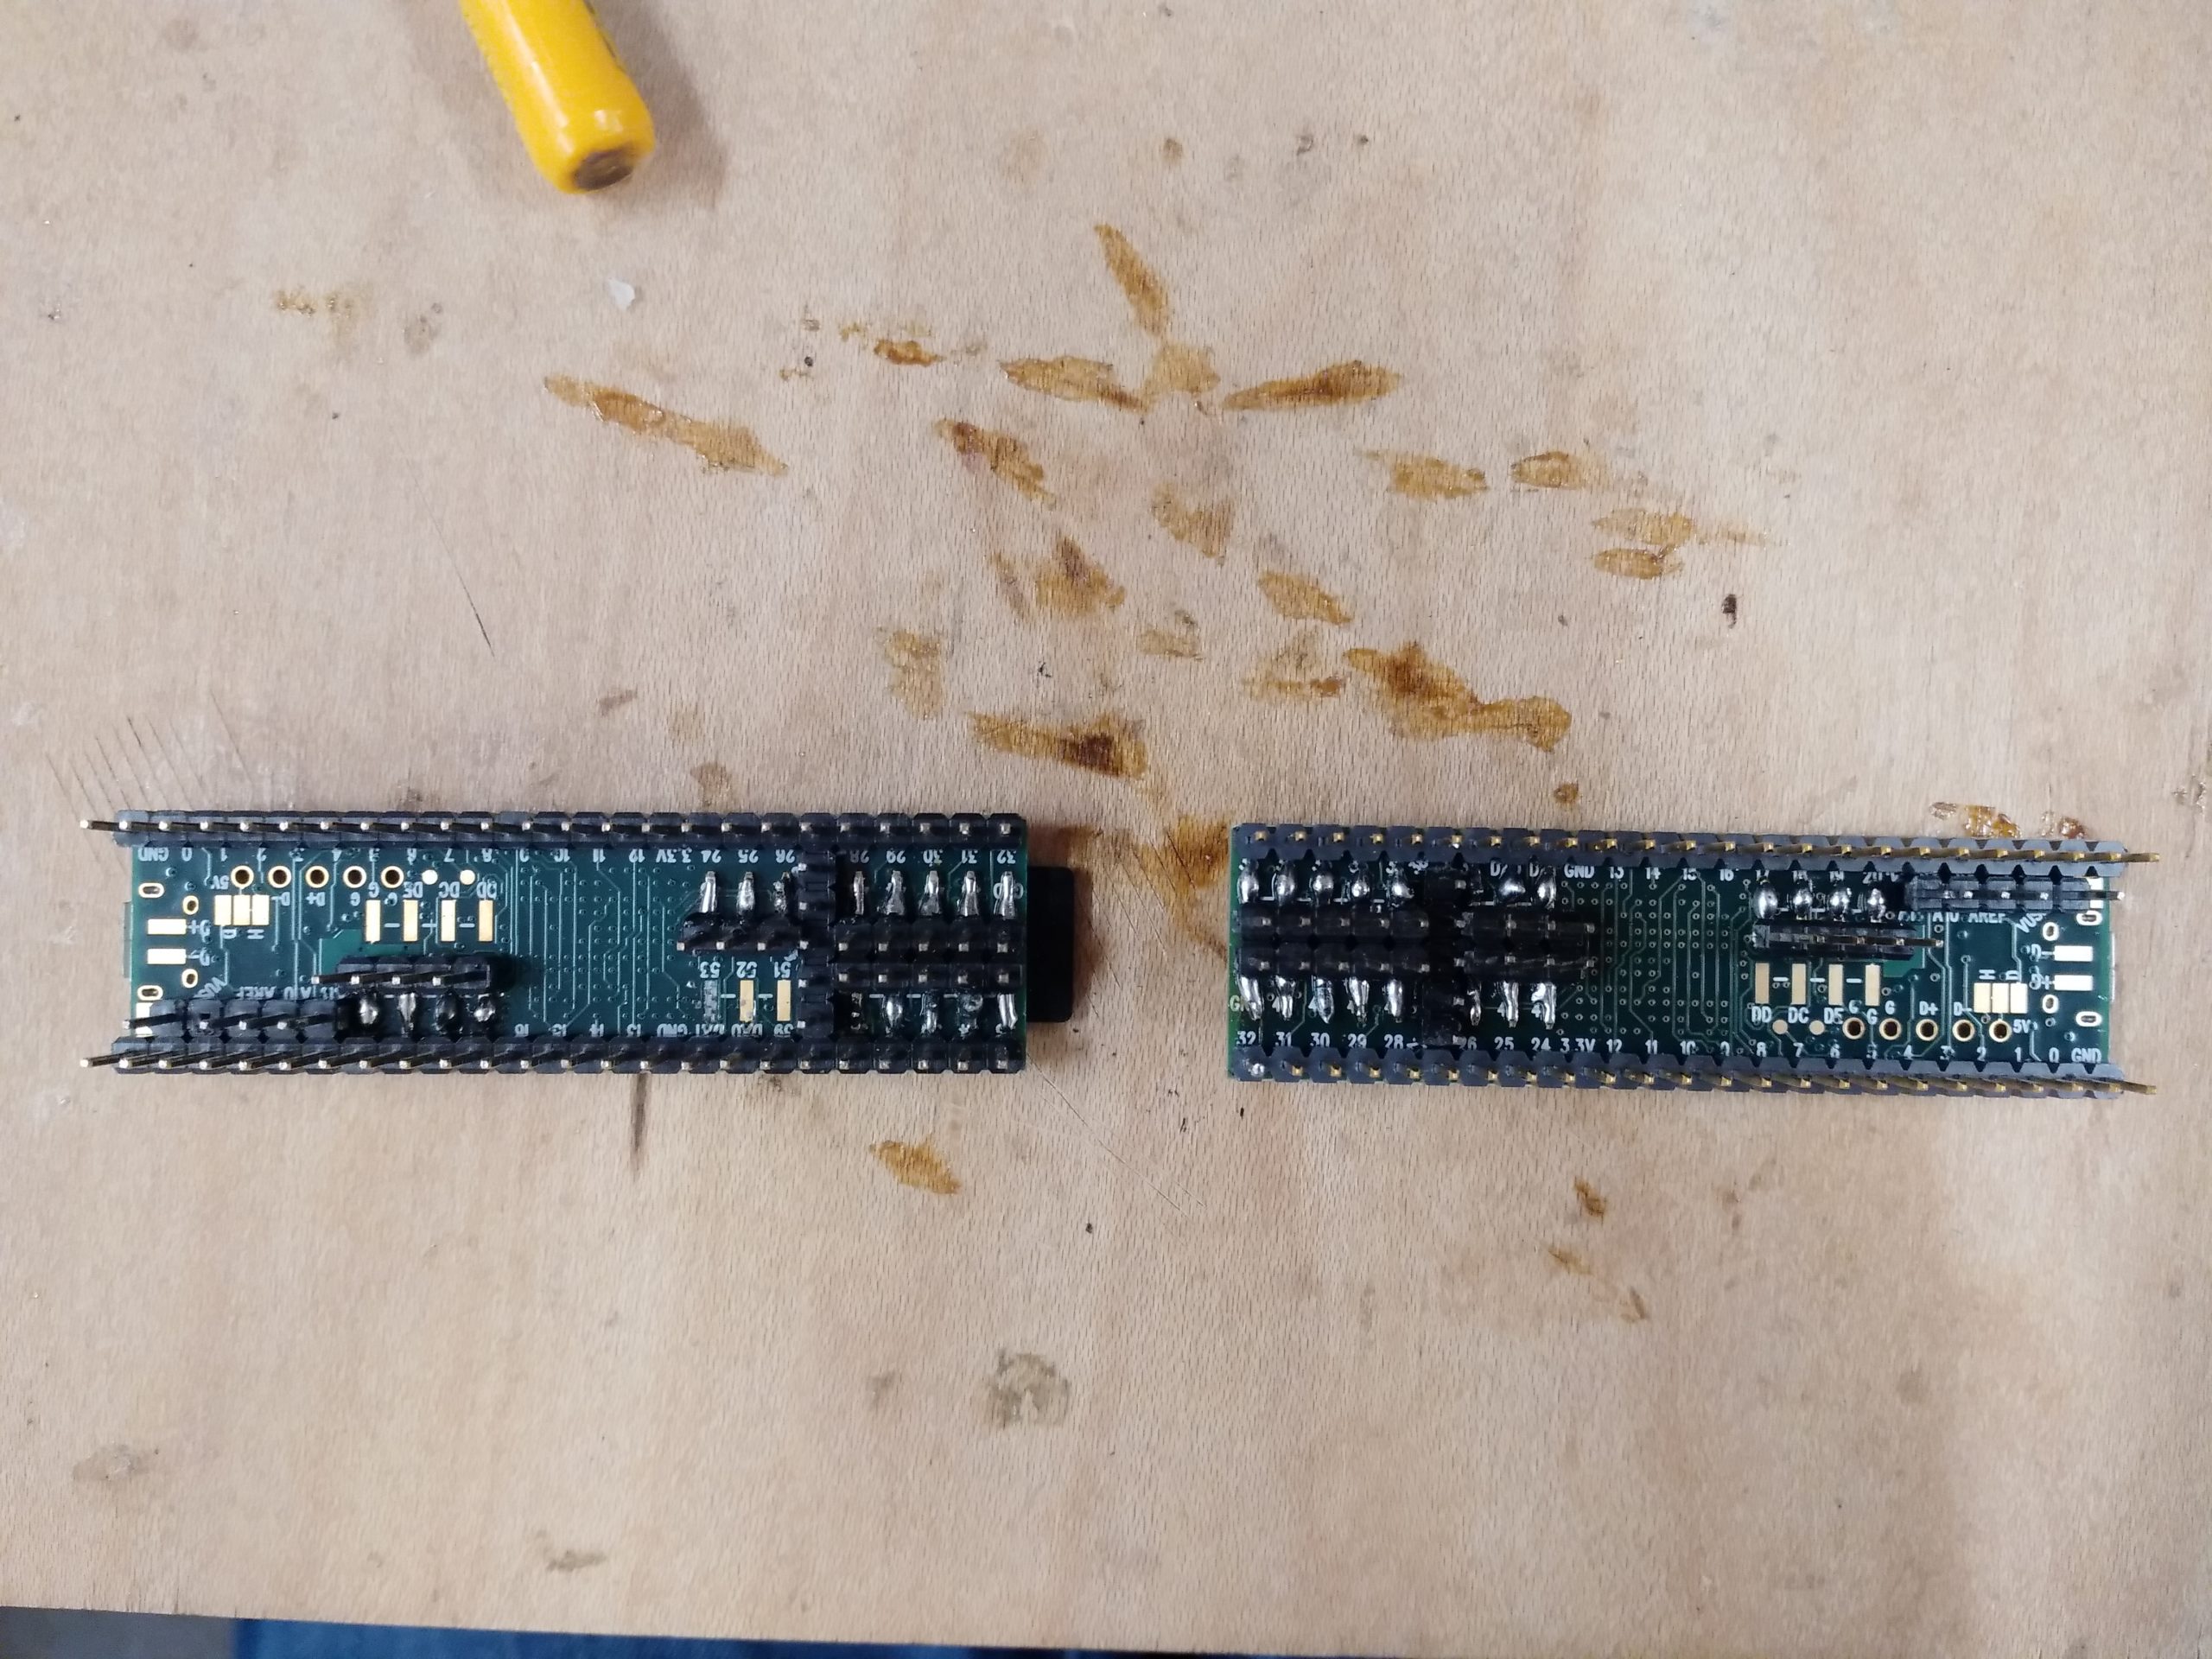
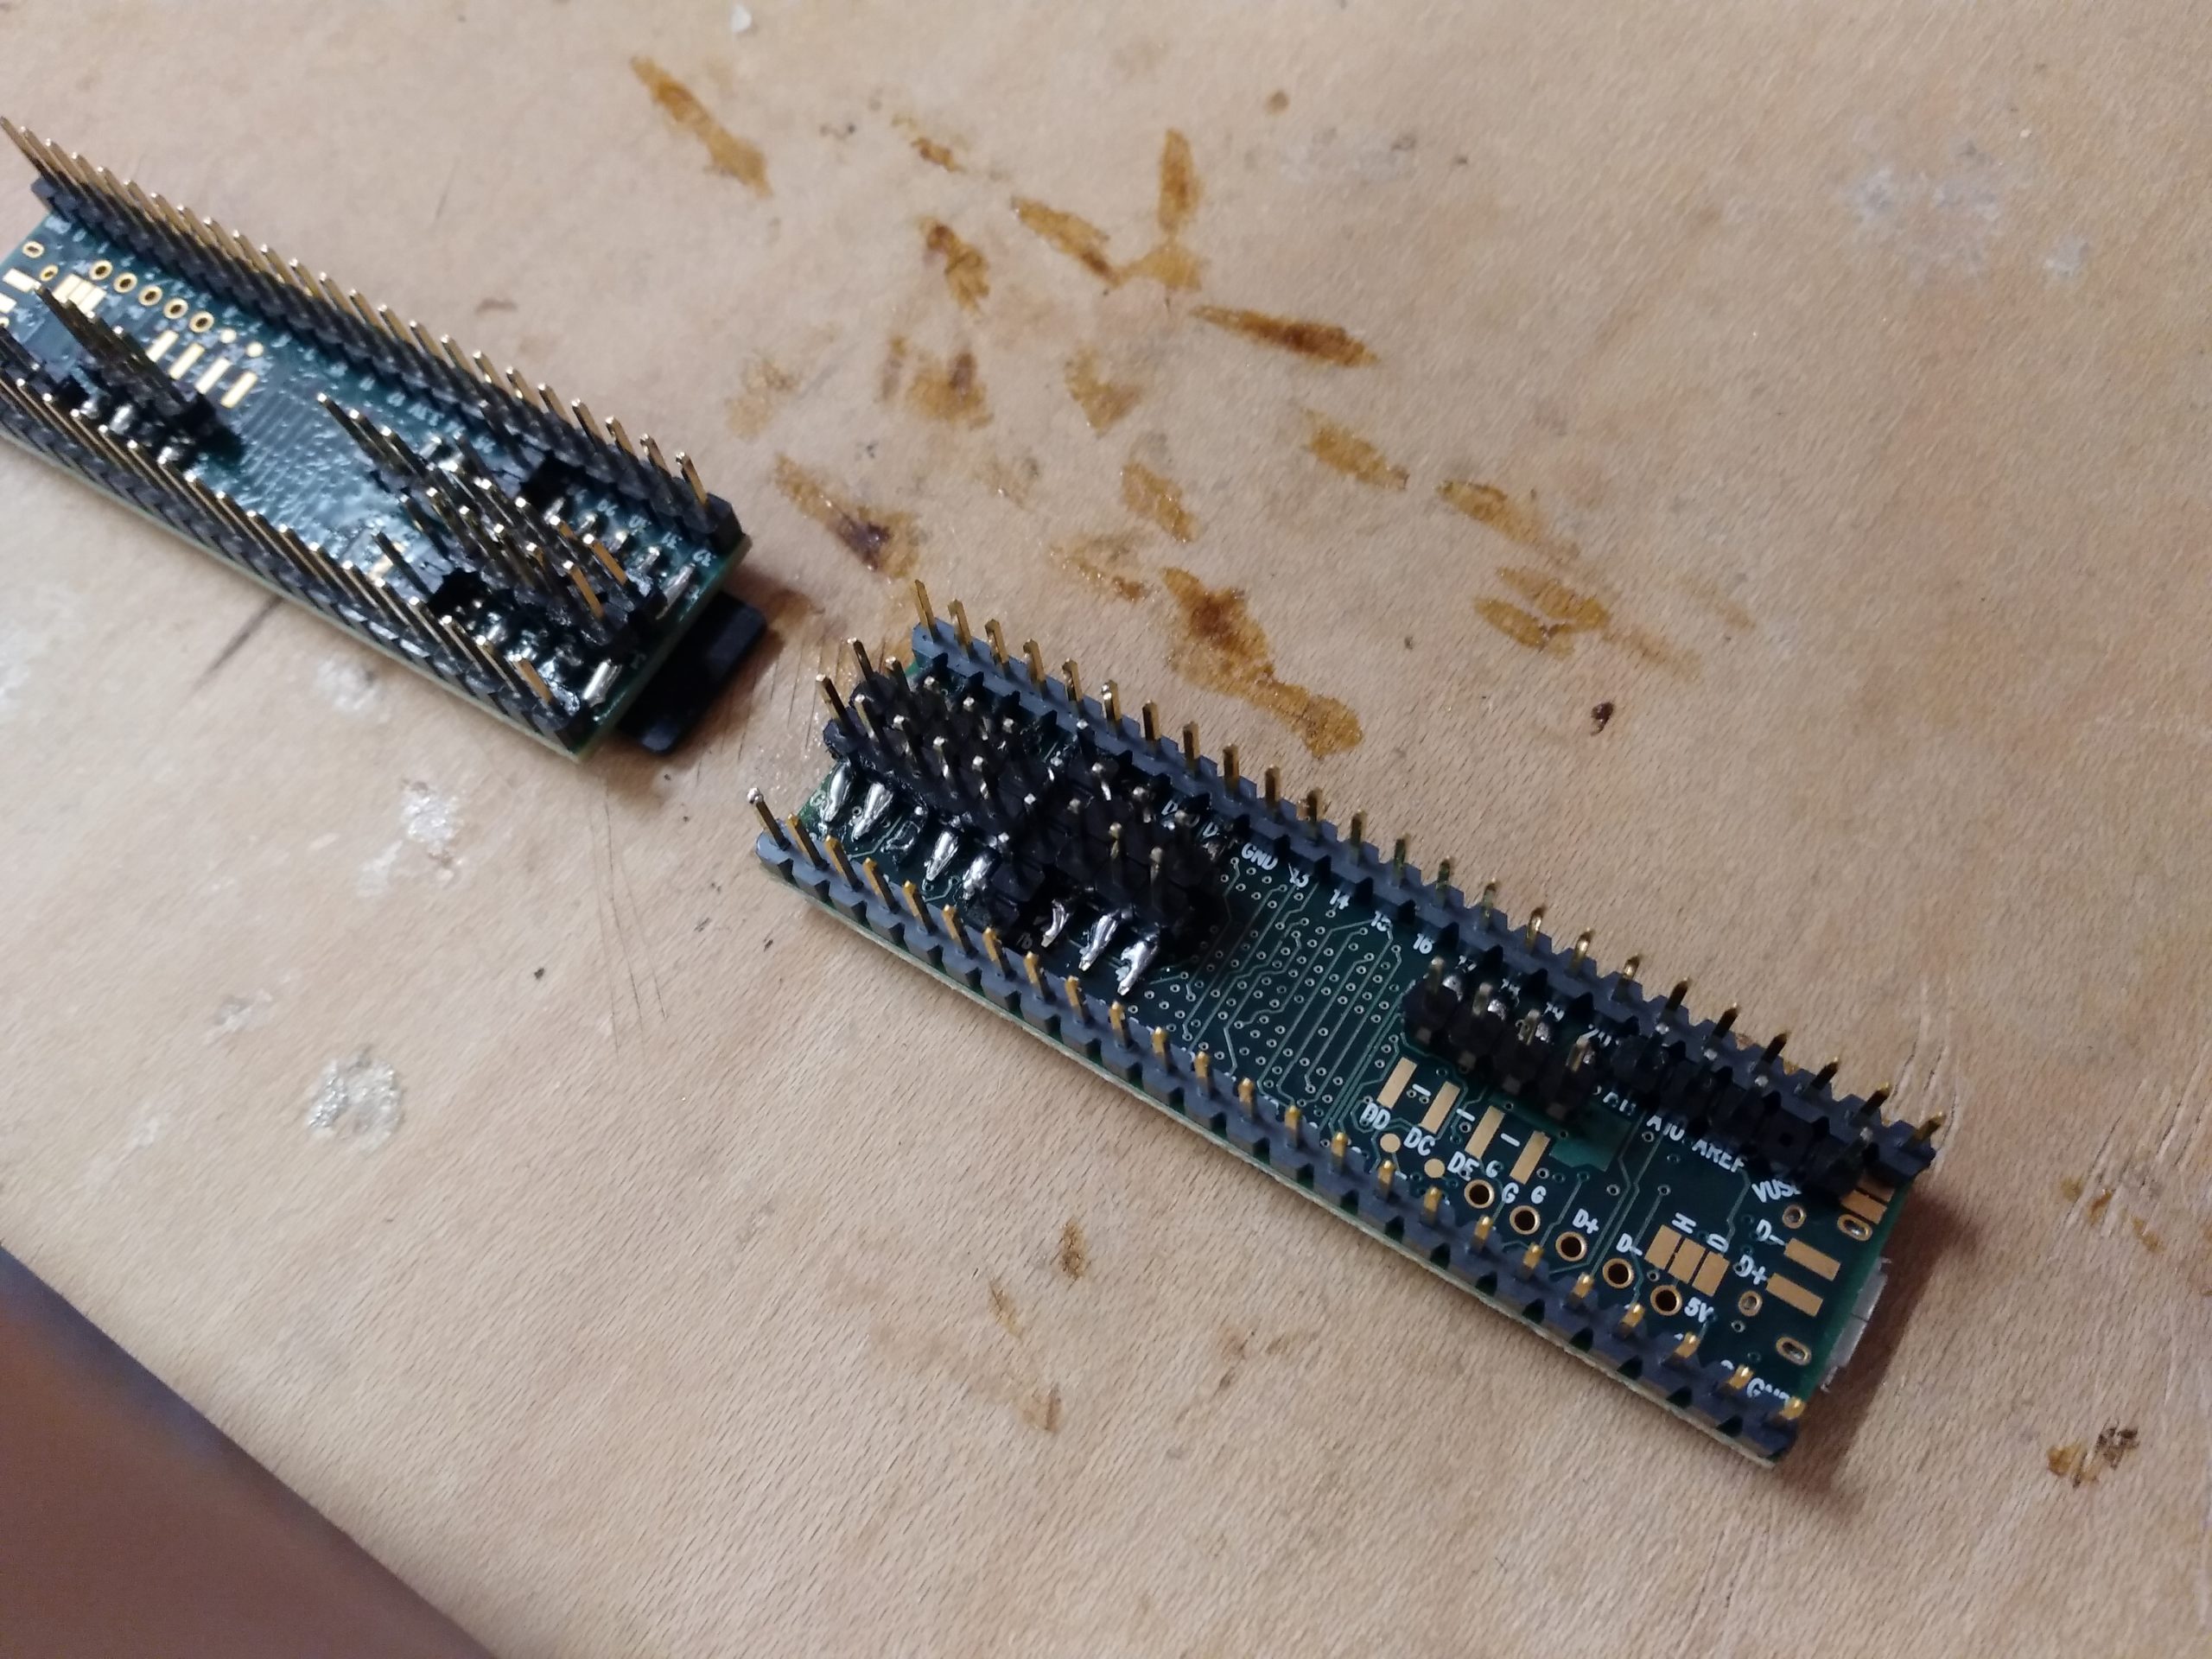
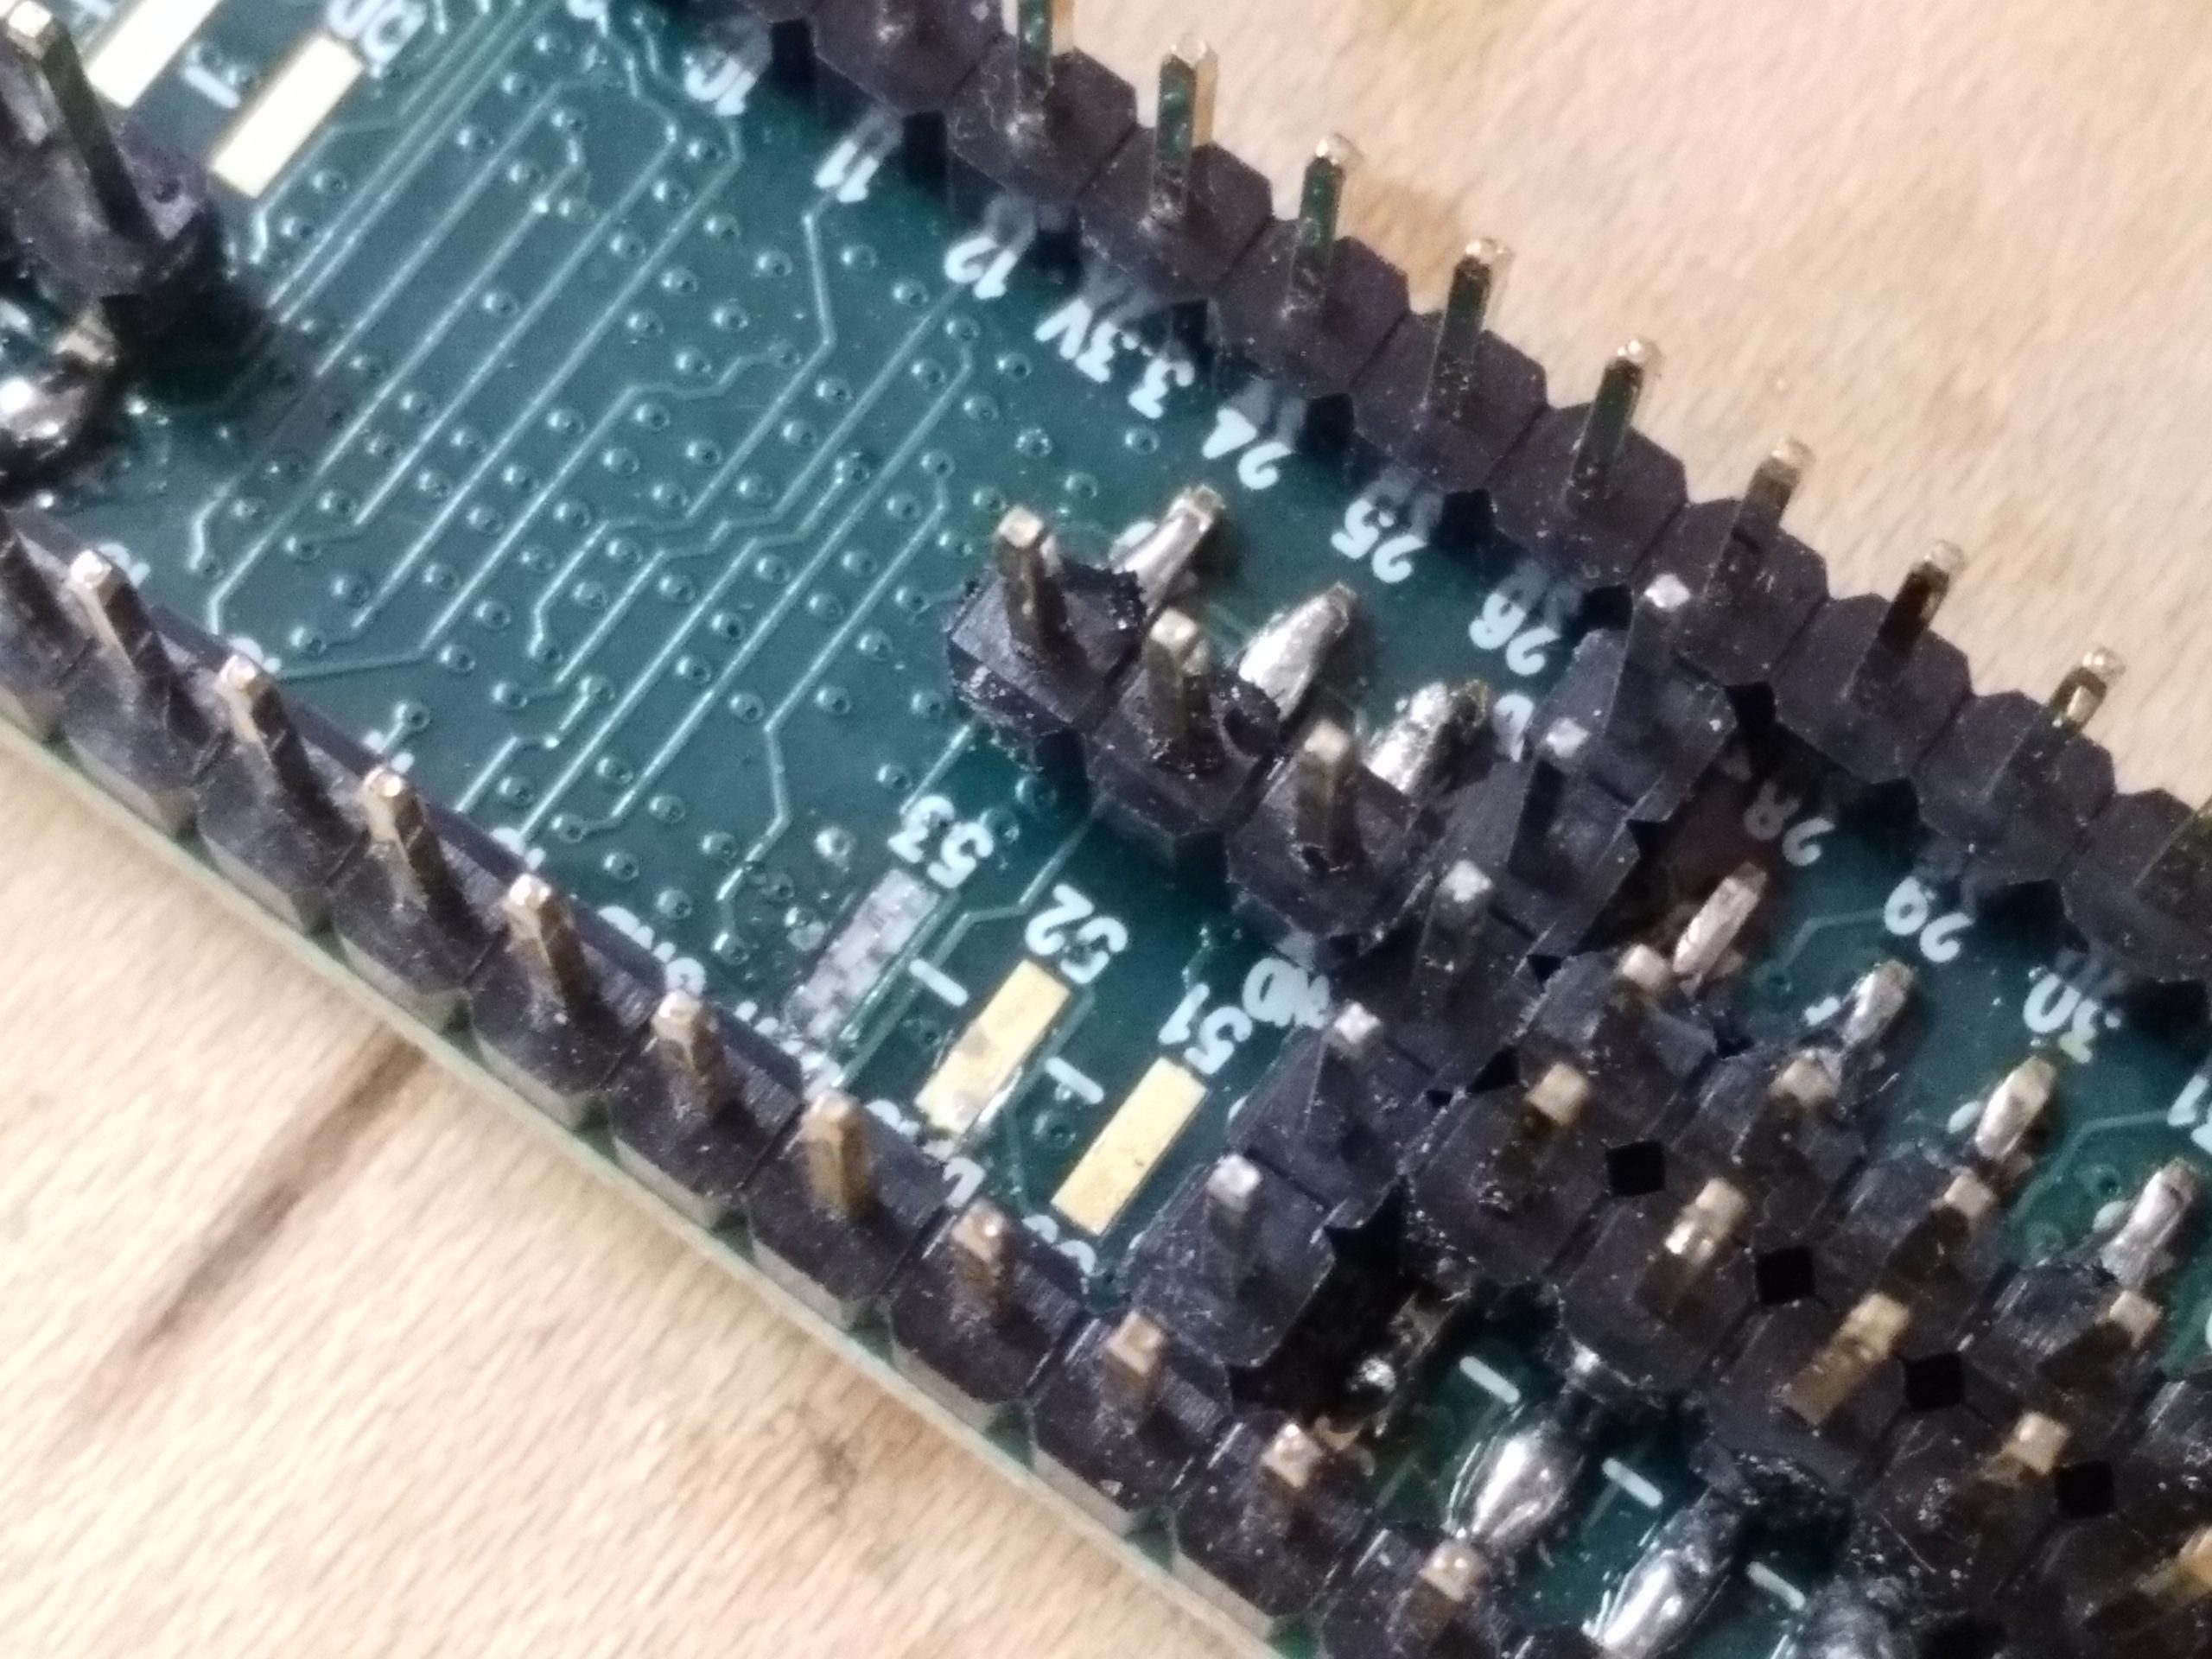
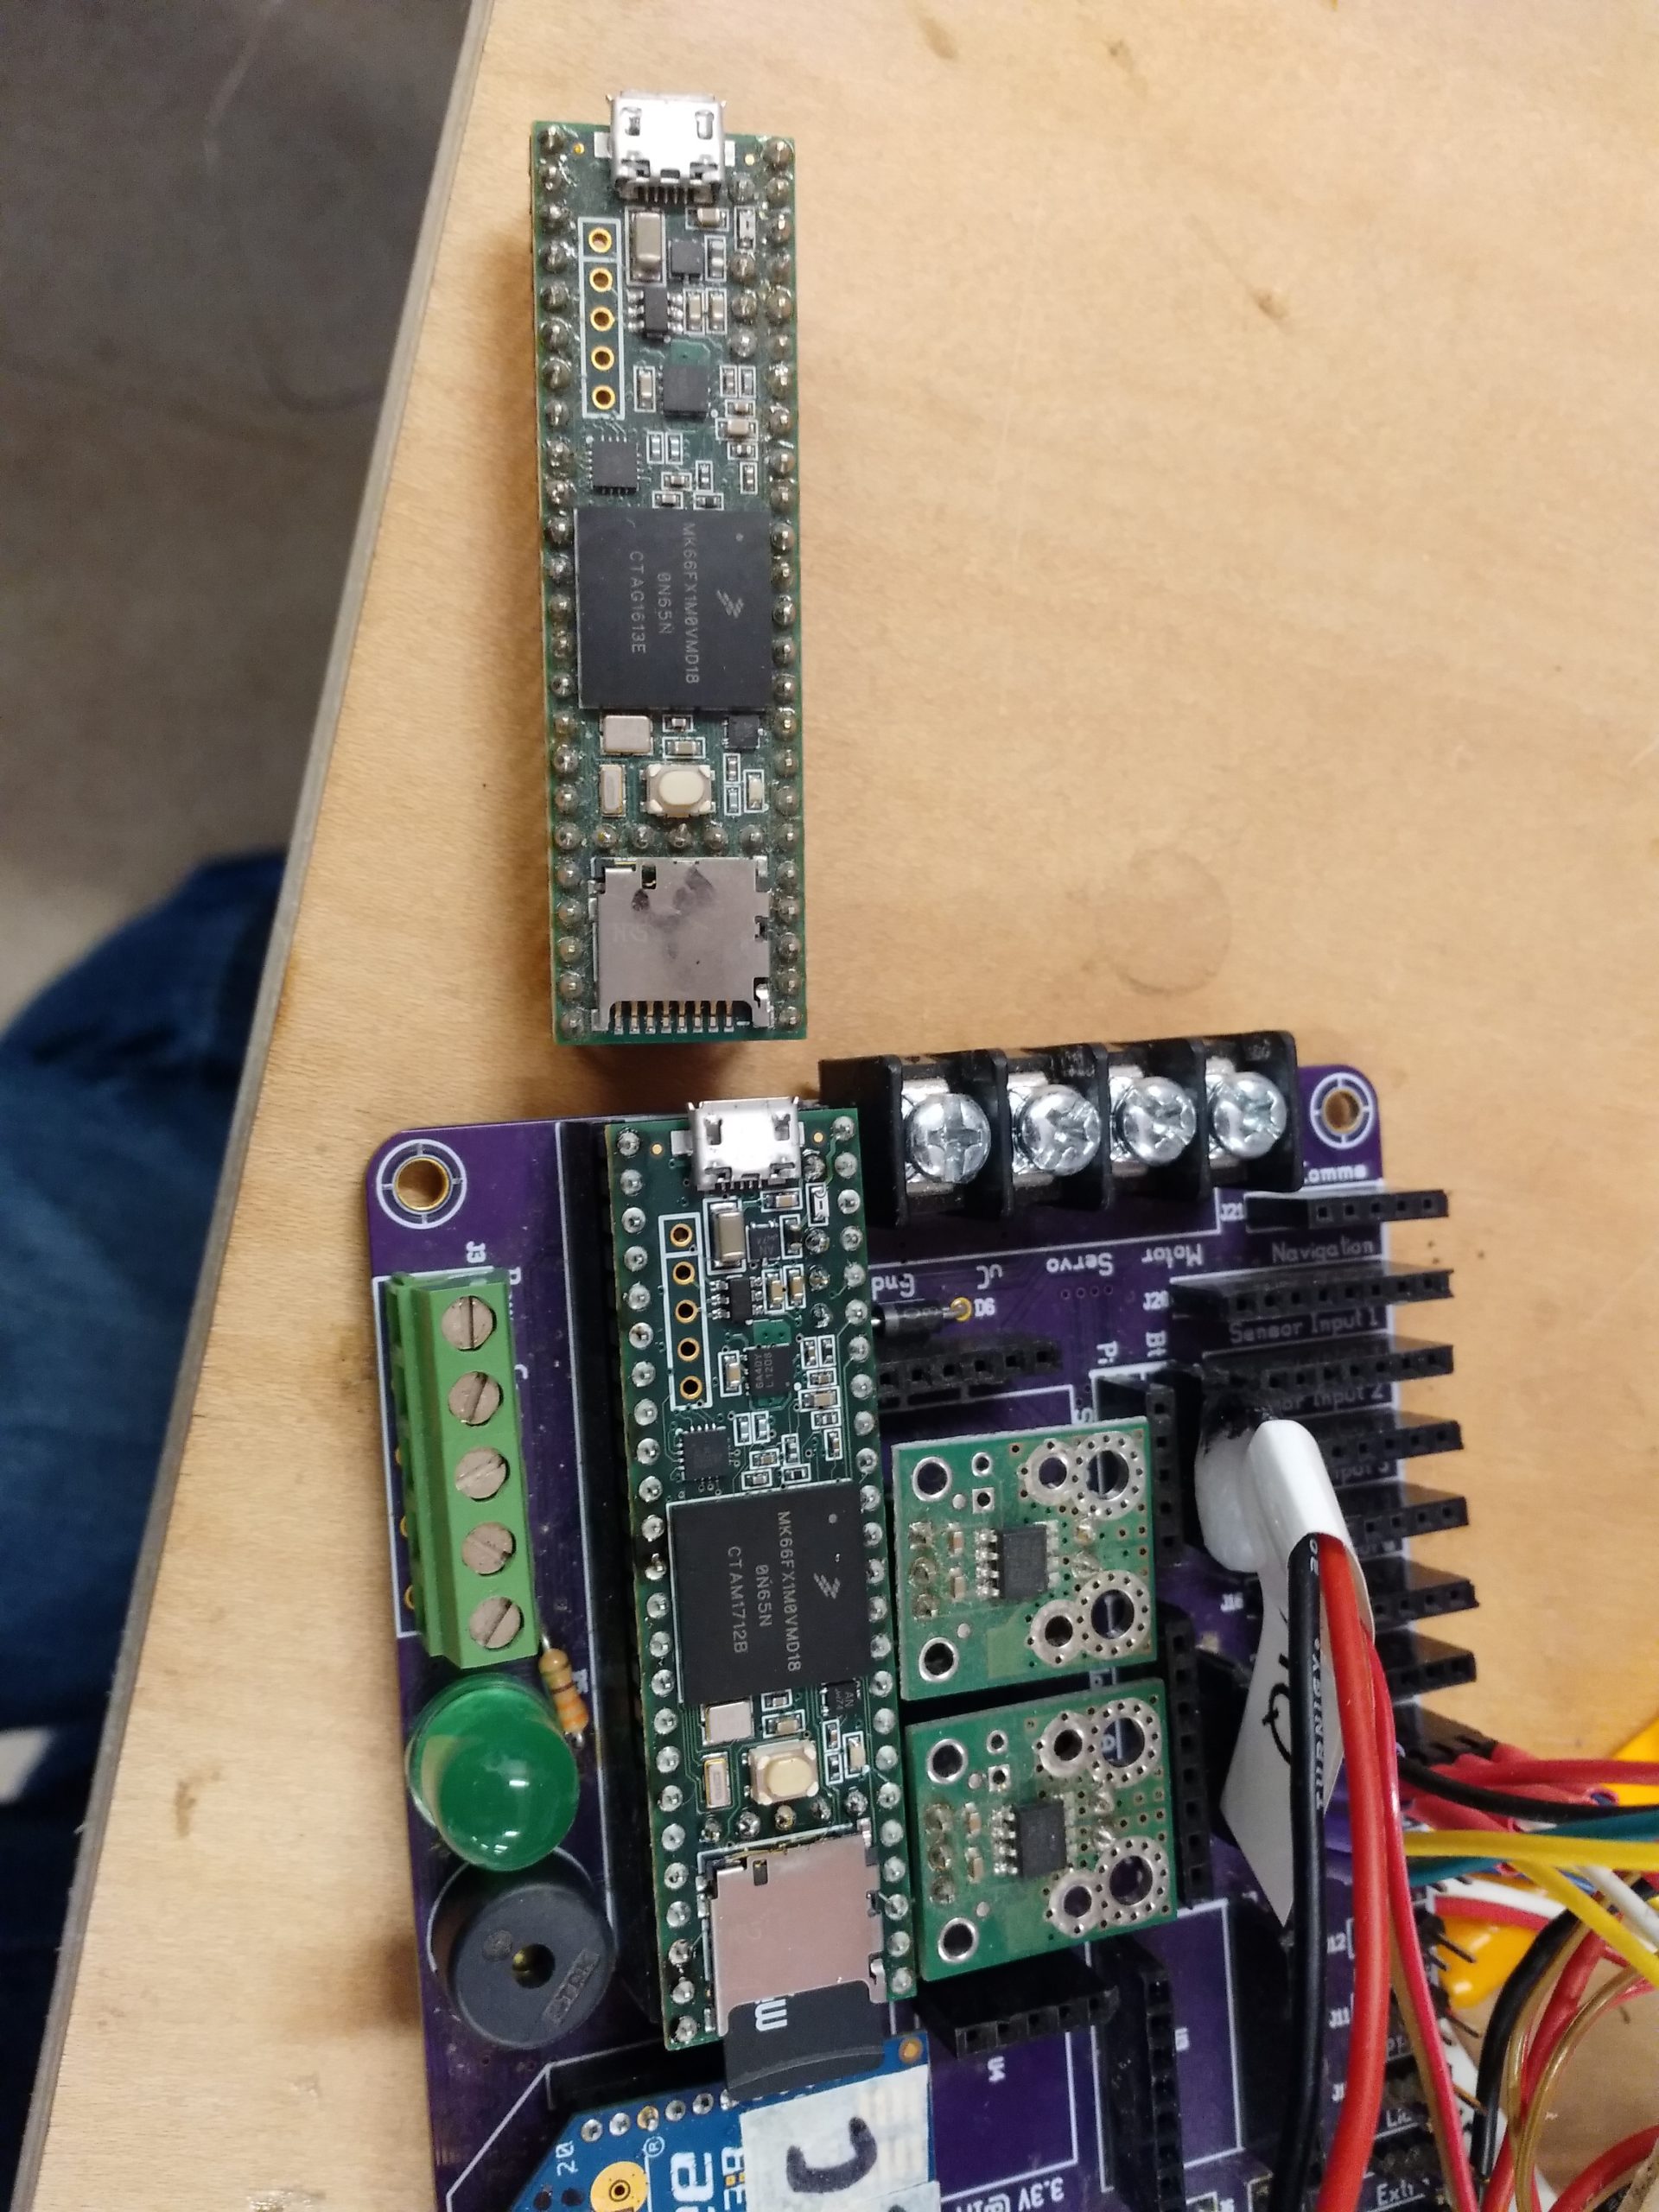
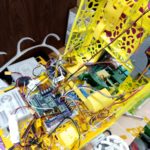
The next piece that broke was a pad on the Teensy 3.6 lifted when trying to remove it. This is understandable, since the force of all the headers was much greater than that of a small copper footprint pour on some fibreglass. Alright, thanks to PJRC, we soldered new headers on and replaced this.
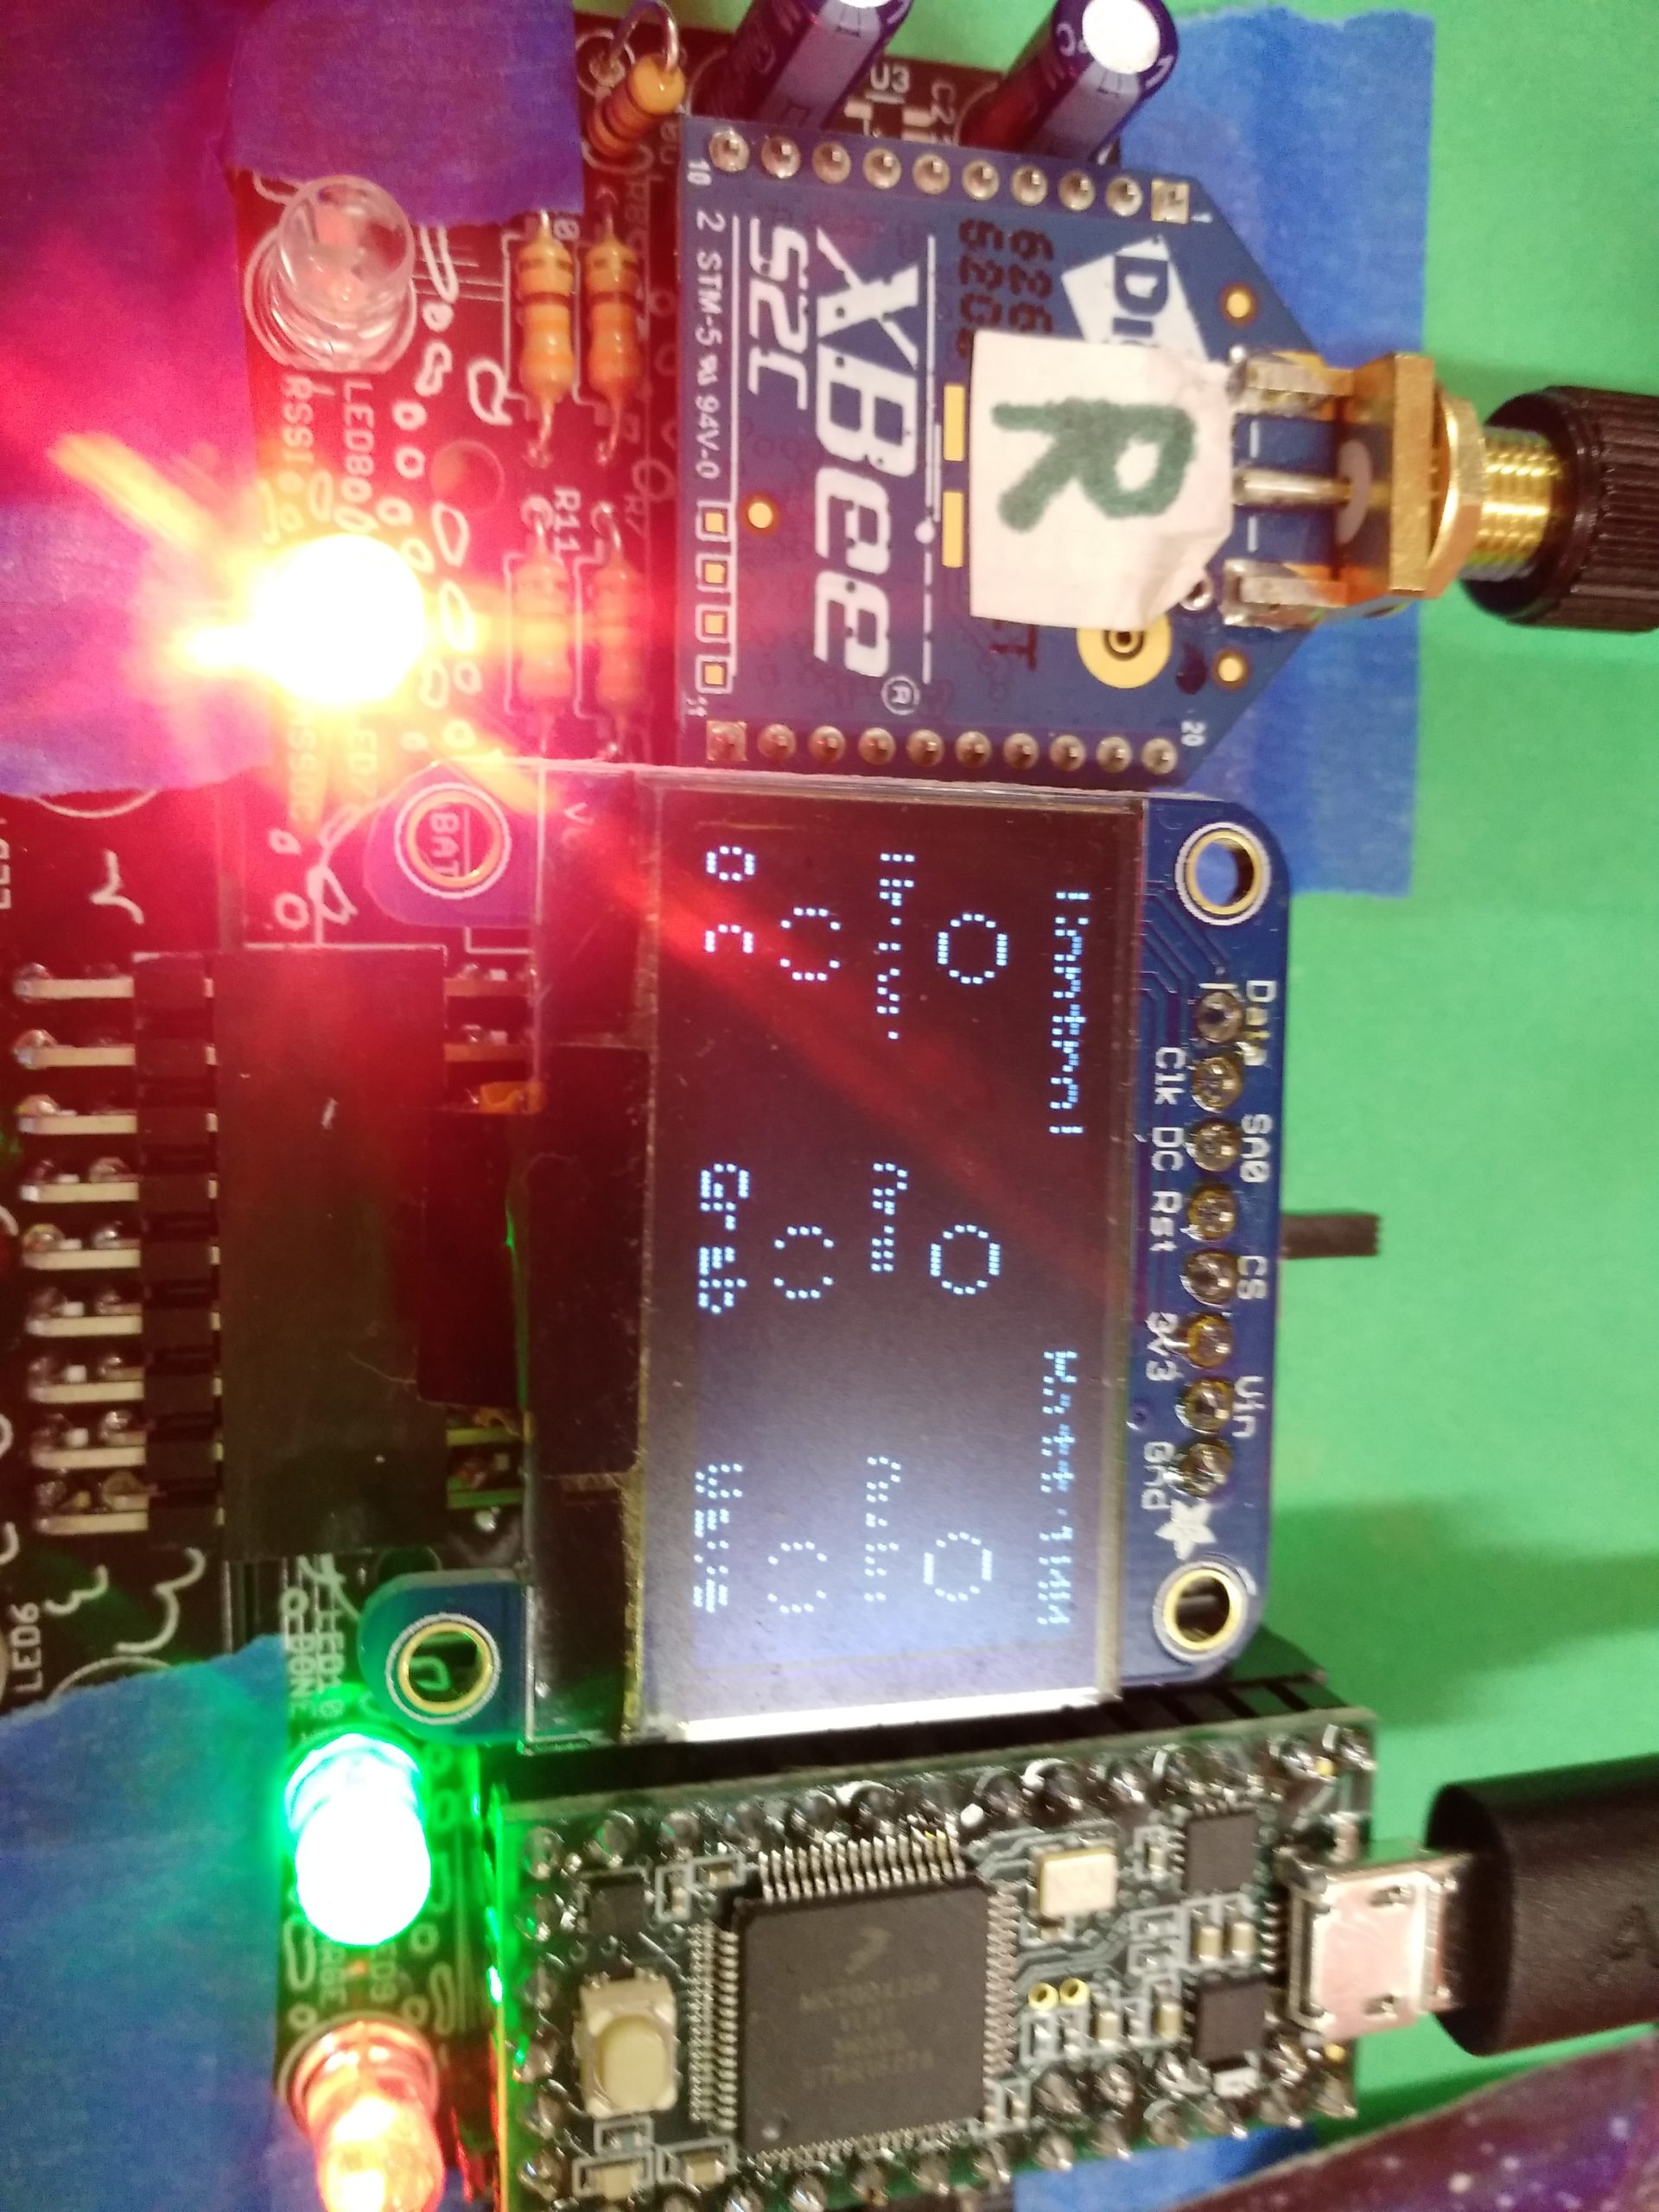
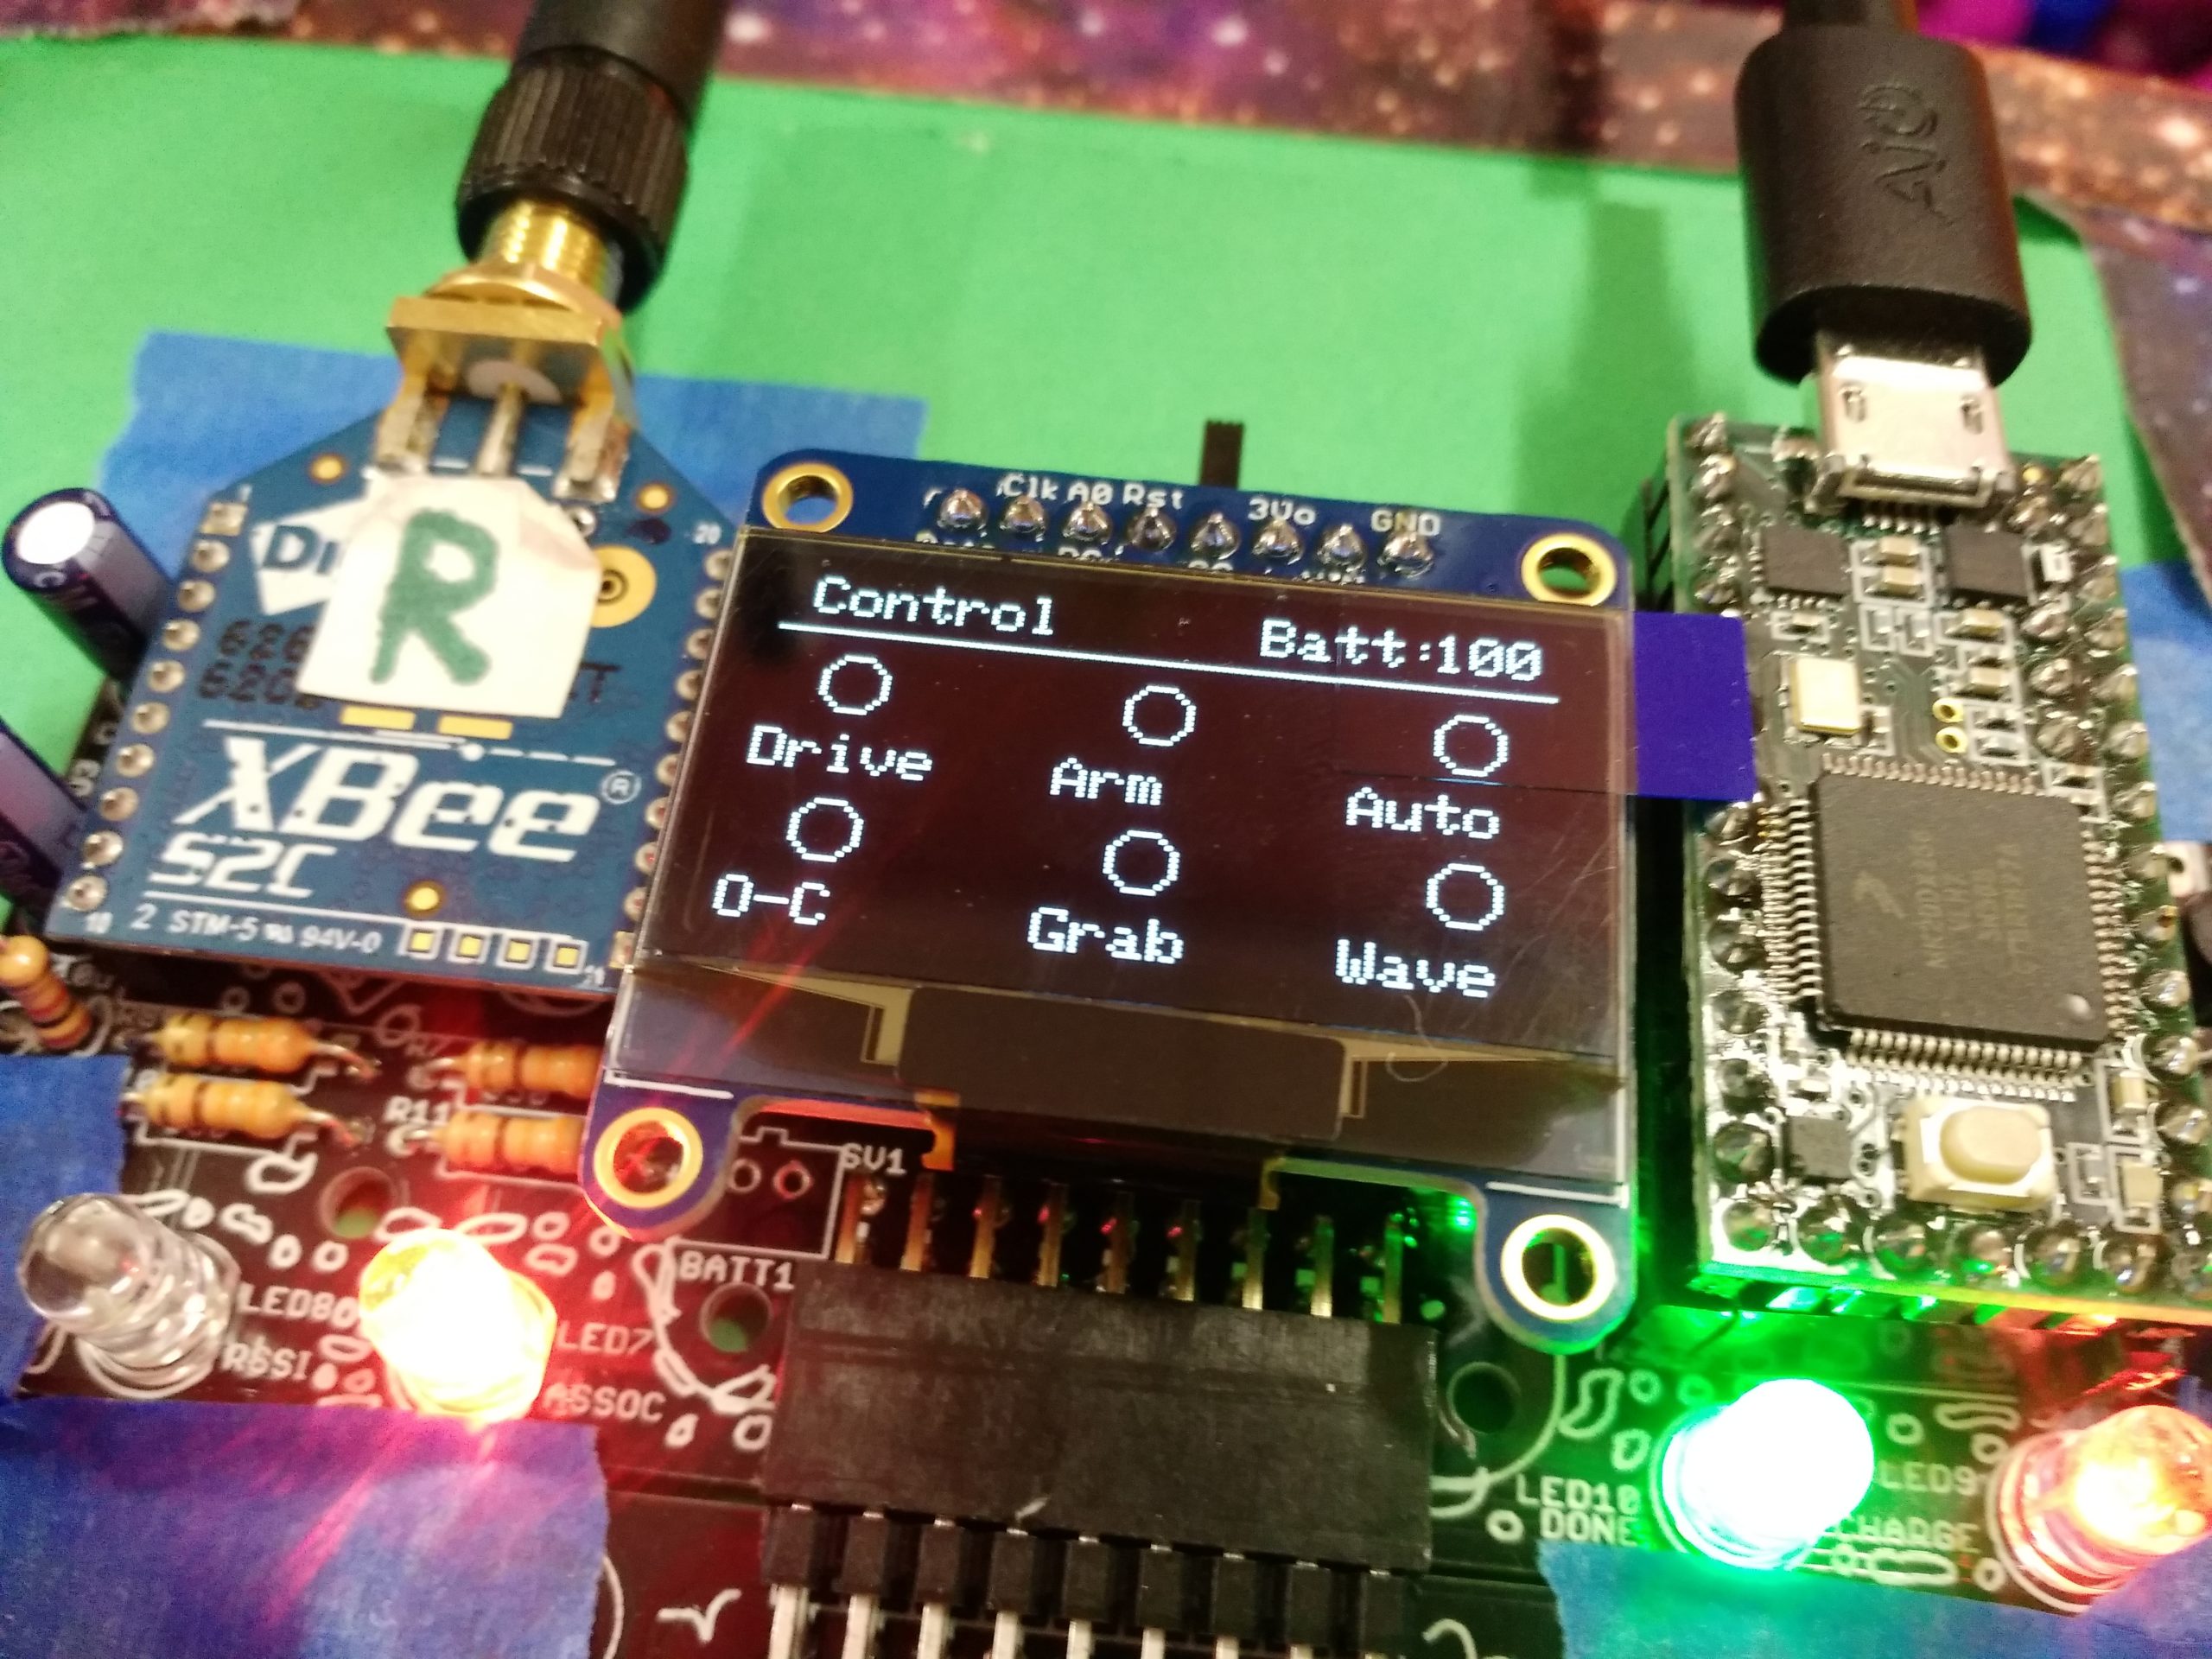
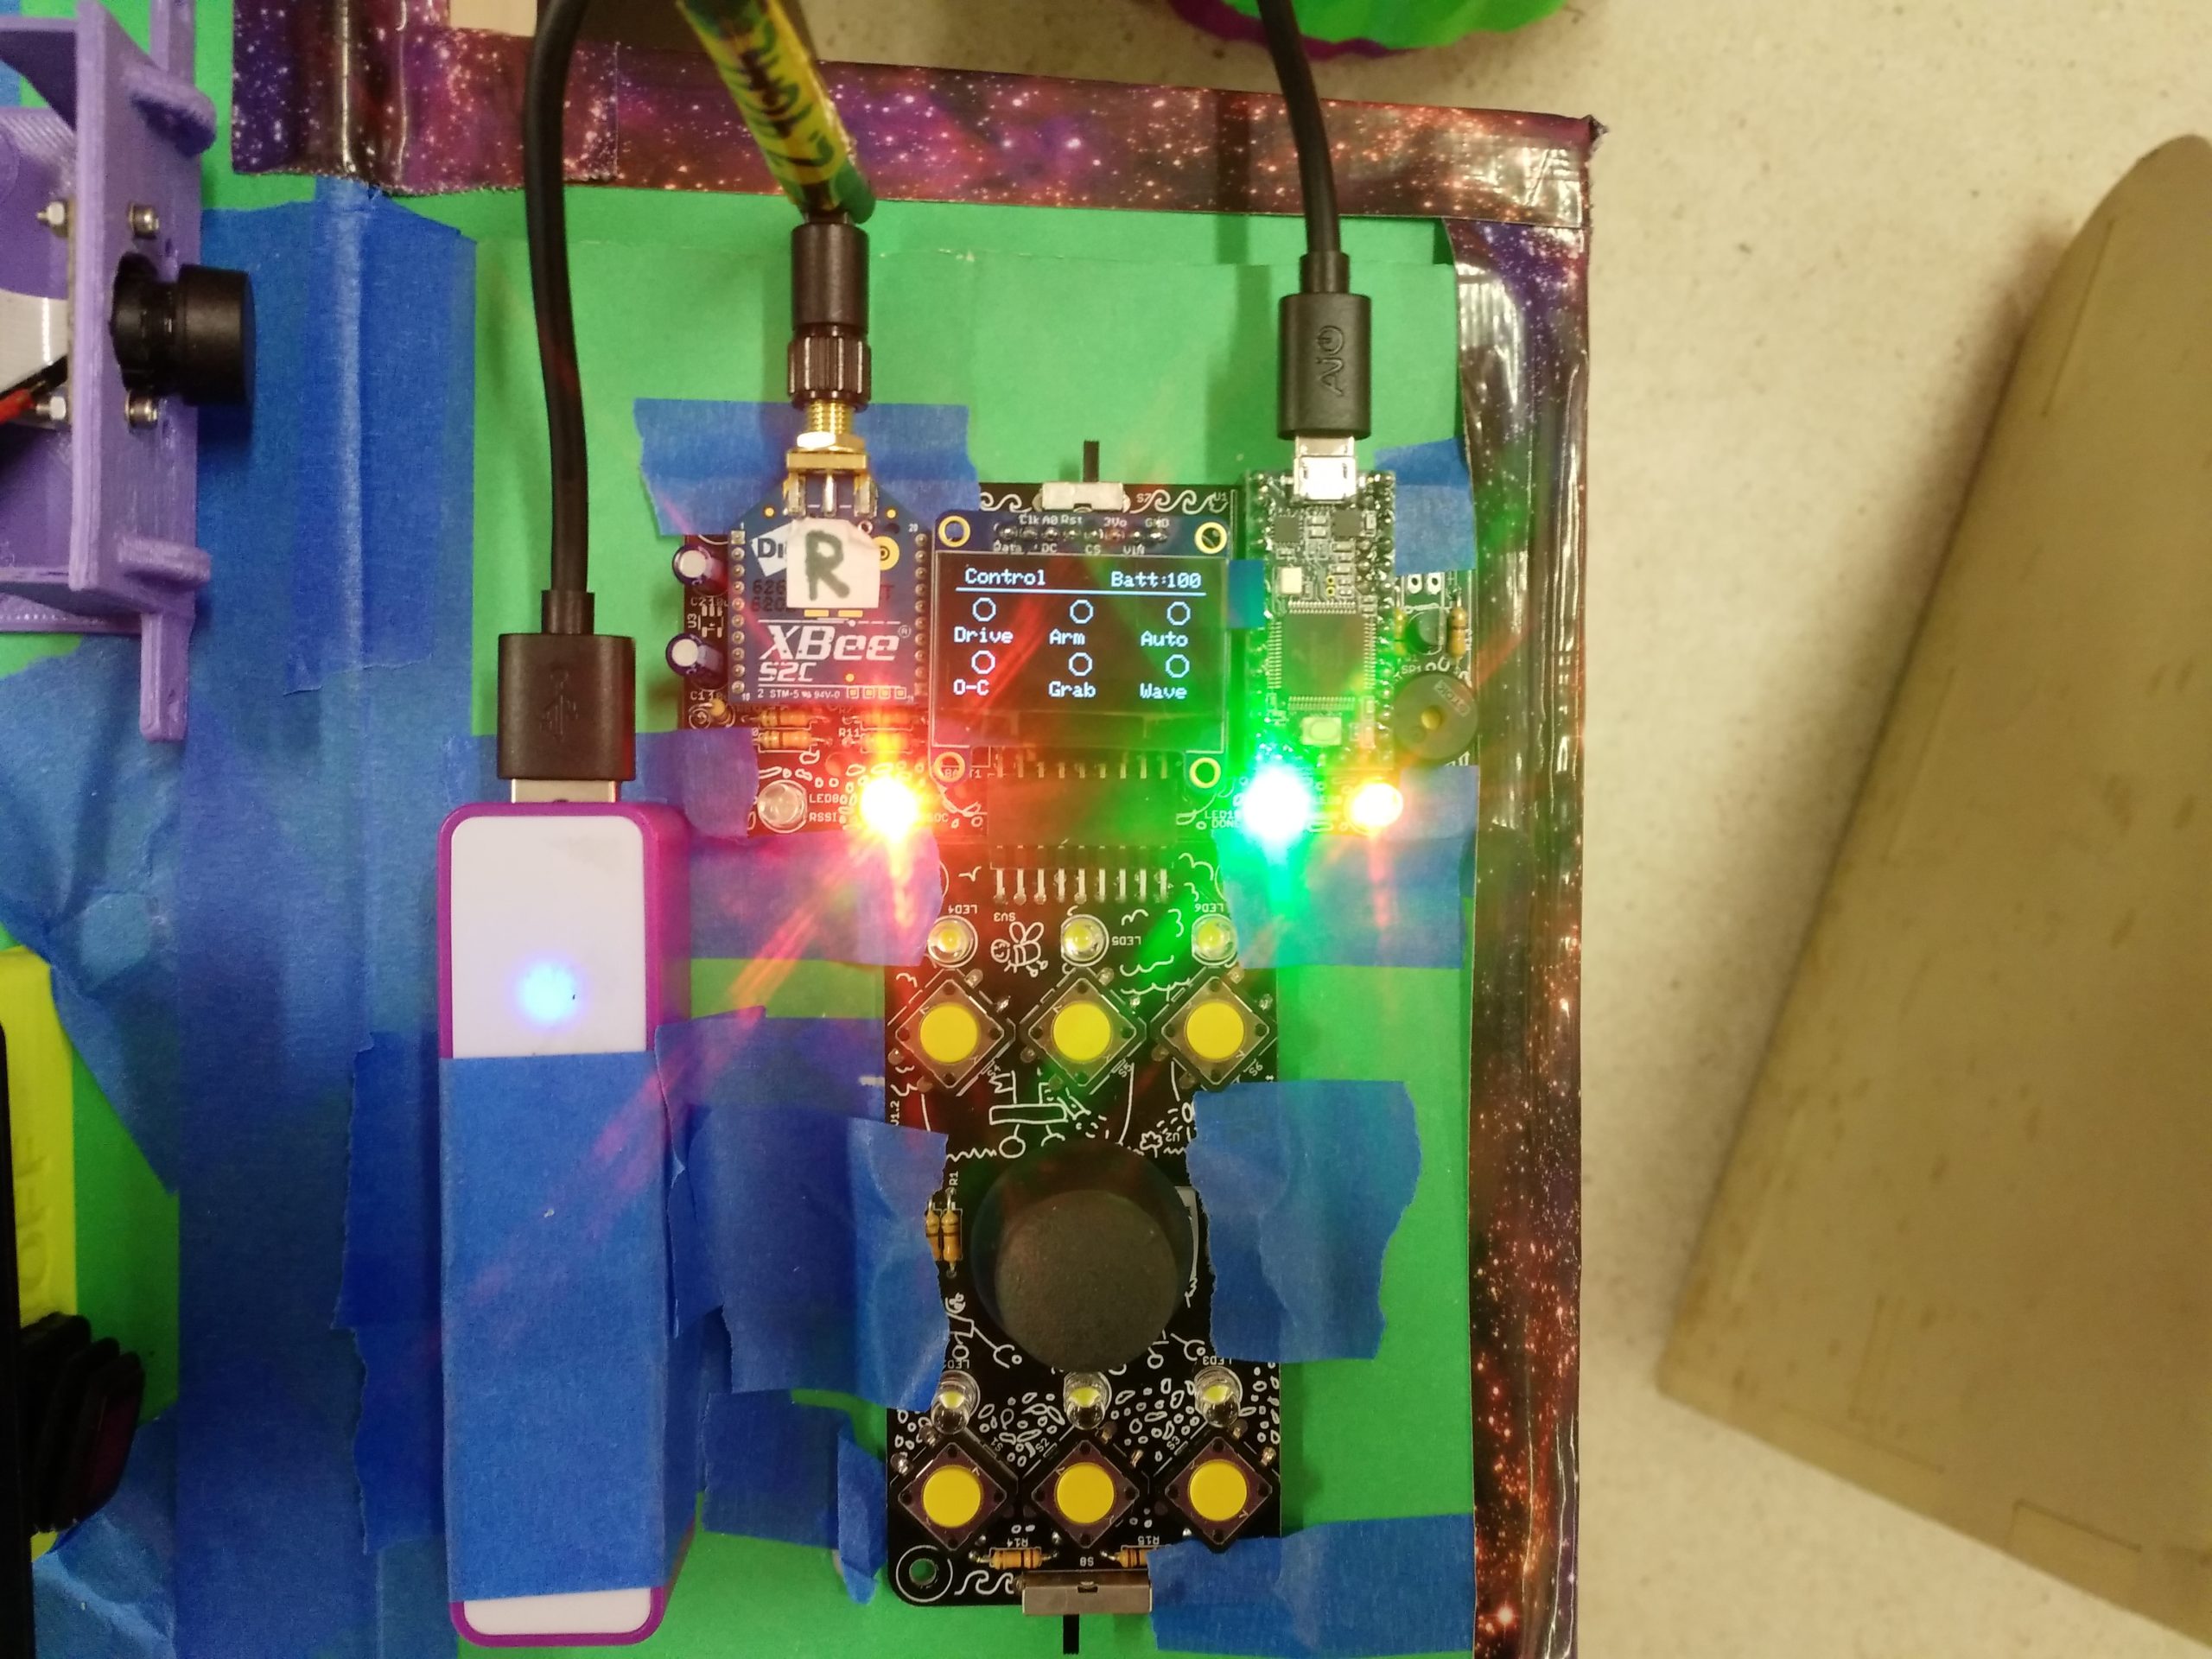
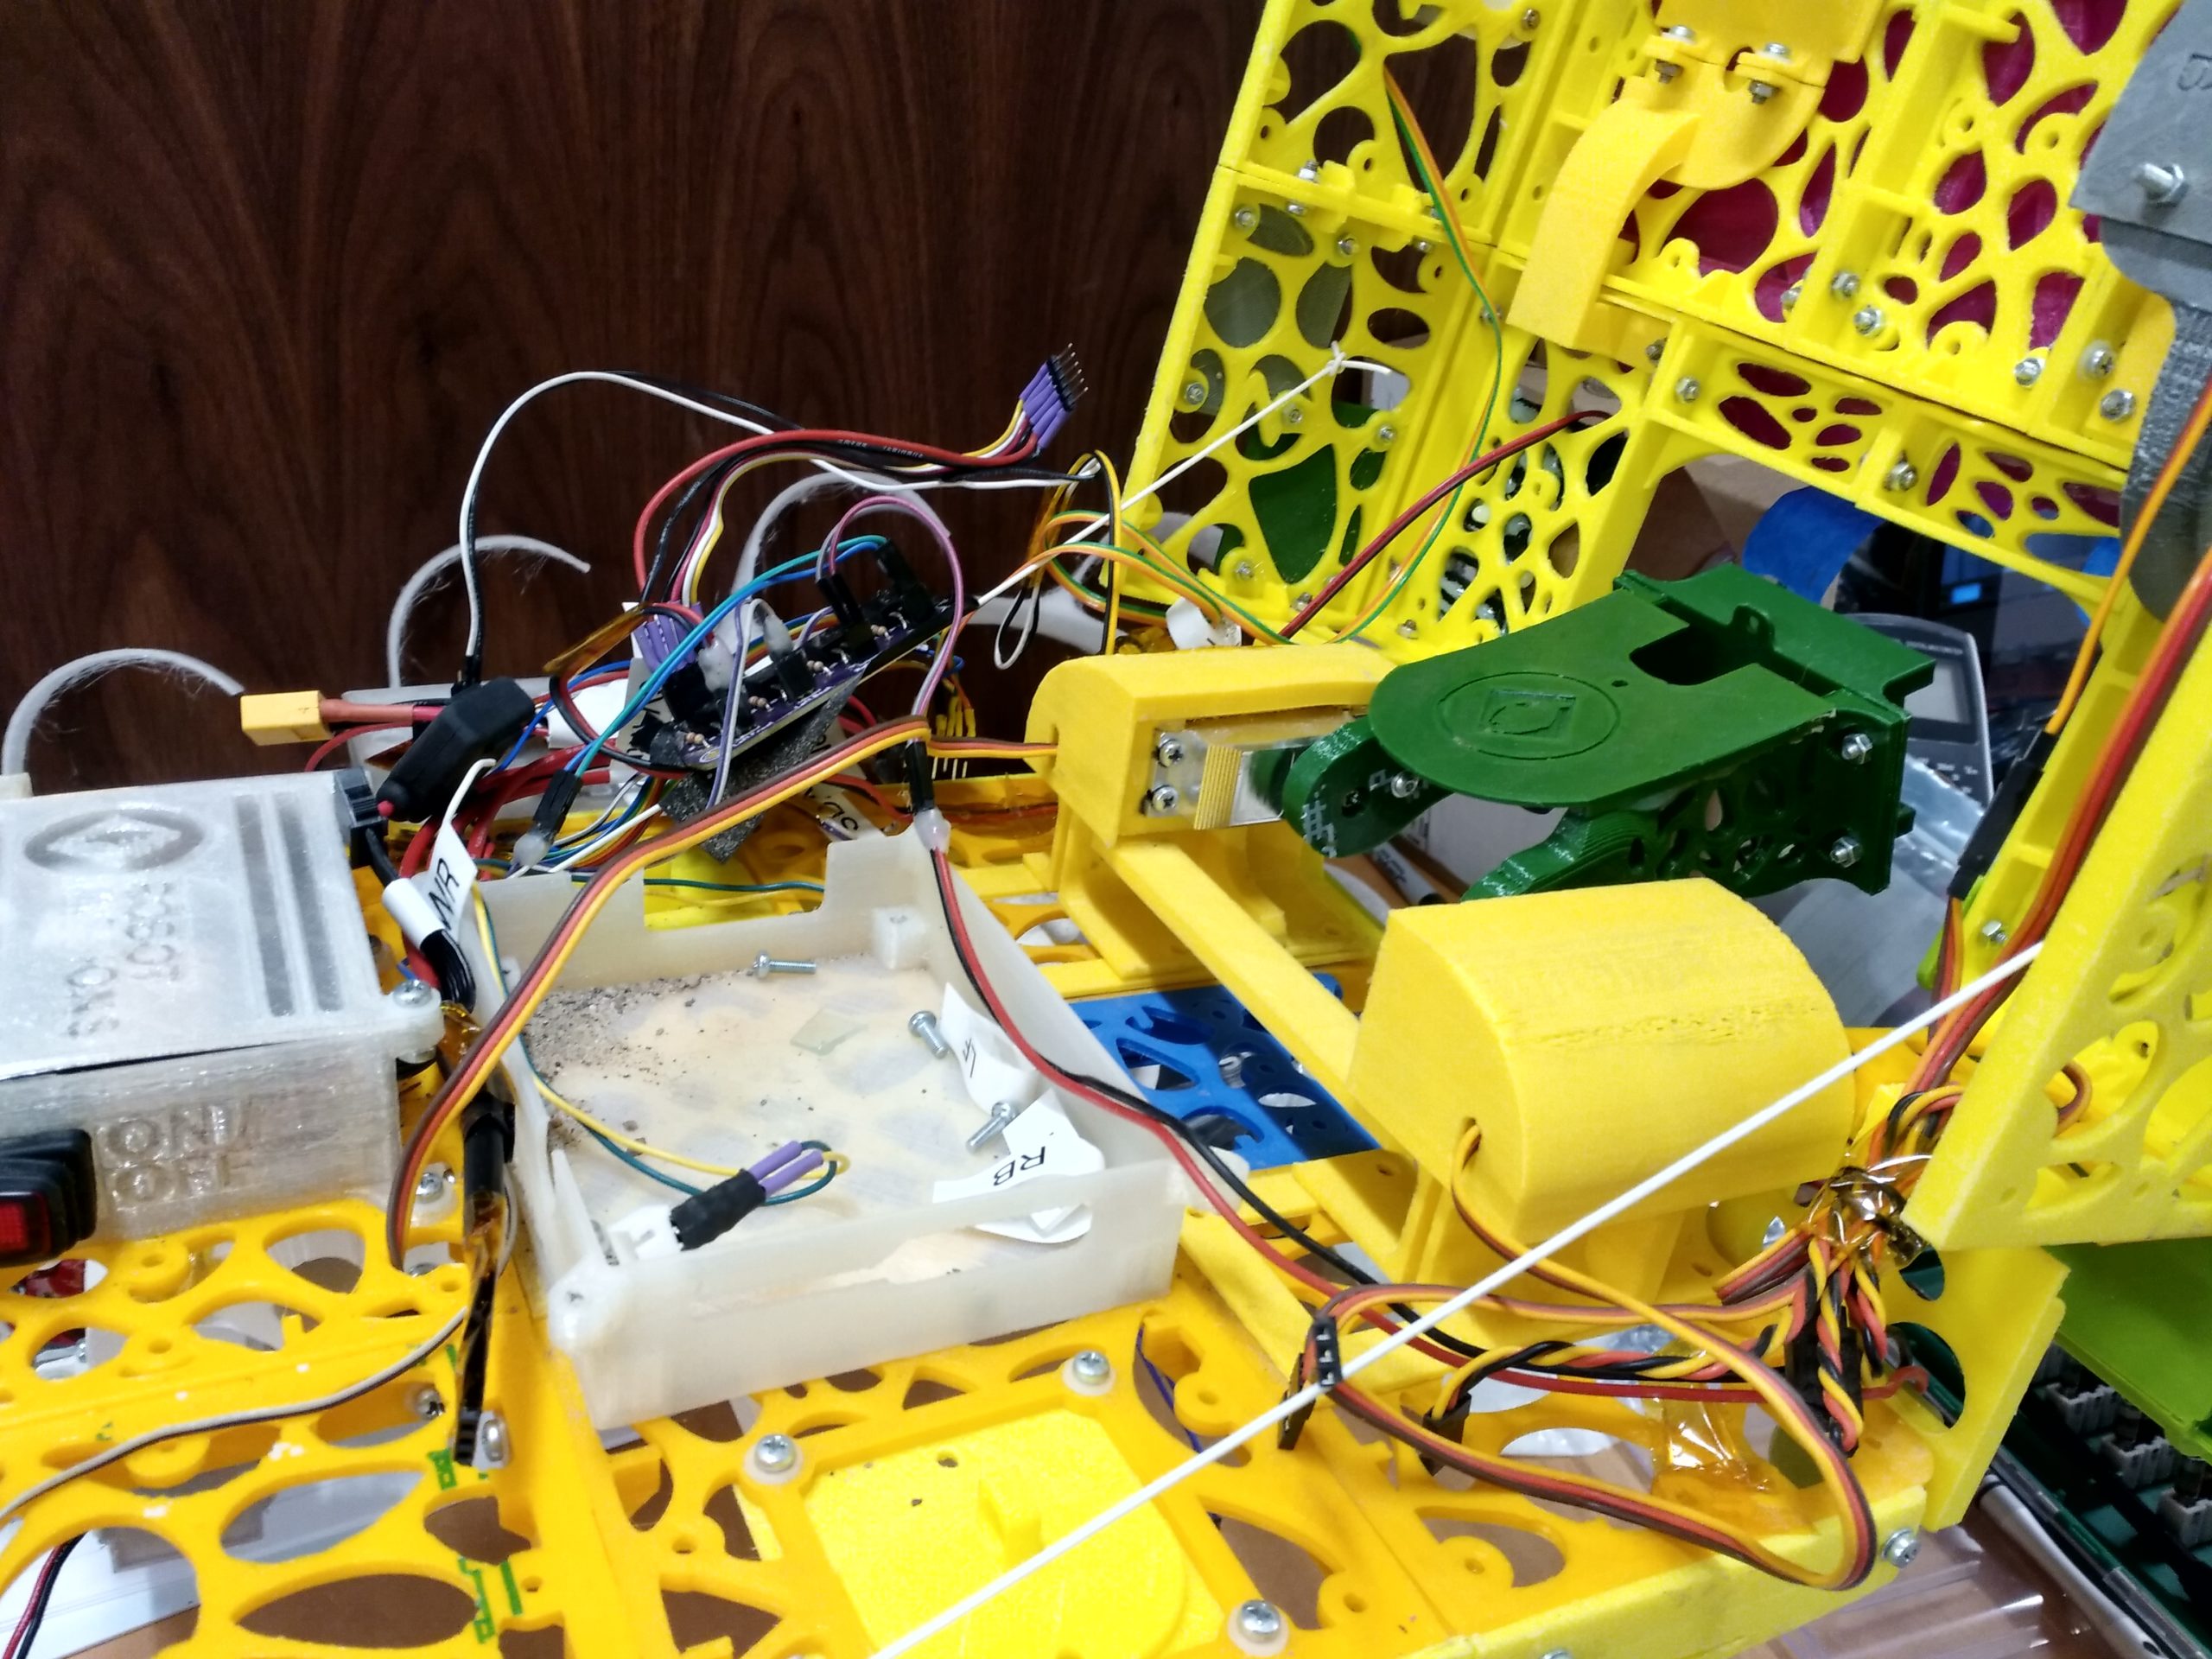
After that was fixing the Operator Interface on the green foam board Bowie. We ordered a replacement display, and all is displaying properly again.
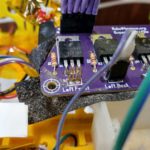
There was a motor driver missing, but that was an easy find – it was in the prototype tree bot of course!
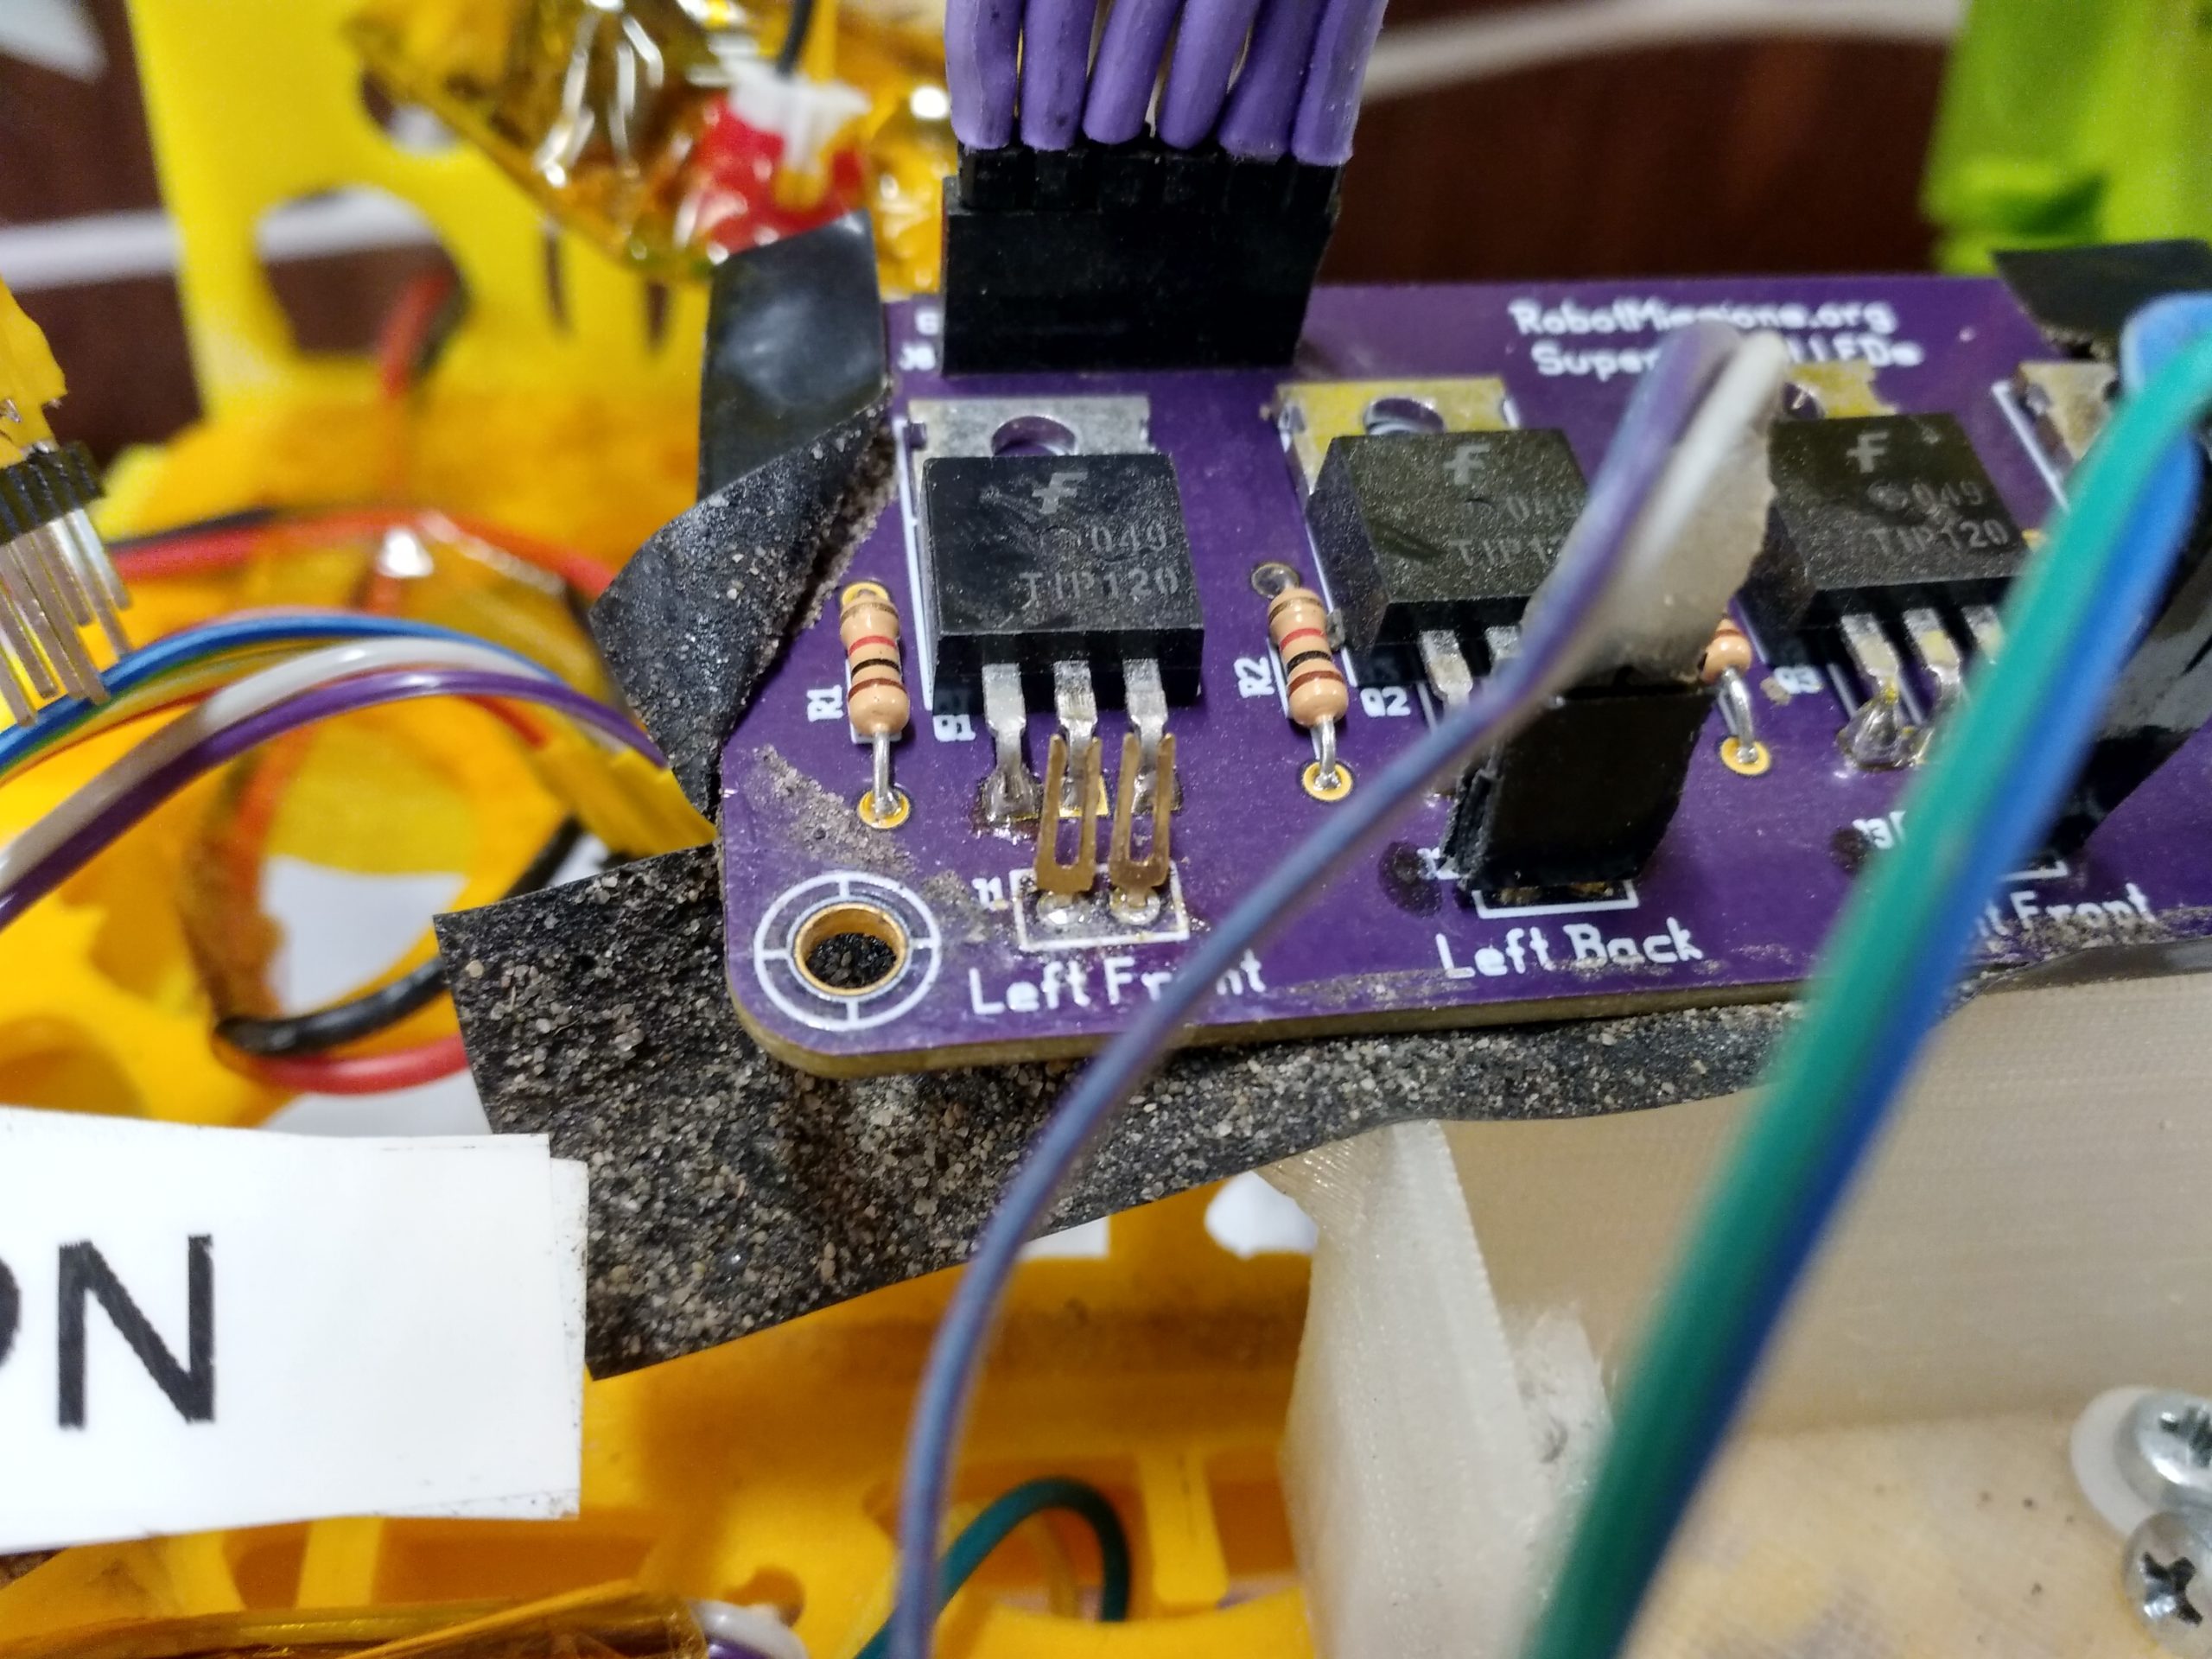
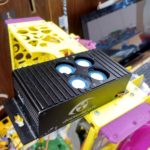
On the super bright lights board (version 1), some F headers are in place but the shrouding is missing. This was fixed by adding new F headers in place.
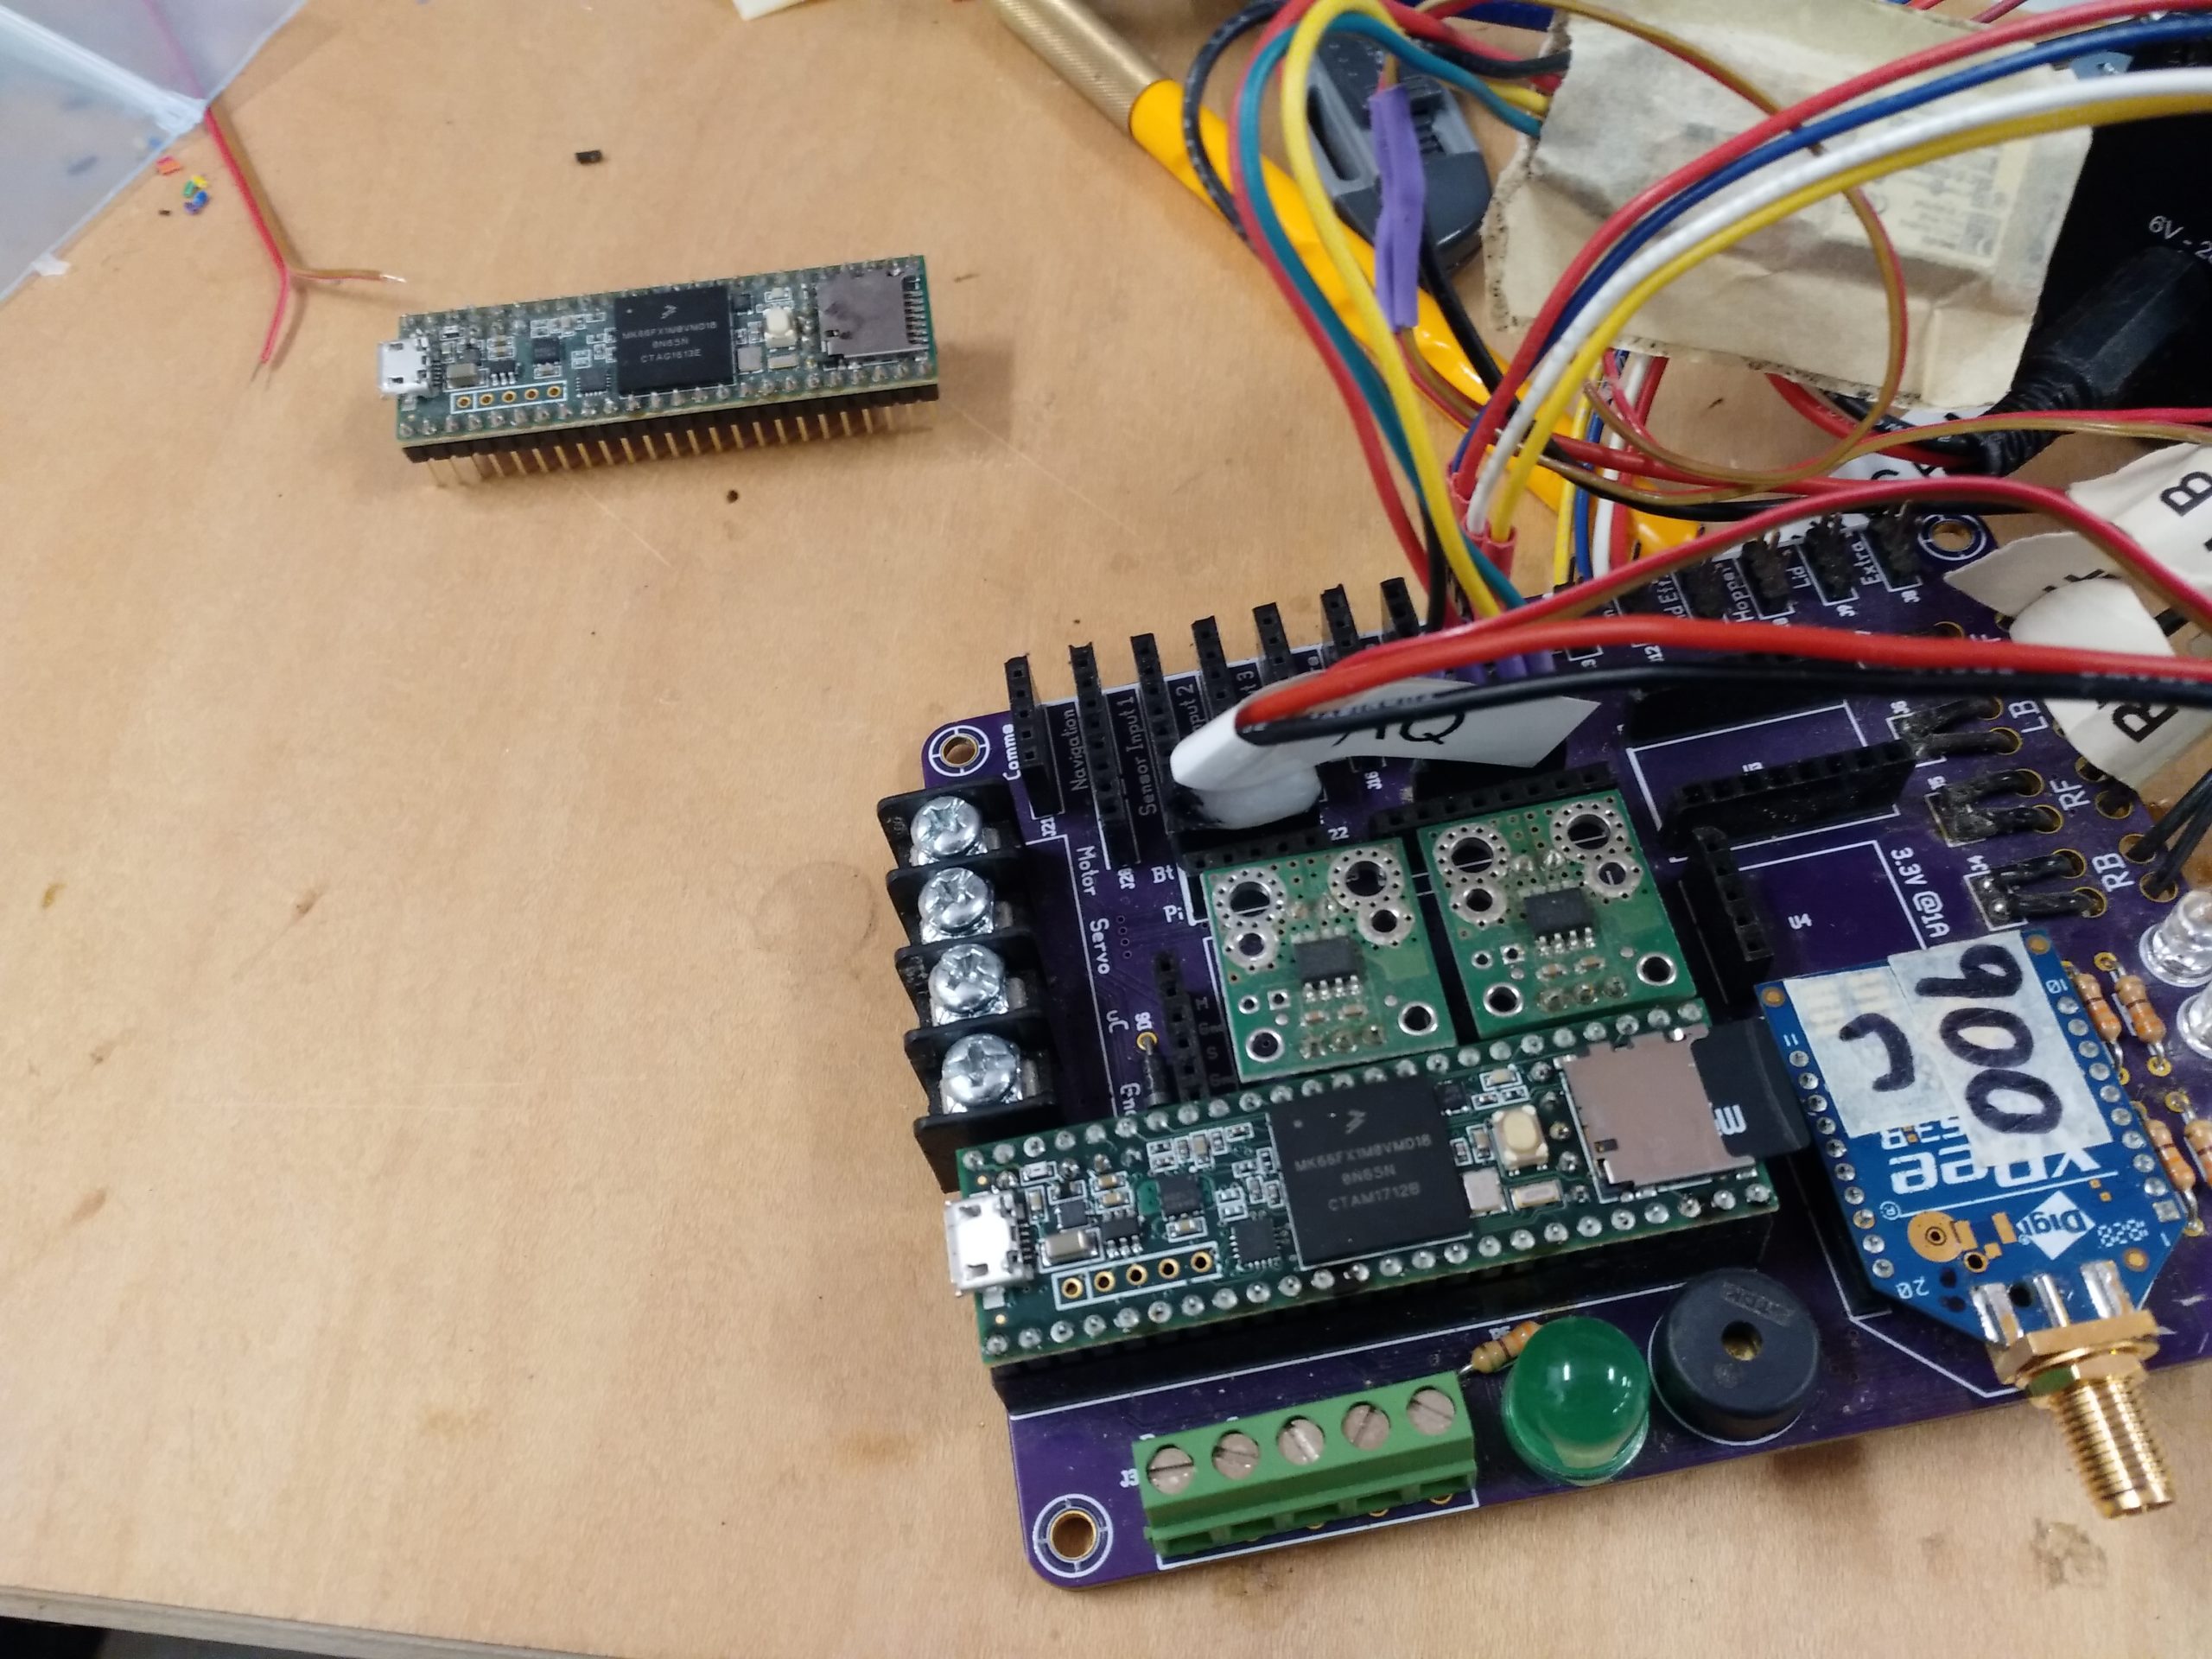
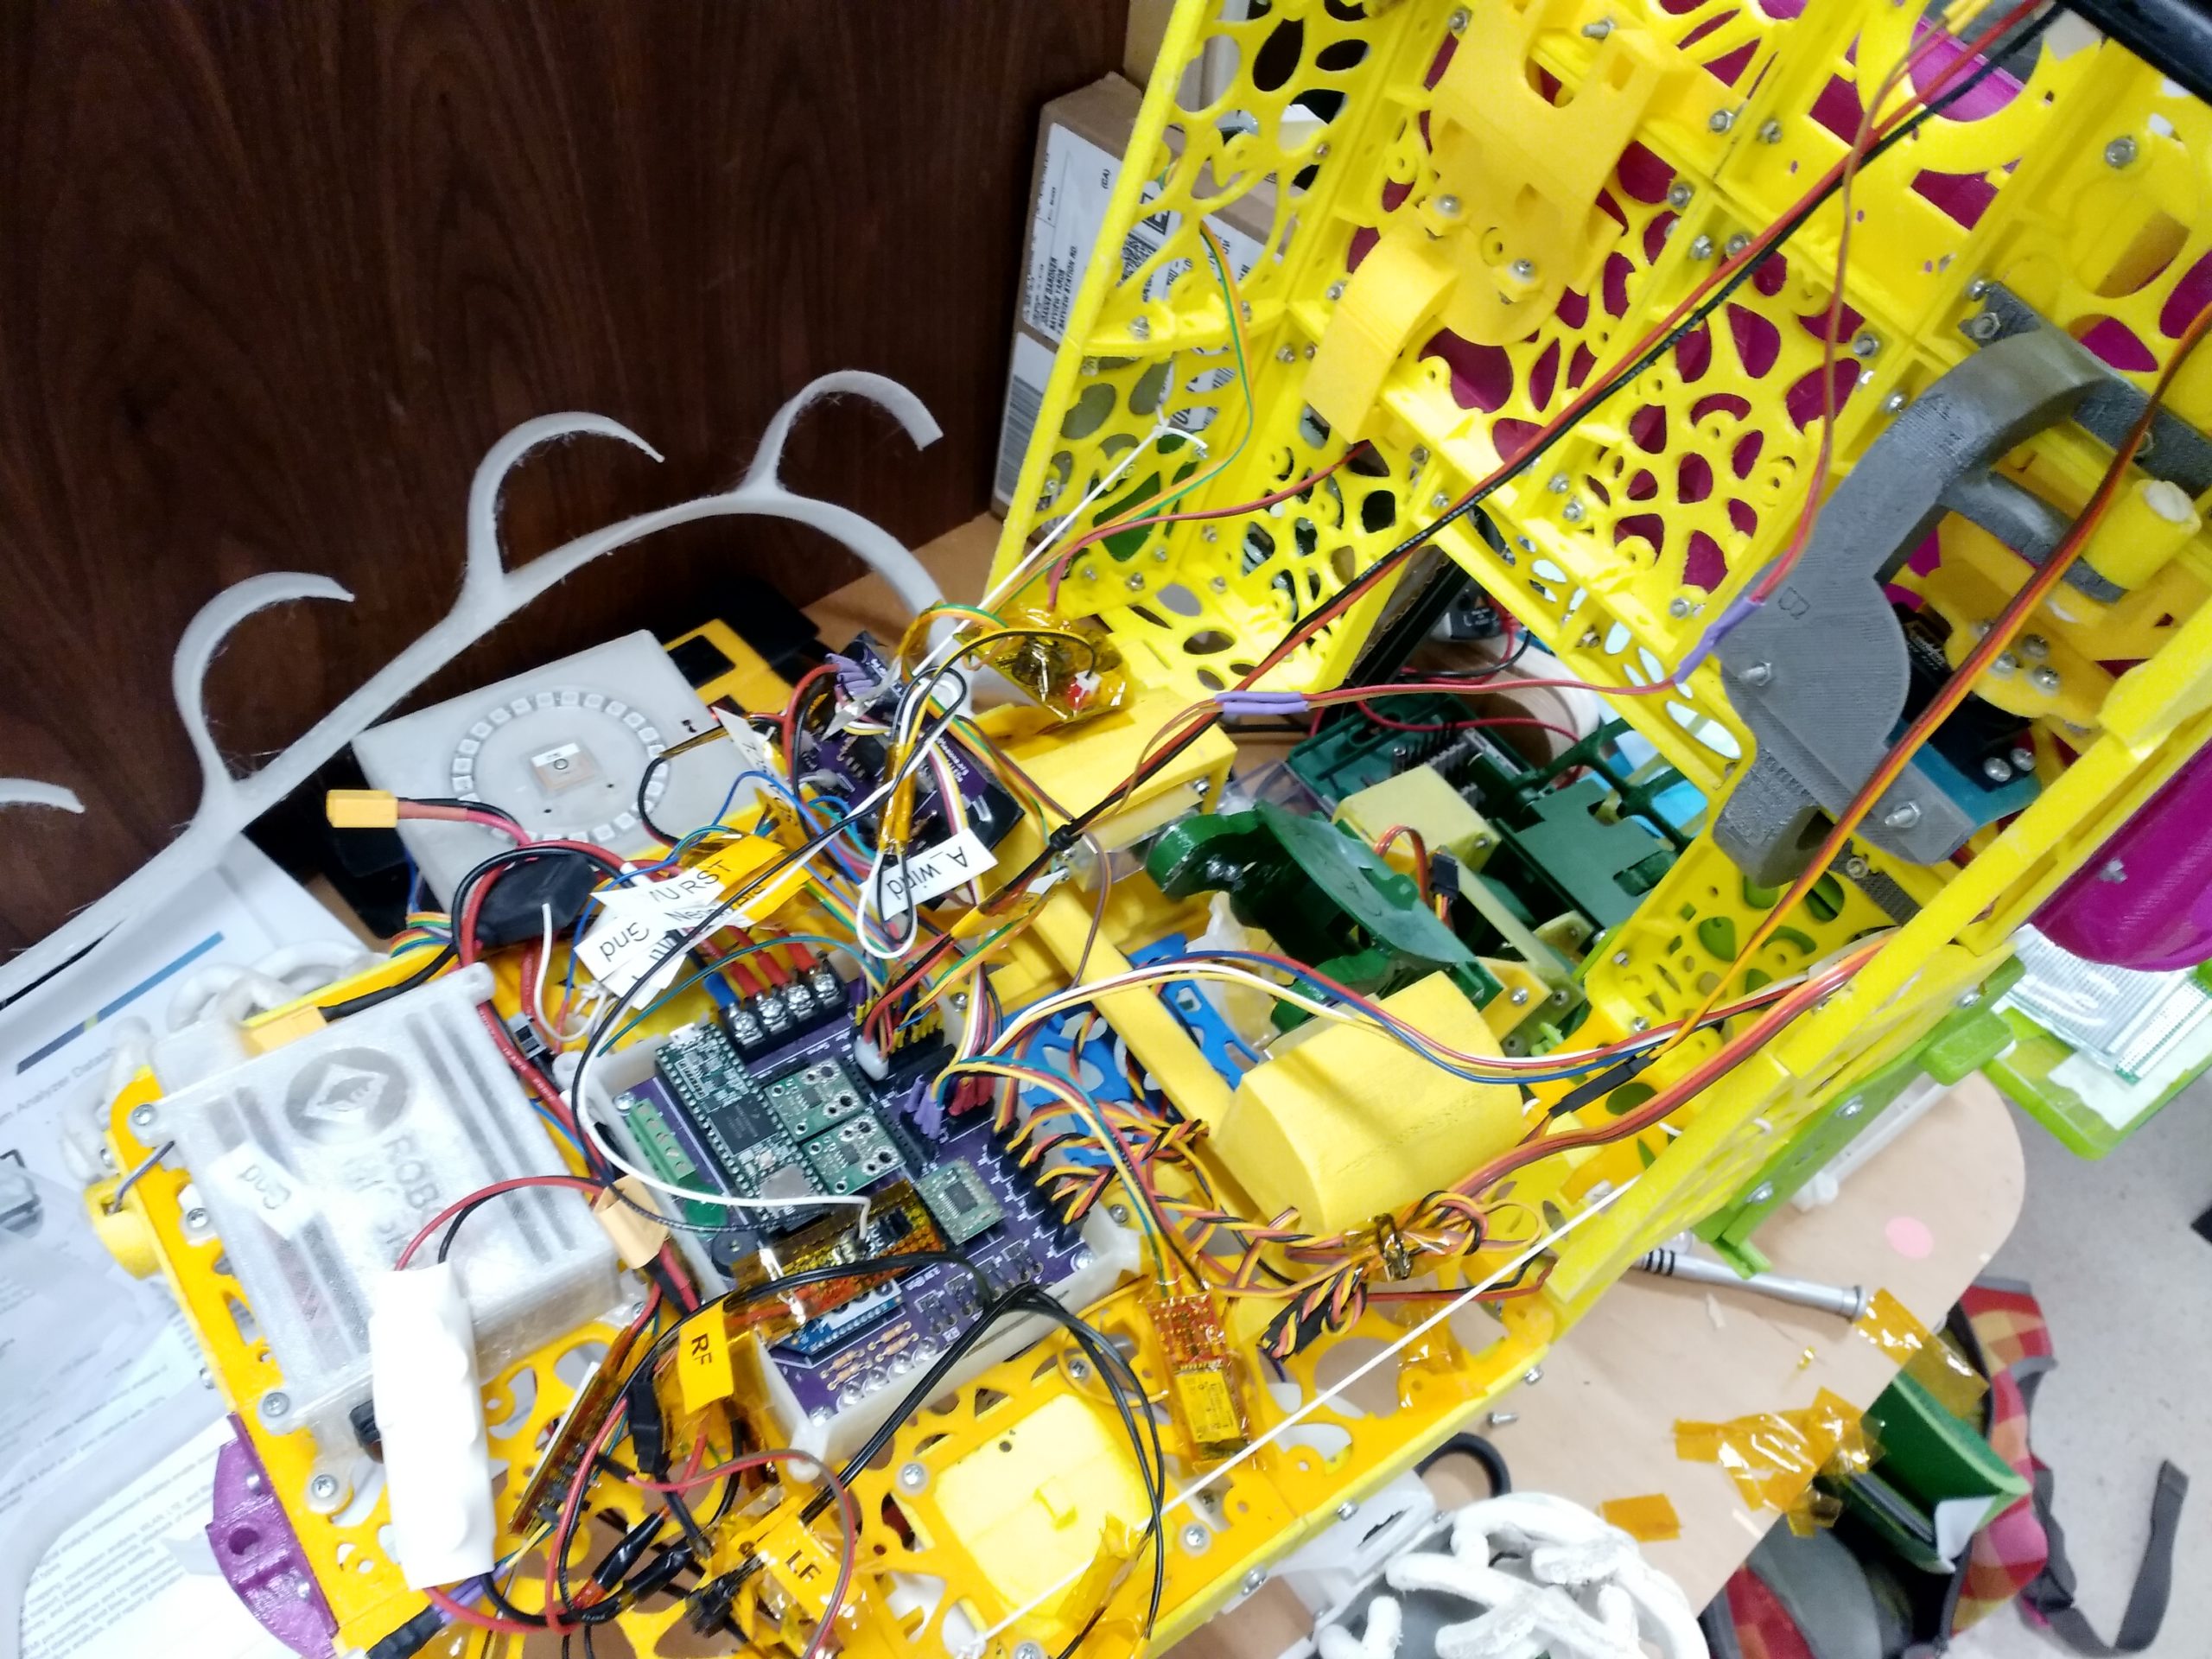
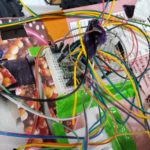
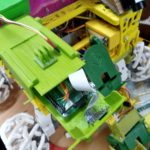
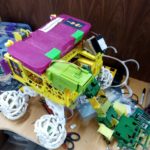
Alright, now it’s time to add everything back in place. All the electronics are in the main chassis now. Then, the air quality sensor on the back. Followed by the RPi on the top. We’re leaving the laser on the other side, because it’s still functional and cool. The claw is added too.
And now there is a working Bowie assembled again!
-
-
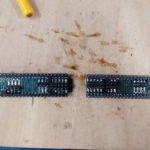
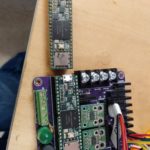
Added headers to new T3.6
-
-
This is what the alignment of the headers looked like
-
-
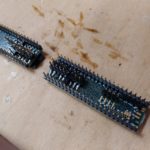
This is what broke, there should be 3 gold plated rectangles – not 2
-
-
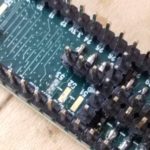
New T3.6 installed
-
-
Comparing the lack of sand on the new one to the old one…
-
-
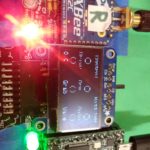
Display on the Operator Interface wasn’t working properly anymore
-

-
New one installed and working
-

-
It’s working again
-
-
Here’s a motor driver we were looking for
-
-
F header shrouding missing on the super bright lights board (v1.0)
-
-
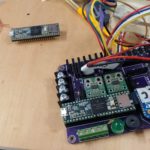
Ready for brain insertion!
-
-
Brain insertion complete!
-
-
Air quality sensors on back
-
-
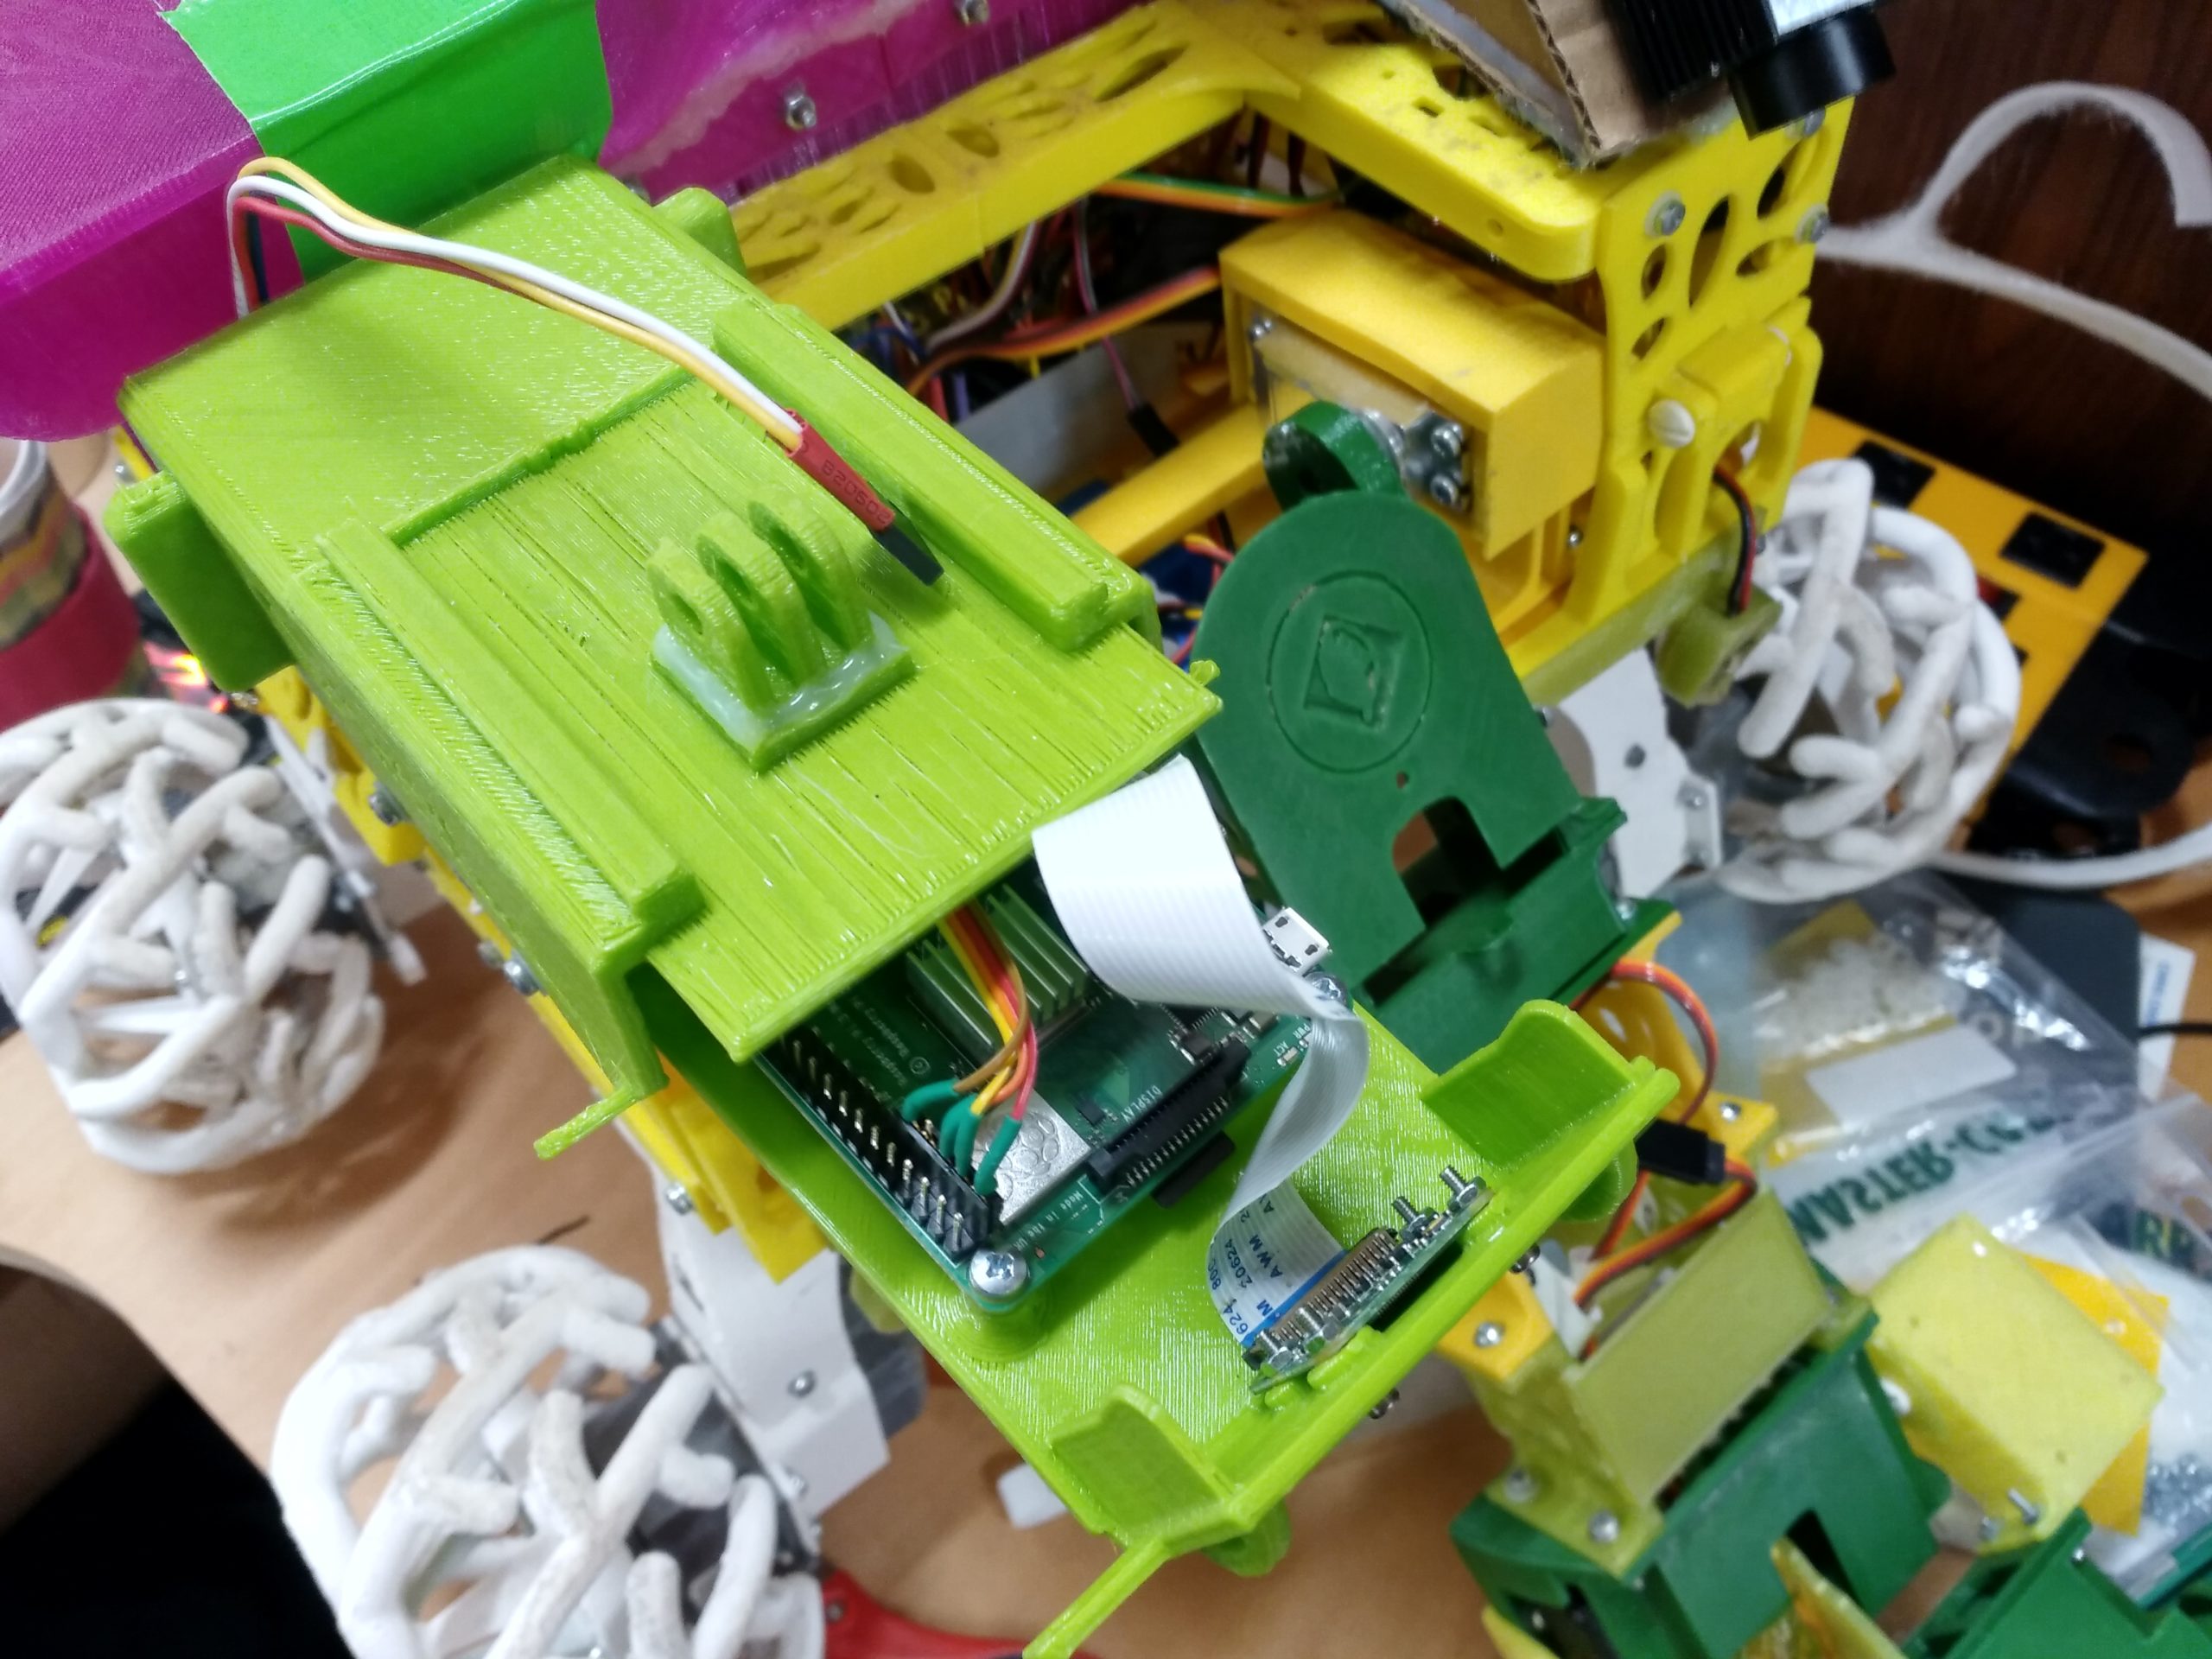
RPi on front
-
-
Claw added
-
-
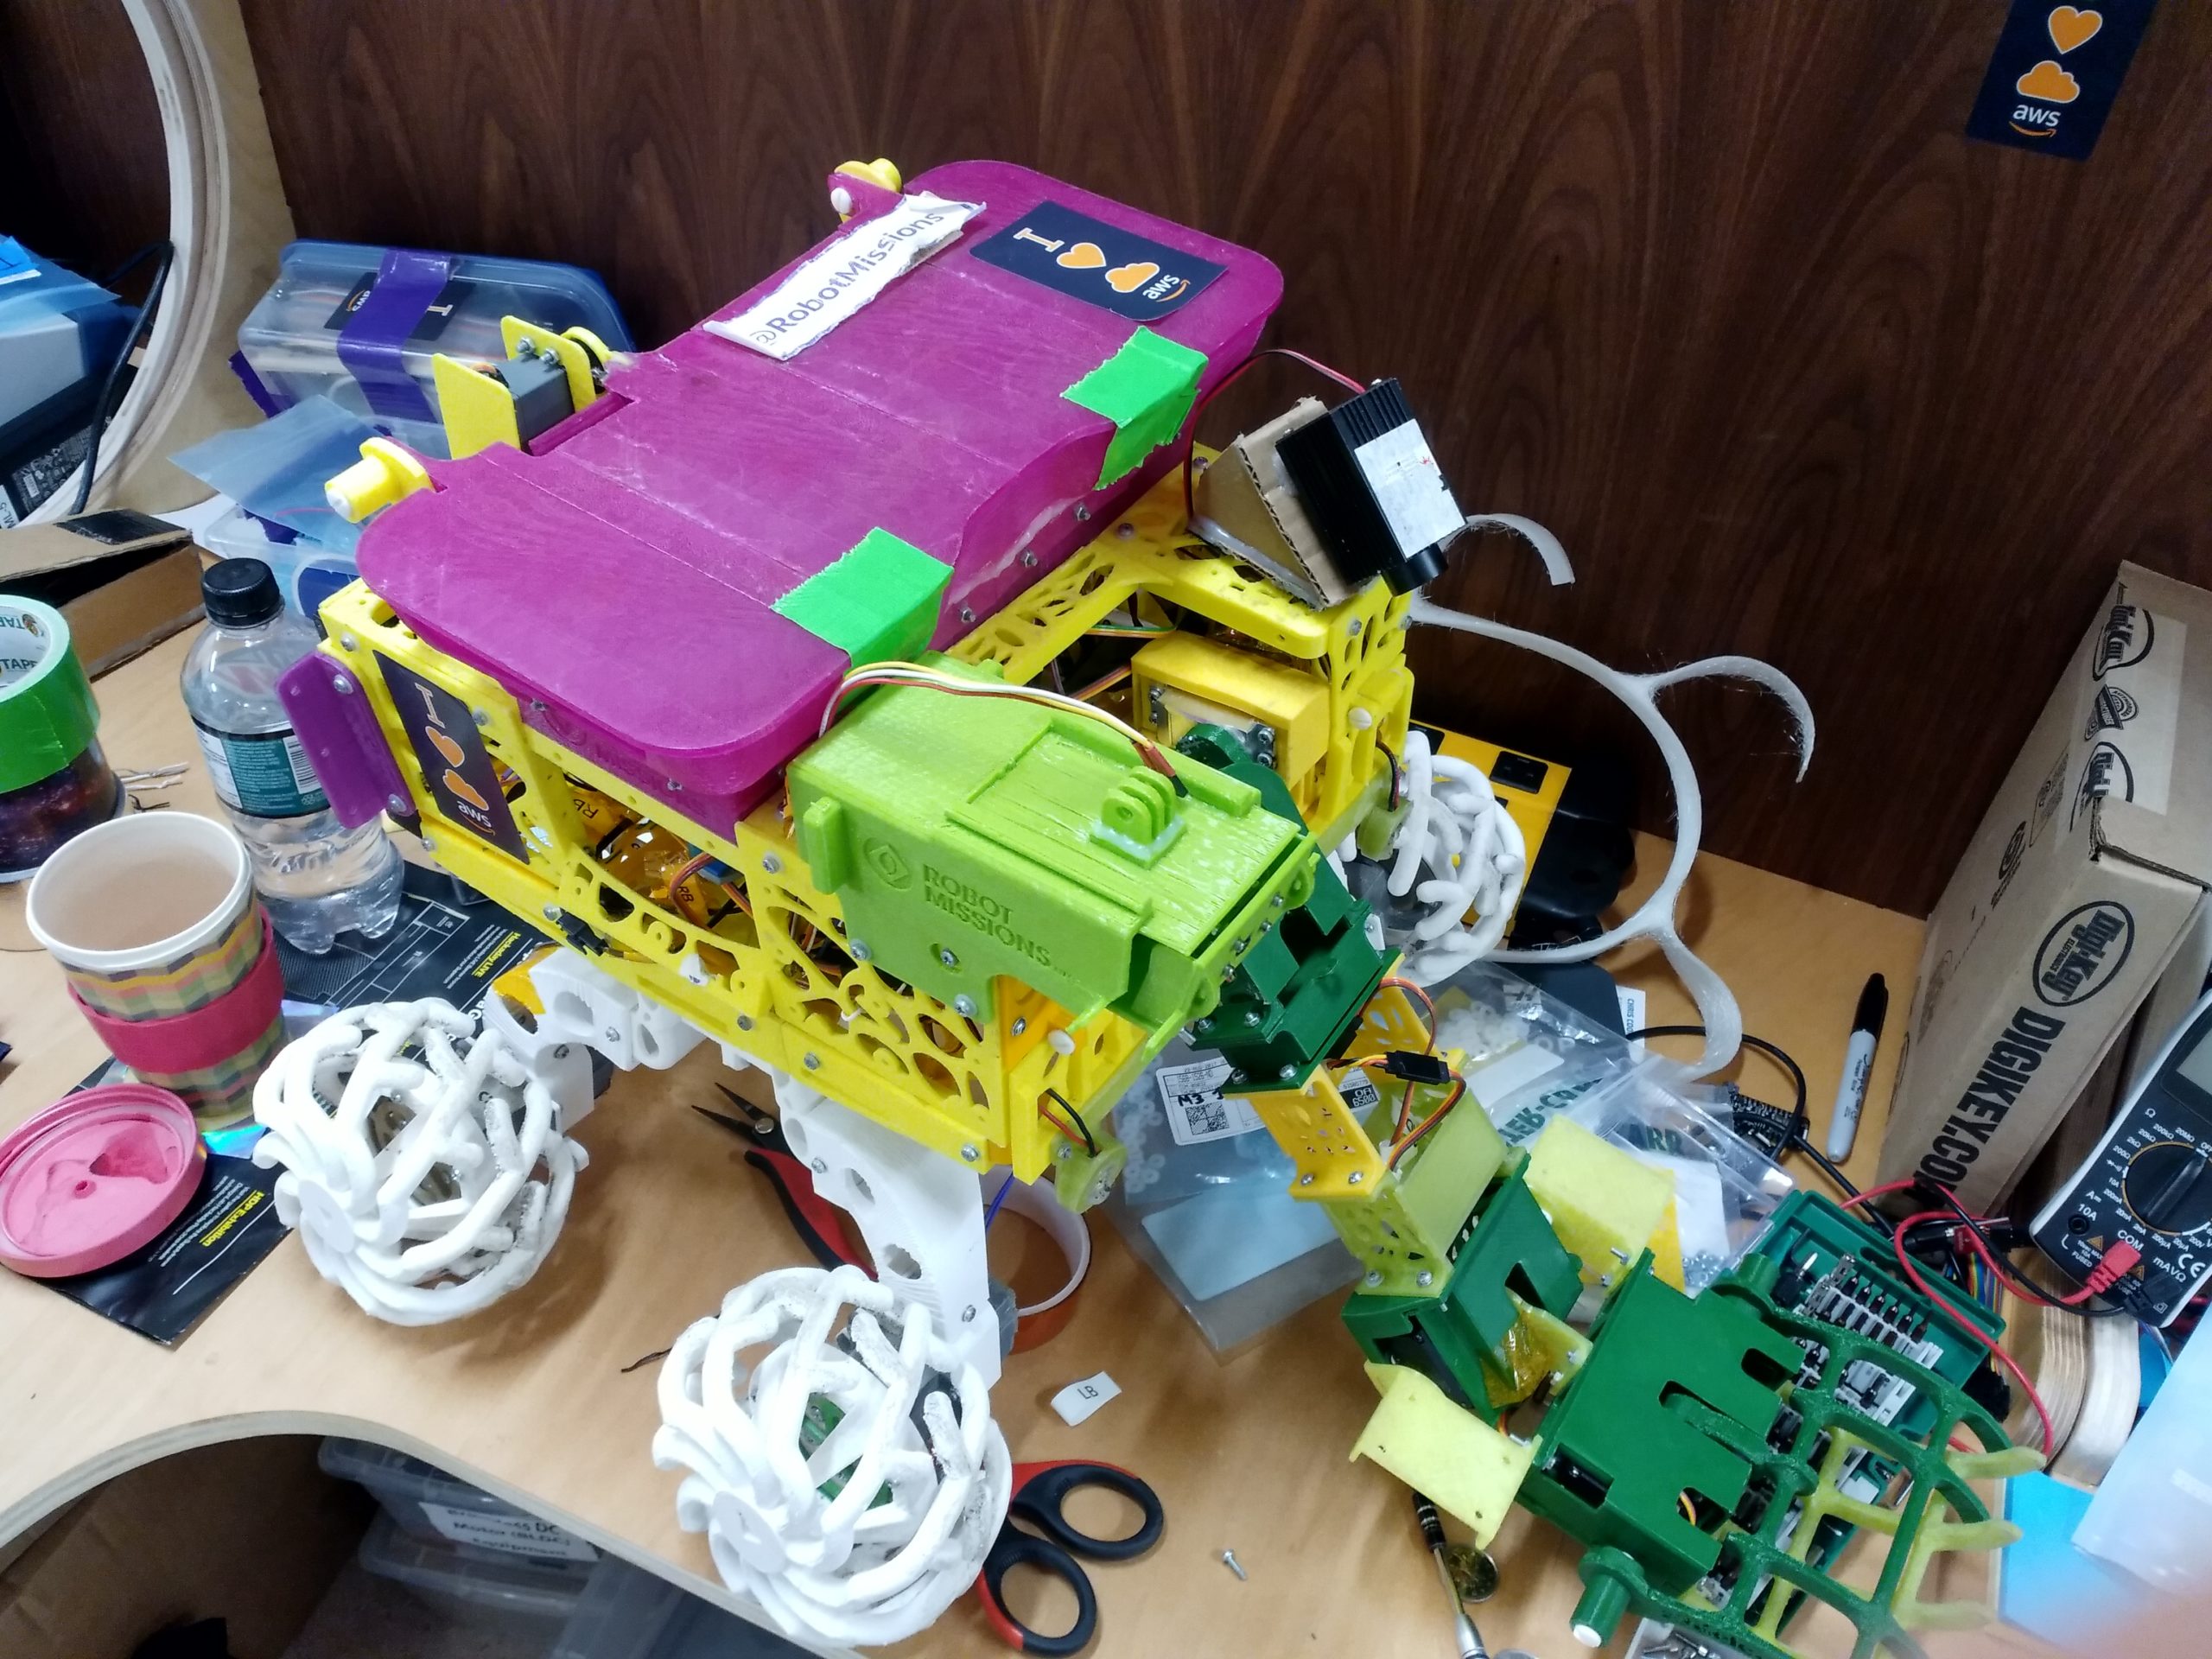
Bowie re-assembled!