by Erin RobotGrrl | Jan 17, 2020 | News, Progress Logs
Today’s kit log is pretty exciting. We finally get to see the results of all the work for two of the kits: power pack and super bright lights. Check out the instruction pages! super brights, power pack and press the big green go button
Today we wrote and finished the python script that takes in the steps and parts csv, then outputs a series of html pages. The development process was fine, didn’t get caught on anything real big. Had some off by one bugs, but it wasn’t anything difficult.
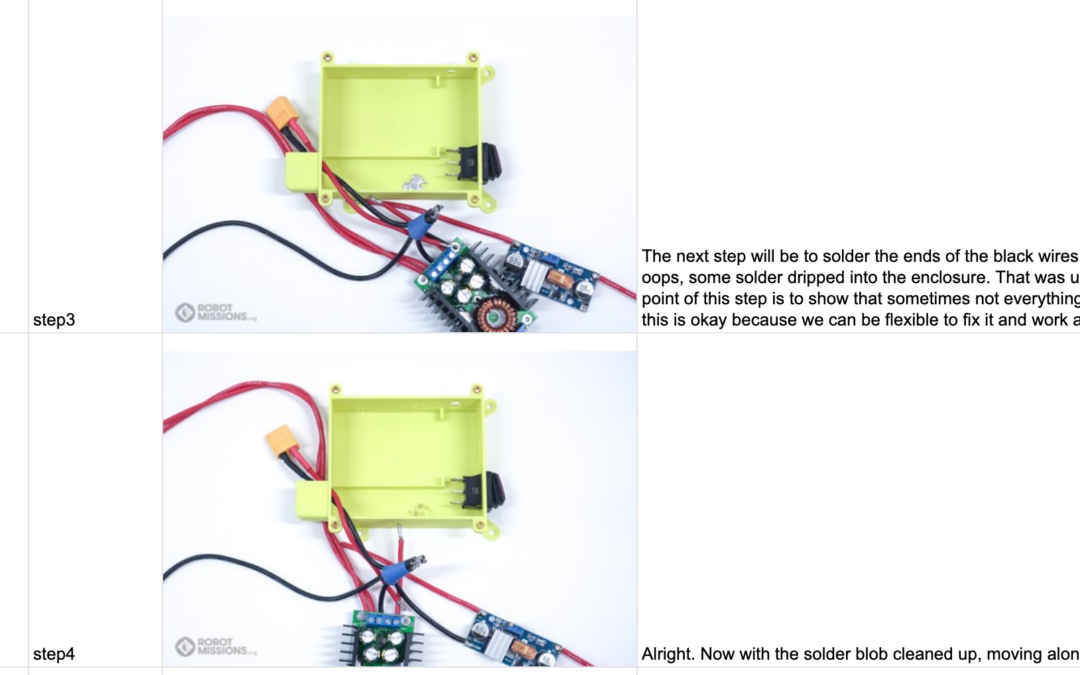
There was one mistake we encountered. That is, the images that are on google sheets are input into a cell as a formula. For example, it is =IMAGE(url). When exporting to csv, google sheets does not include this. Unfortunately since we have re-arranged some of the order of the images and deleted some, there isn’t really a way to script or automate copying the image name into another cell. So this has to be done by hand for every step. Shucks. It’s not the end of the world, it is fixable, just a bit of a delay. It was funny when finding this bug, because it was “wonder if this array actually contains anything? let’s print it” and it displayed a whole bunch of nothing in a list.
Either way, we were able to fix two of the instructions today, and prepare the pages on wordpress, and copy and paste the output html from the python script into the pages.
The next kit log will continue on this progress, as there is the operator interface and wheel kit instructions to complete.
by Erin RobotGrrl | Jan 9, 2020 | News, Progress Logs
Some more progress on the power pack kit step written descriptions today. We were able to trim a few of the steps. There are only a few more steps remaining for this one, and will be completed after this update goes live.
Next kit log will be to continue the progress with the other three remaining kits.
Update: power pack kit written descriptions complete, 91/91. The overviews of each part need to be written next.
by Erin RobotGrrl | Jan 8, 2020 | News, Progress Logs
Today we made partial progress on all of the instructions. The power pack instructions in google sheets was updated to the proper parts – the last of the transportation from google docs. Then, the process began of going through each of the kits and finding where each part started and stopped, then going through and listing out the step numbers. Once this was complete, the written descriptions could be started for the power pack kit.
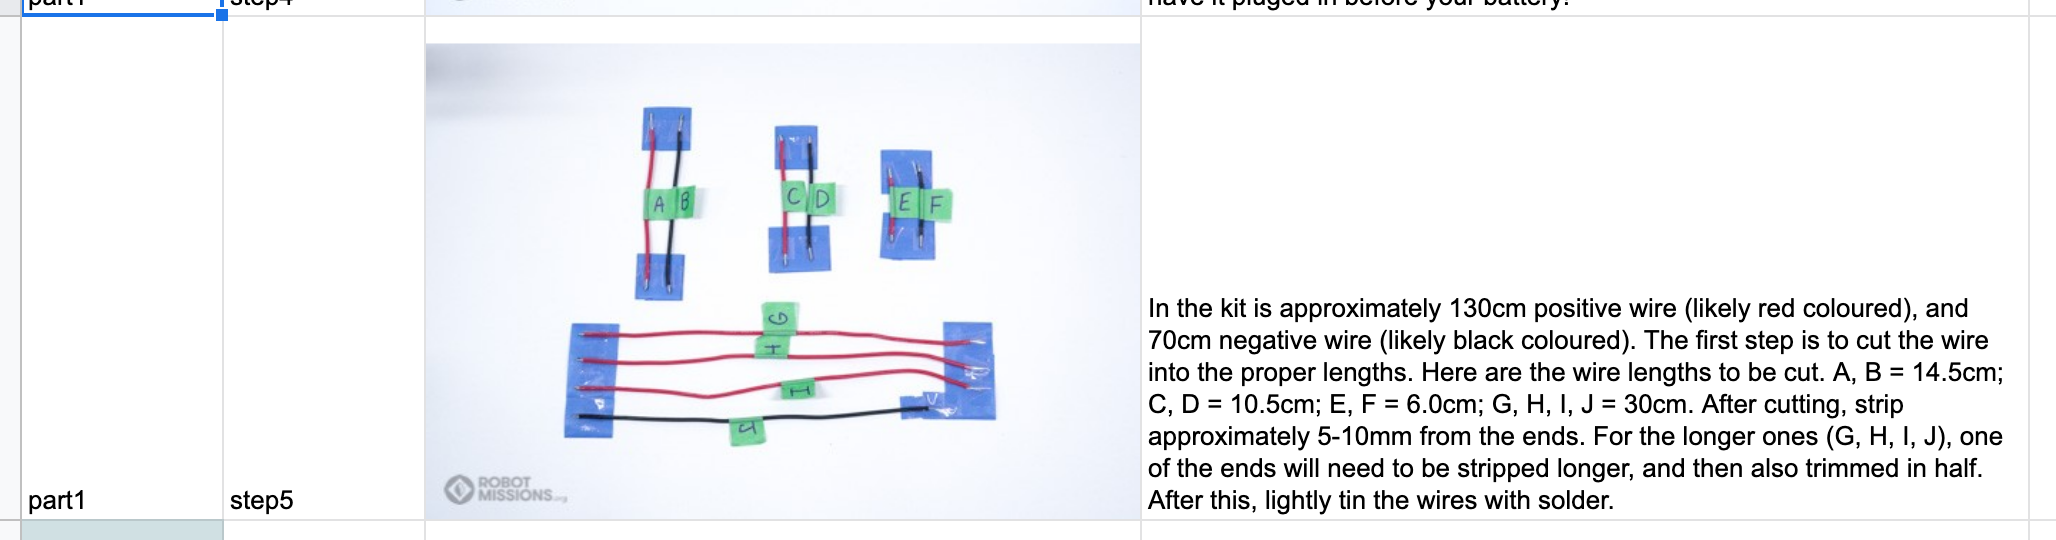
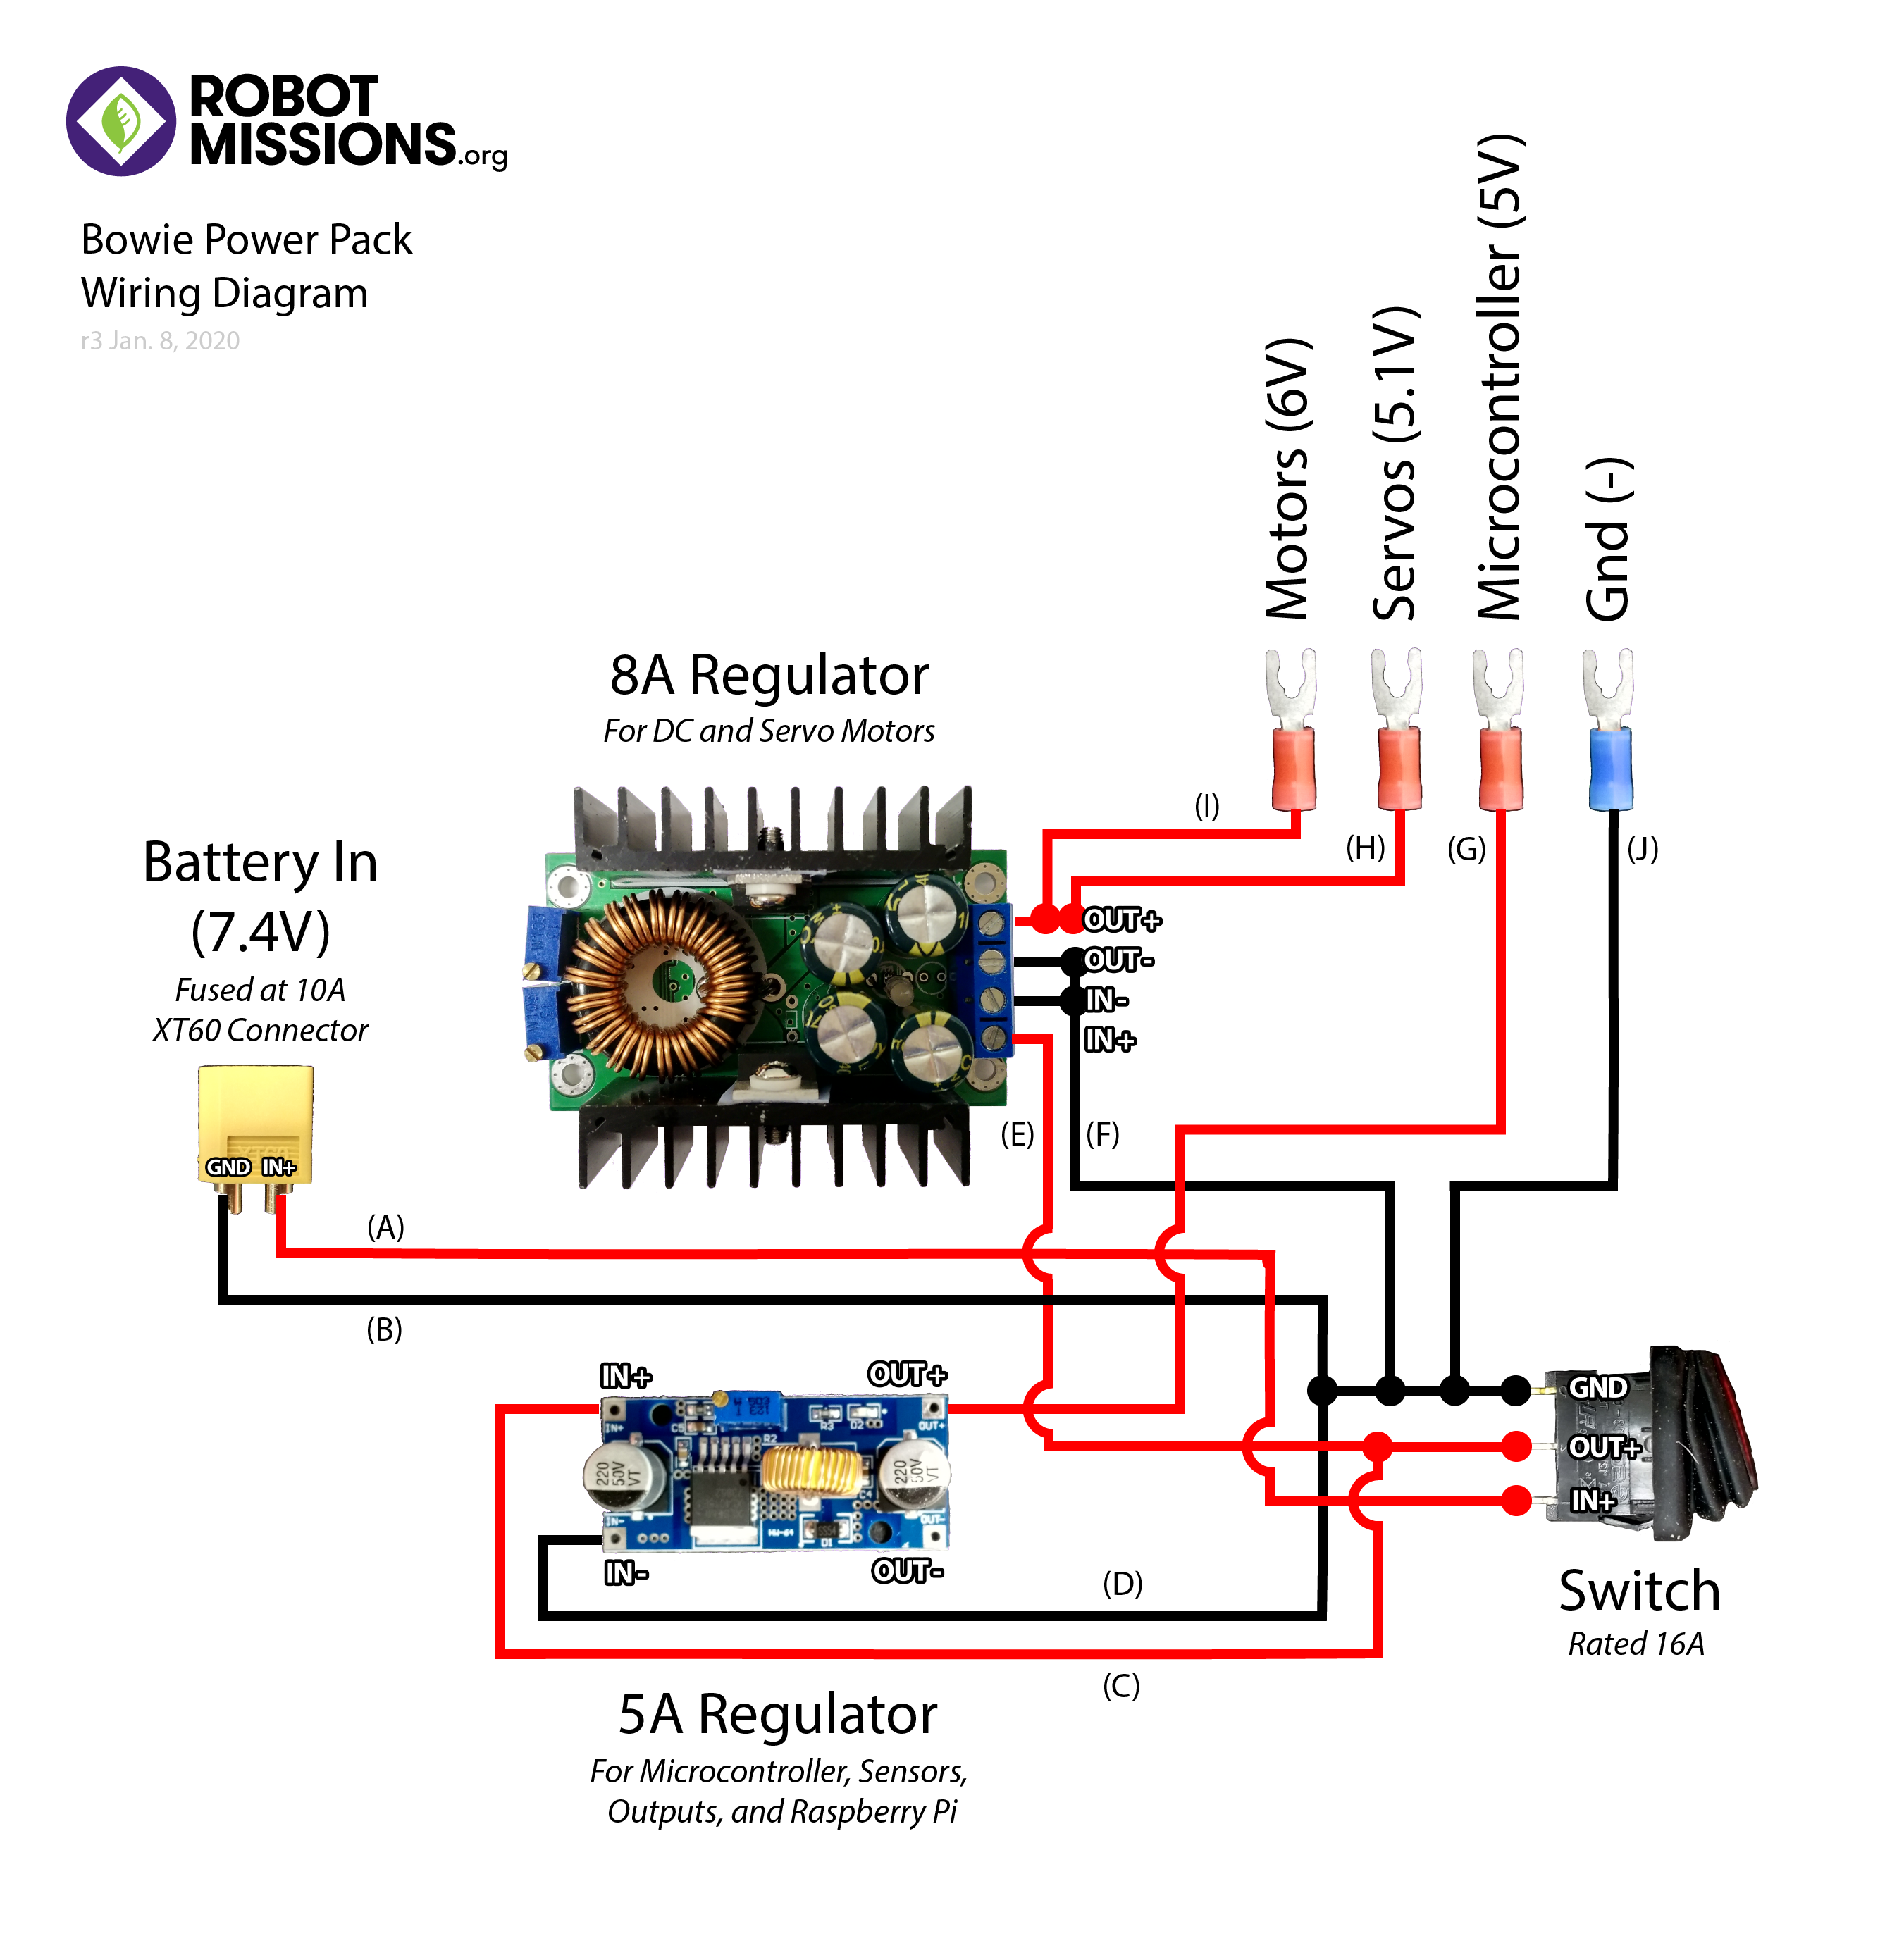
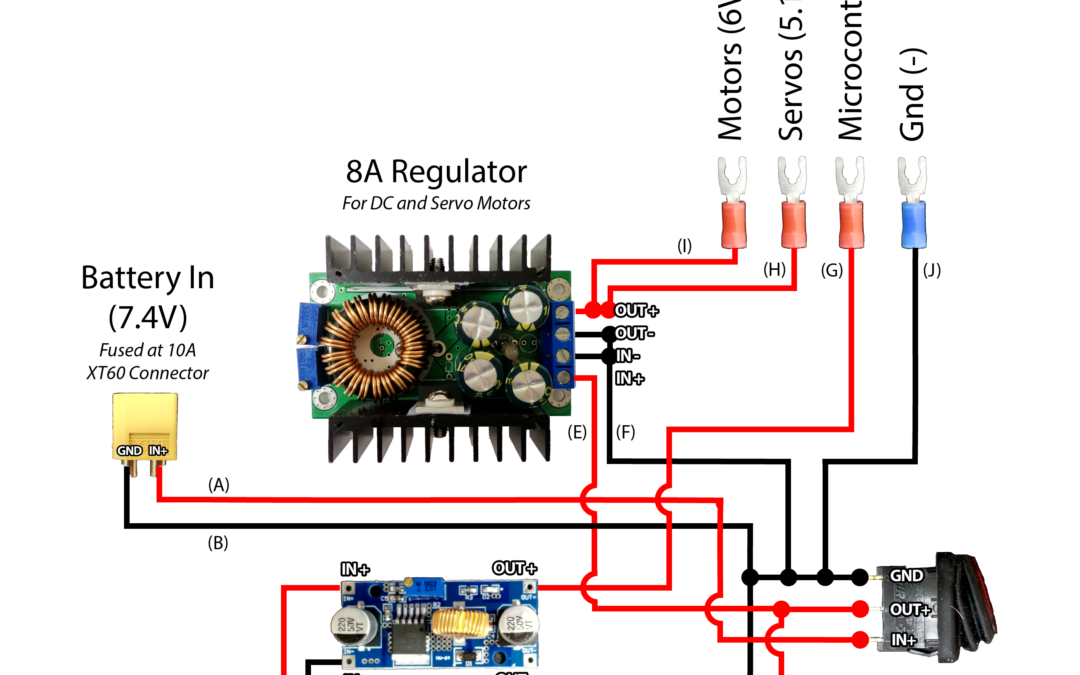
Starting the writing for the power pack kit revealed that the diagram was missing the labels for the lengths that the wires have to be cut. So, this had to be edited. Once that edit was done, the instructions were updated to include reference to the wire label.
-
-
Wire lengths and letters
-

-
Letters now on the diagram
The power pack kit progress remains at the start of part 4. #35/102. The next kit log will continue on this progress.
by Erin RobotGrrl | Dec 21, 2019 | News, Progress Logs
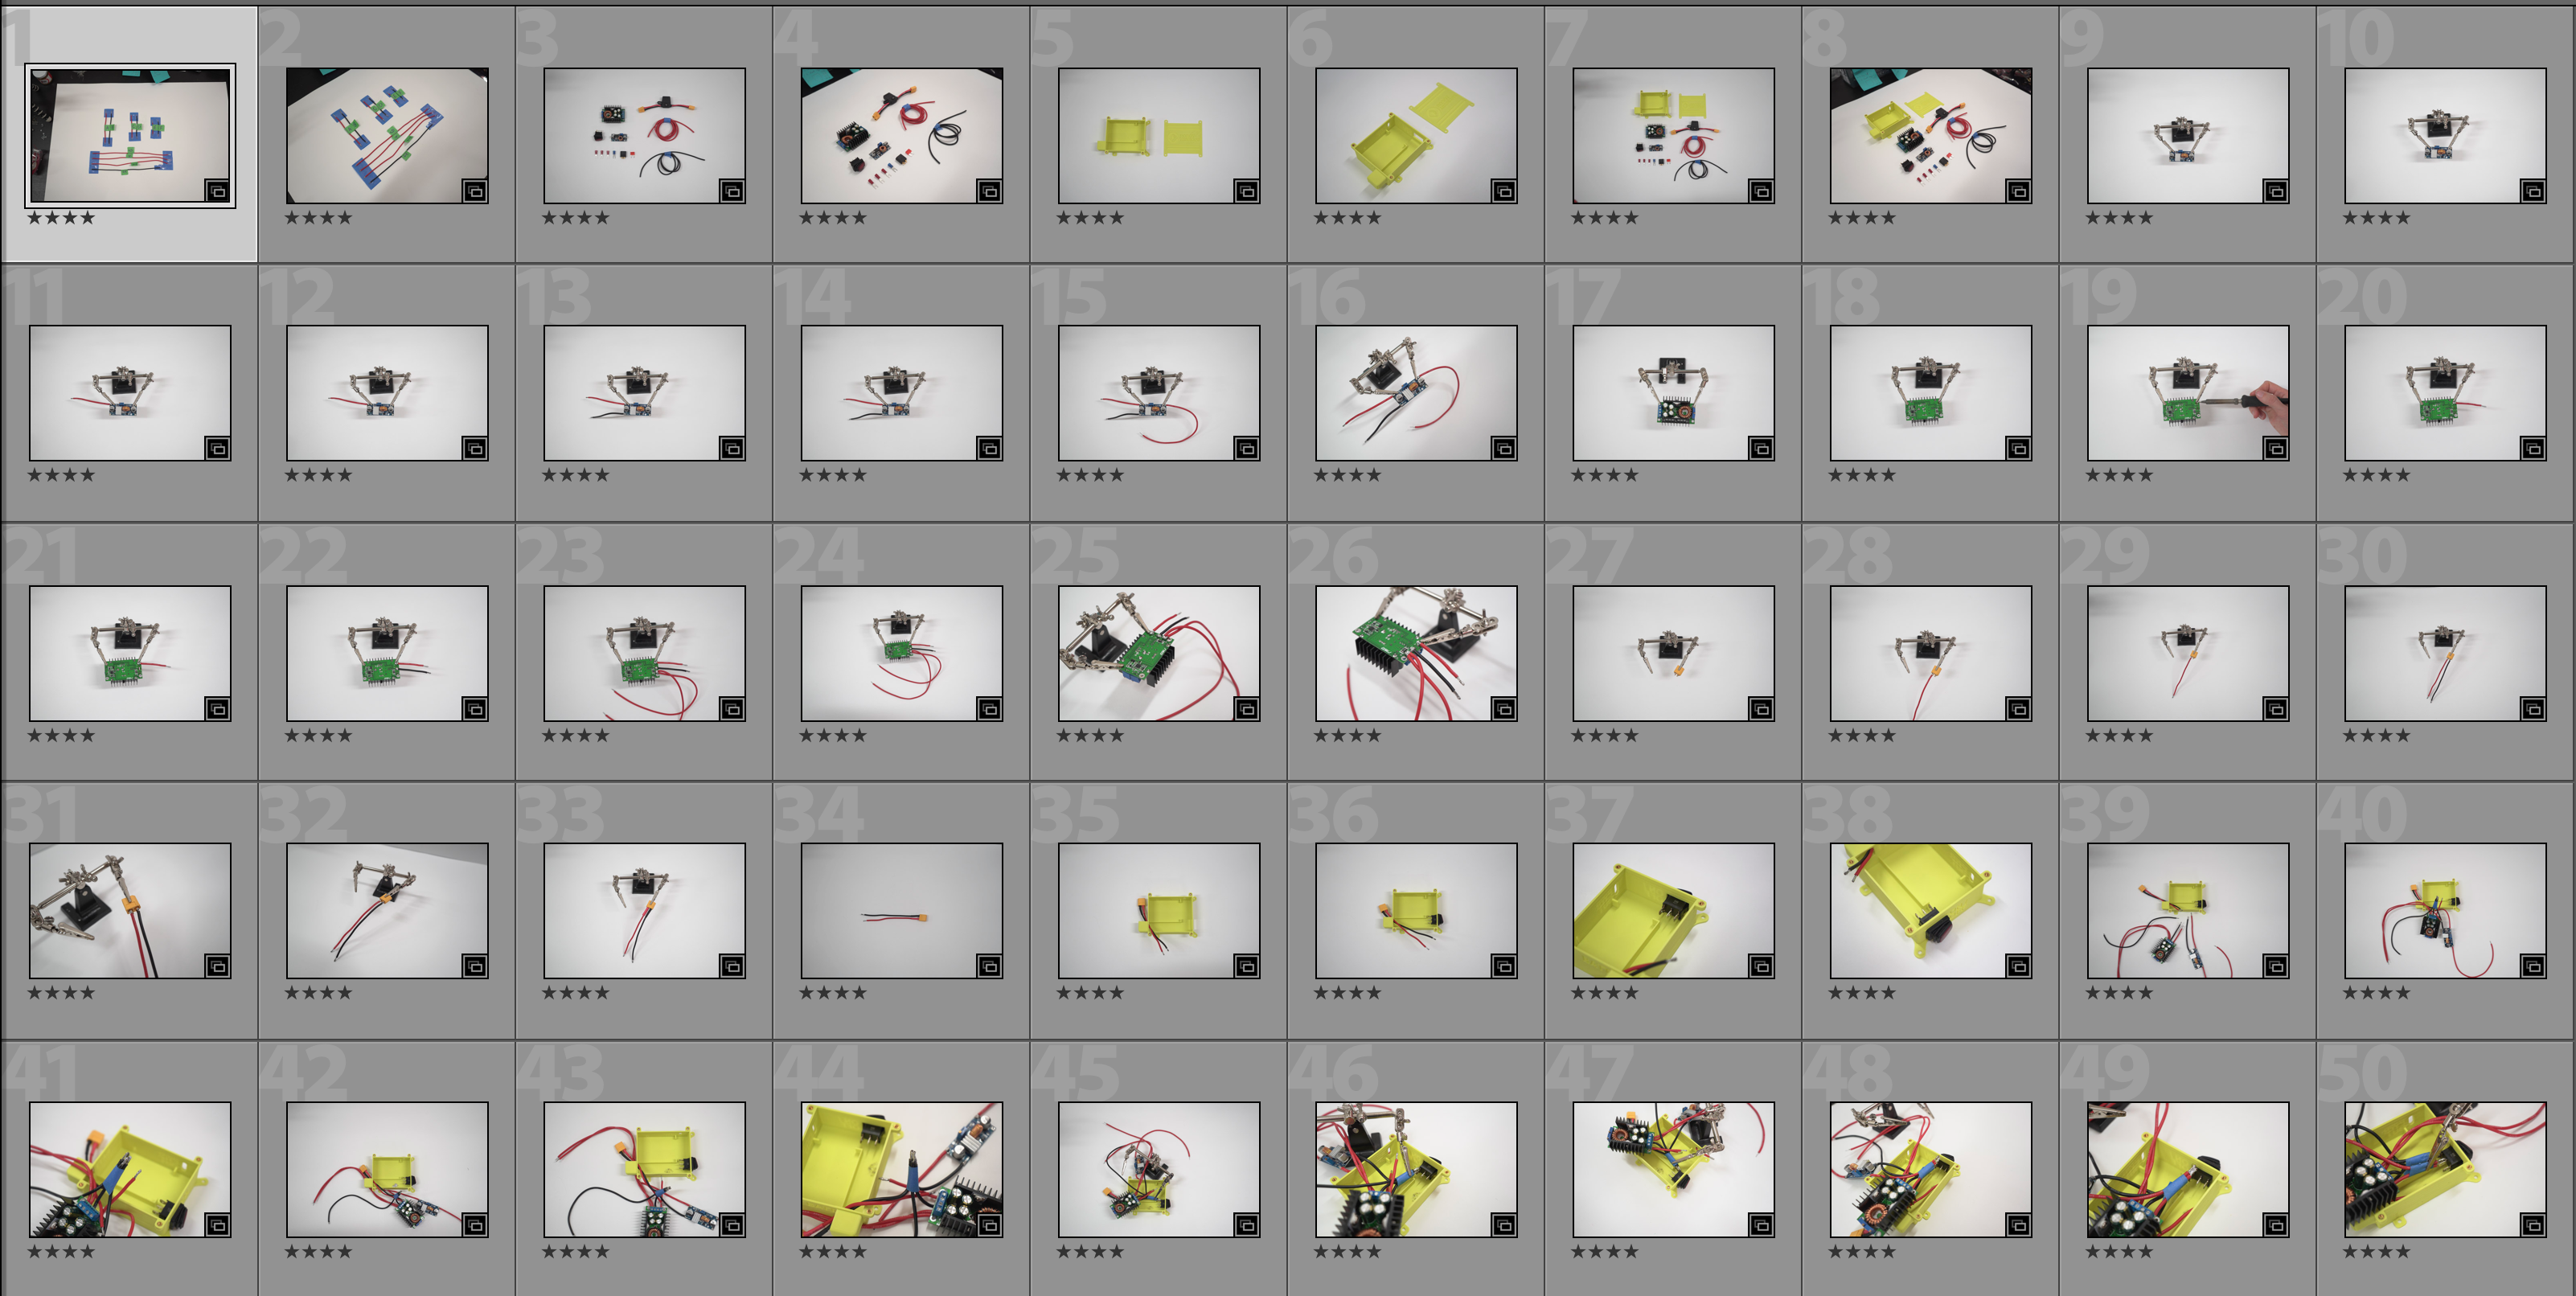
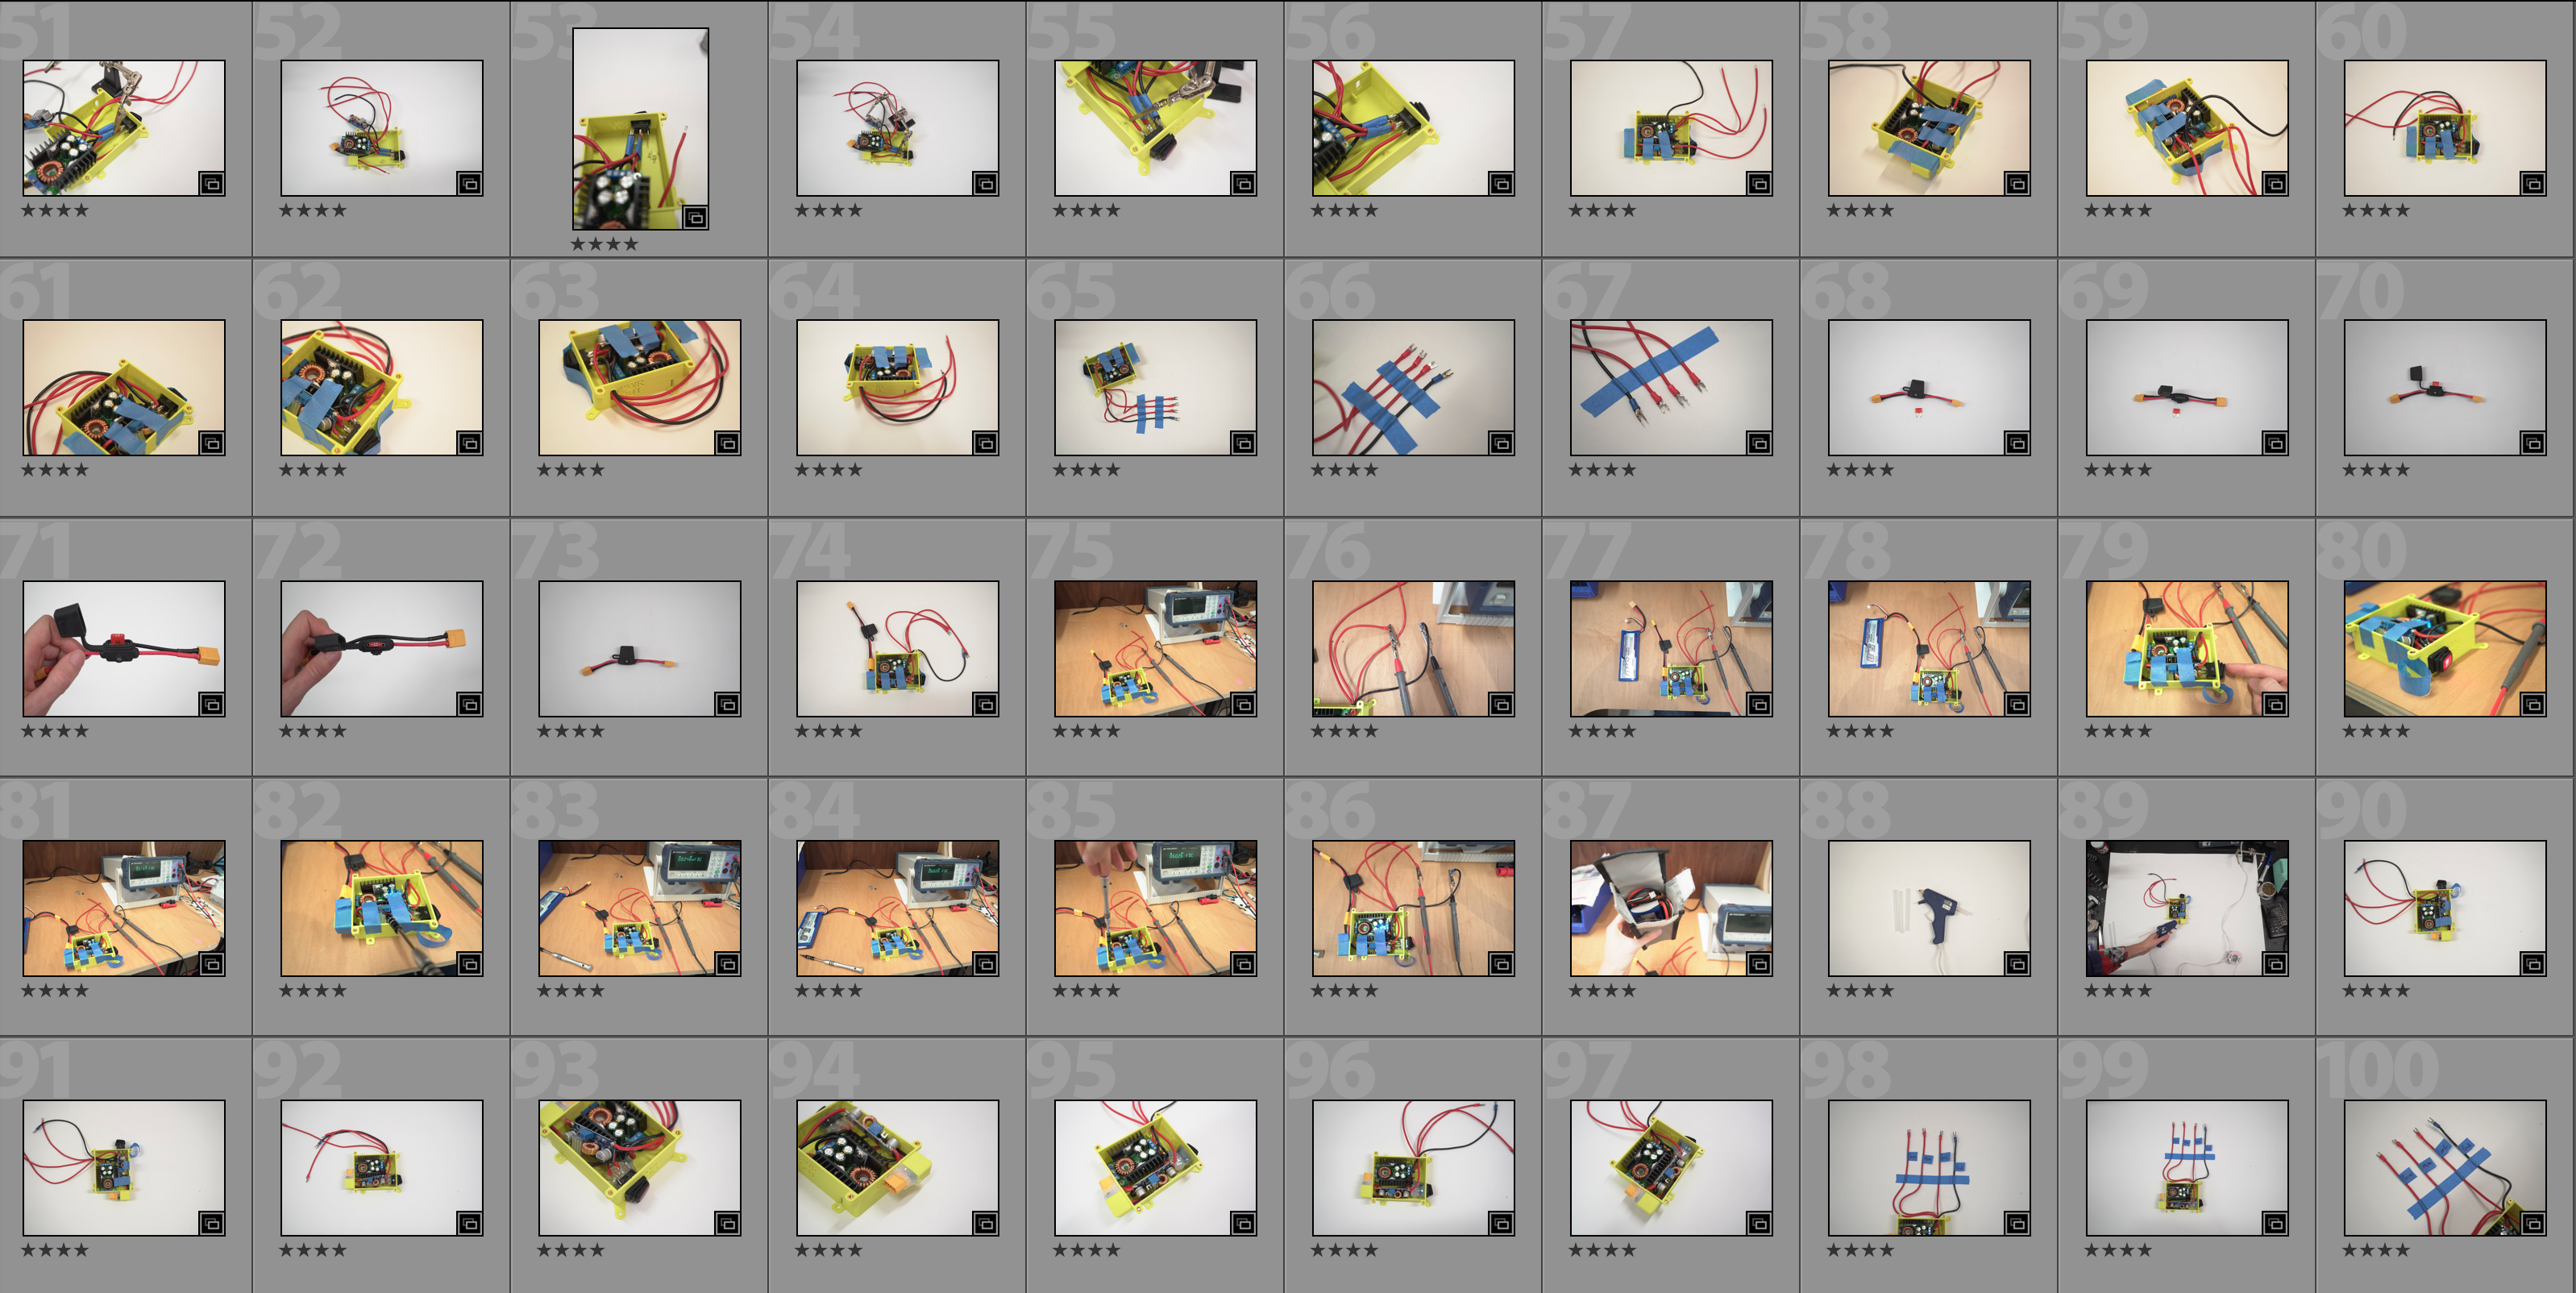
Today we edited the power pack kit photos to correct the crop & alignment, as well as white balance, exposure, white level, clarity, and sharpness. These photos were then added to the Google Doc for the first draft of the instructions. Edits were made to the previous outline. Now, the outline is 7 “pages” (think of those like sections). The doc spans 29 pages (including the images).
The next step will be to add the words to the doc, and continue until the power pack kit is complete. Then move on to the next kit, which is the super bright lights kit.
by Erin RobotGrrl | Dec 19, 2019 | News, Progress Logs
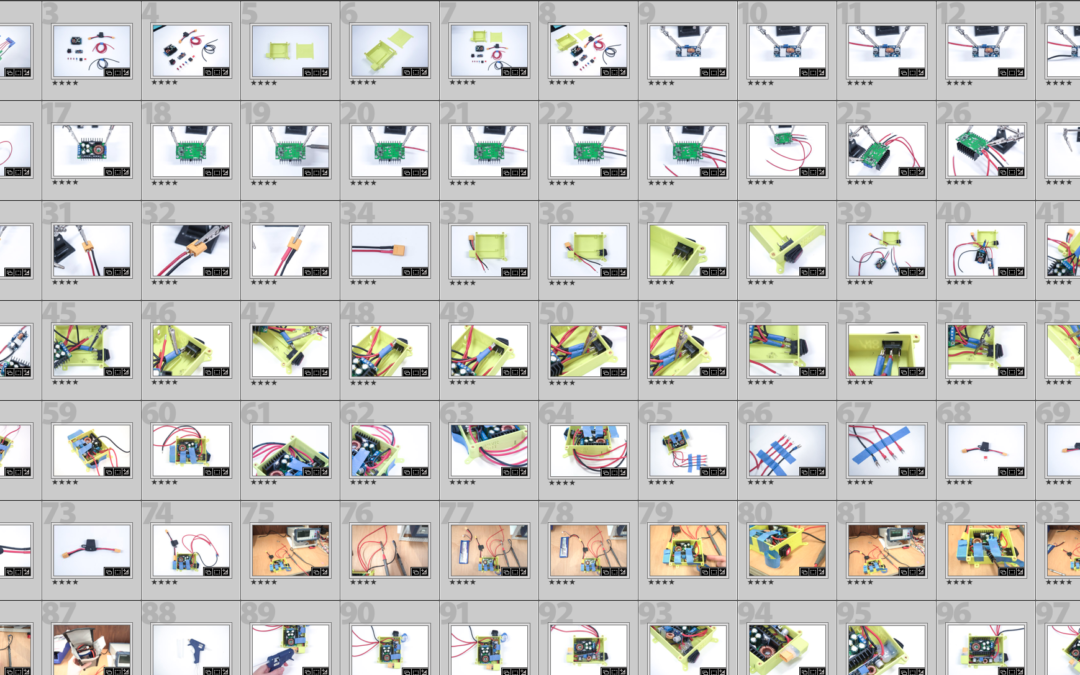
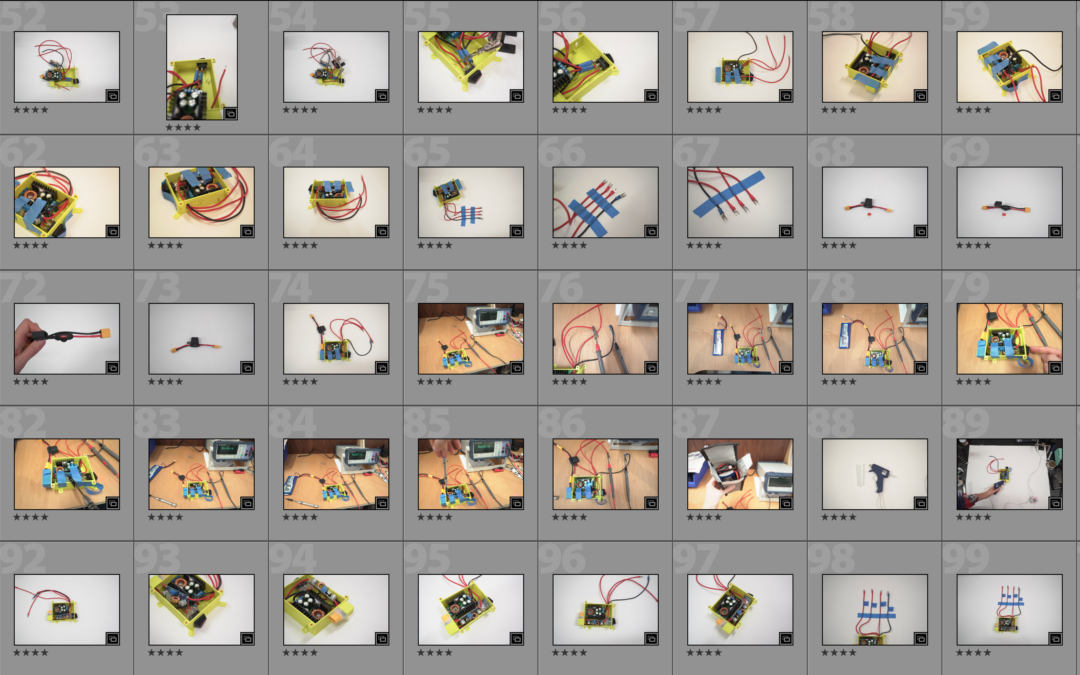
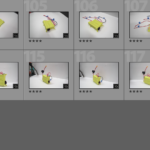
Today we took a look at the power pack kit instruction photos. 687 photos were taken, and 121 of these will make the cut to go on to colour correction and editing. The photos were divided into 18 folders, which will then go in to a 9 page guide. Descriptions were added for each folder to remember once reaching the stage of editing the guide. Regarding the number of photos taken: it’s more a sign of amateurism than being thorough. Unsure what is the most important to capture until writing the step by step, so it might be better to try to capture almost everything and then cut.
-
-
1-50 Images in gallery before editing
-
-
51-100 Images in gallery before editing
-
-
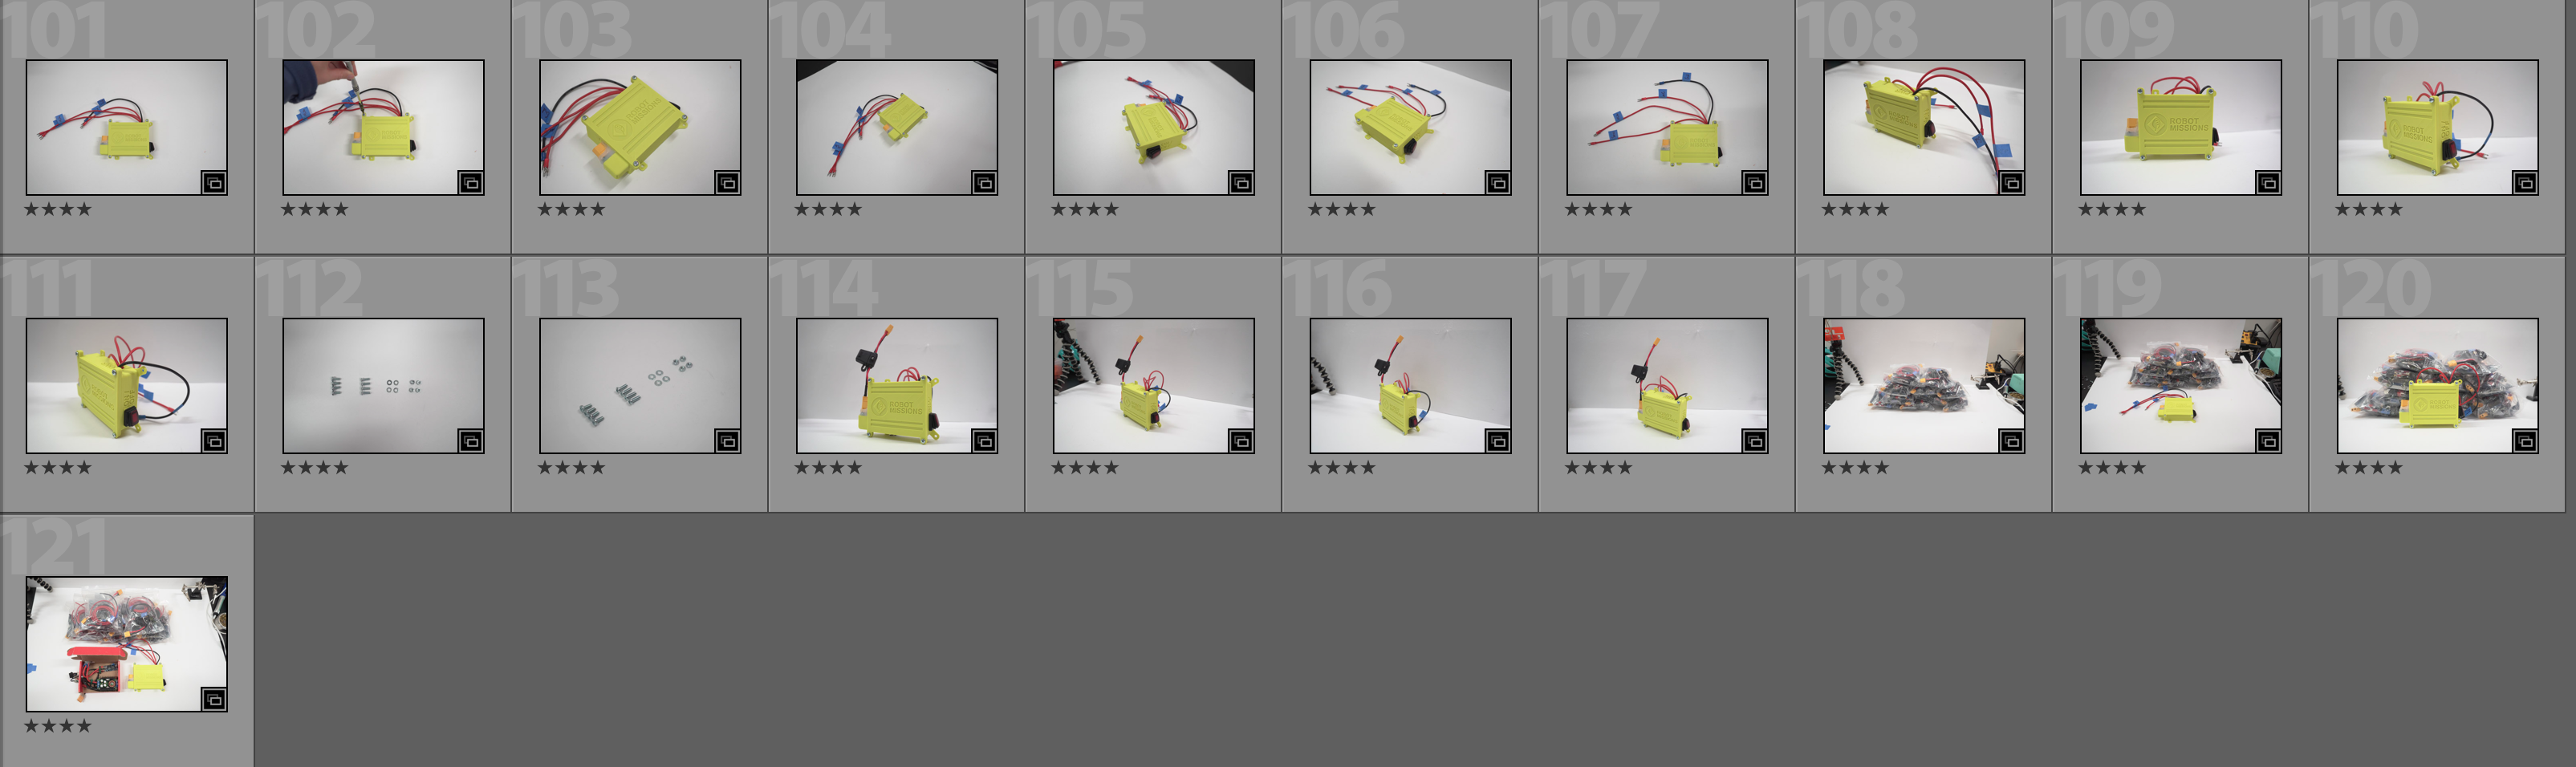
101-121 Images in gallery before editing
The next step will be to edit and colour correct these photos. After that, exporting to various sizes: high res, web, and thumbnail. Then, start the outline of the guide and add the photos for each step. After that is the written description of each step.